Share
A local WordPress install is a crucial workflow requirement for designers and developers alike. Whether you’re developing a plugin, putting the finishing touches to a website, or just making changes for a client, a local setup boosts productivity by letting you work quickly and safely on your computer or Mac. You’ll naturally be looking to take the next step at some stage.
There are other ways of migrating your website (using a plugin, for example), but this article will show you how to migrate your website from a local host environment to a live installation on the web. To get you comfortable with the overall principles, we’ll focus on doing this manually before listing some plugin solutions to help you streamline the process. First, let’s make sure our bases are covered with a look at the tools you’ll need to follow along.
Overview
Tools Required to Migrate Your Content
If the selections above are not to your taste you can go ahead and give Brackets or GNU Emacs a try.
Lastly, you’ll need an FTP client to upload your local WordPress files to the server. Again, options here vary across platforms. Without getting bogged down in the intricacies of competing solutions, here is a brief list of common options to consider for Mac and PC:
Once you’ve made your choices, we’re almost ready to get started. Before we dive in, though, let’s briefly discuss WordPress’ built-in export tool and how it fits into the overall migration picture.
Can’t I Just Use the Built-in Export Tool?
WordPress’s built-in export tool is a convenient solution if you want to transfer content from one site to another. To use it, go to “WordPress Dashboard > Tools > Export” from your website’s dashboard. You’ll then see a list of simple export options for content types such as comments, posts, and pages.

This produces an XML file suitable for re-importing into another WordPress install. If you’re after a little more control over the export options pictured above, the WP All Export plugin is worth a further look.
However, using a plugin like the one mentioned previously will only export the WordPress database, and it won’t cover theme changes, images, or anything else outside of the core WordPress files. In this article, we want to address moving the entire website – not just parts of the content or a database – so we’ll turn our attention back to our manual migration process at this stage.
Exporting The Local Database
To migrate the website we need to do two basic things:
To keep things nice and organized, we’ll also need a place to gather everything on your PC/Mac while doing this. In this case, create a folder called “Migrate Website”. Copy the contents of your local WordPress install into that folder.
With the folder in place, ensure your local web server runs and navigate to the phpMyAdmin application to begin the database export. This will typically be located at “http://localhost/phpmyadmin”.
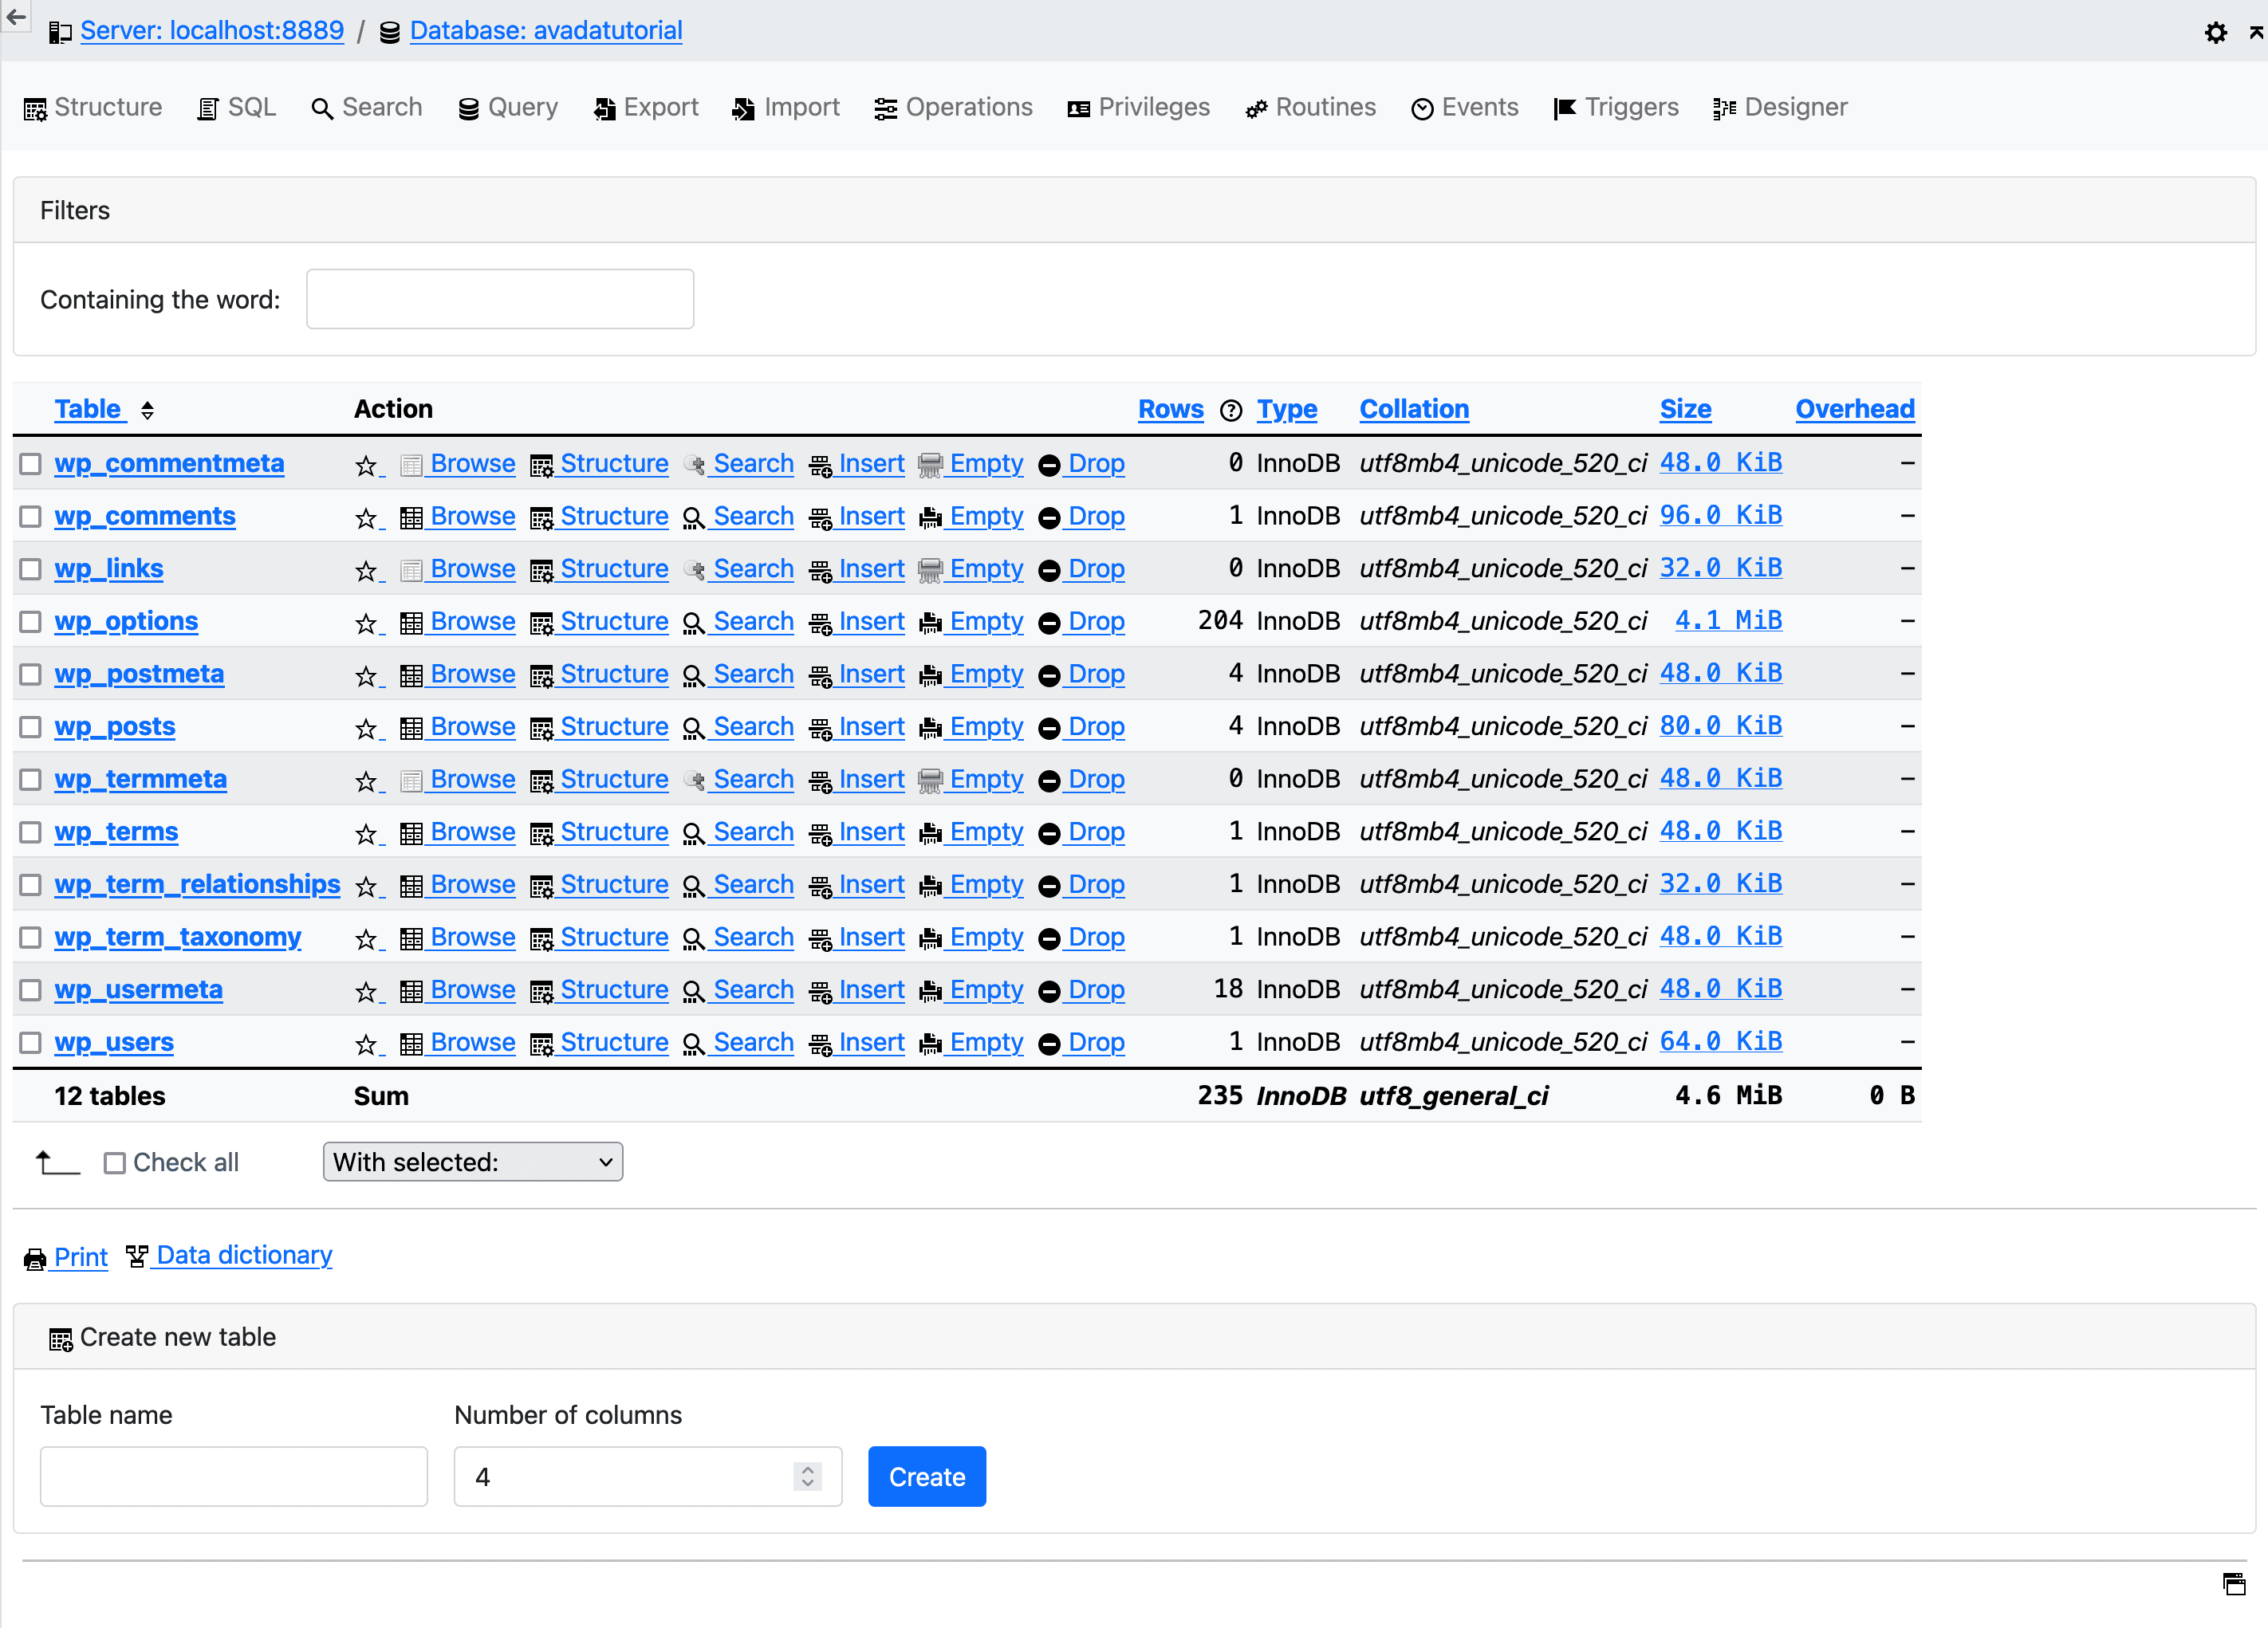
Select the relevant database and click “Export” from the top menu in phpMyAdmin.
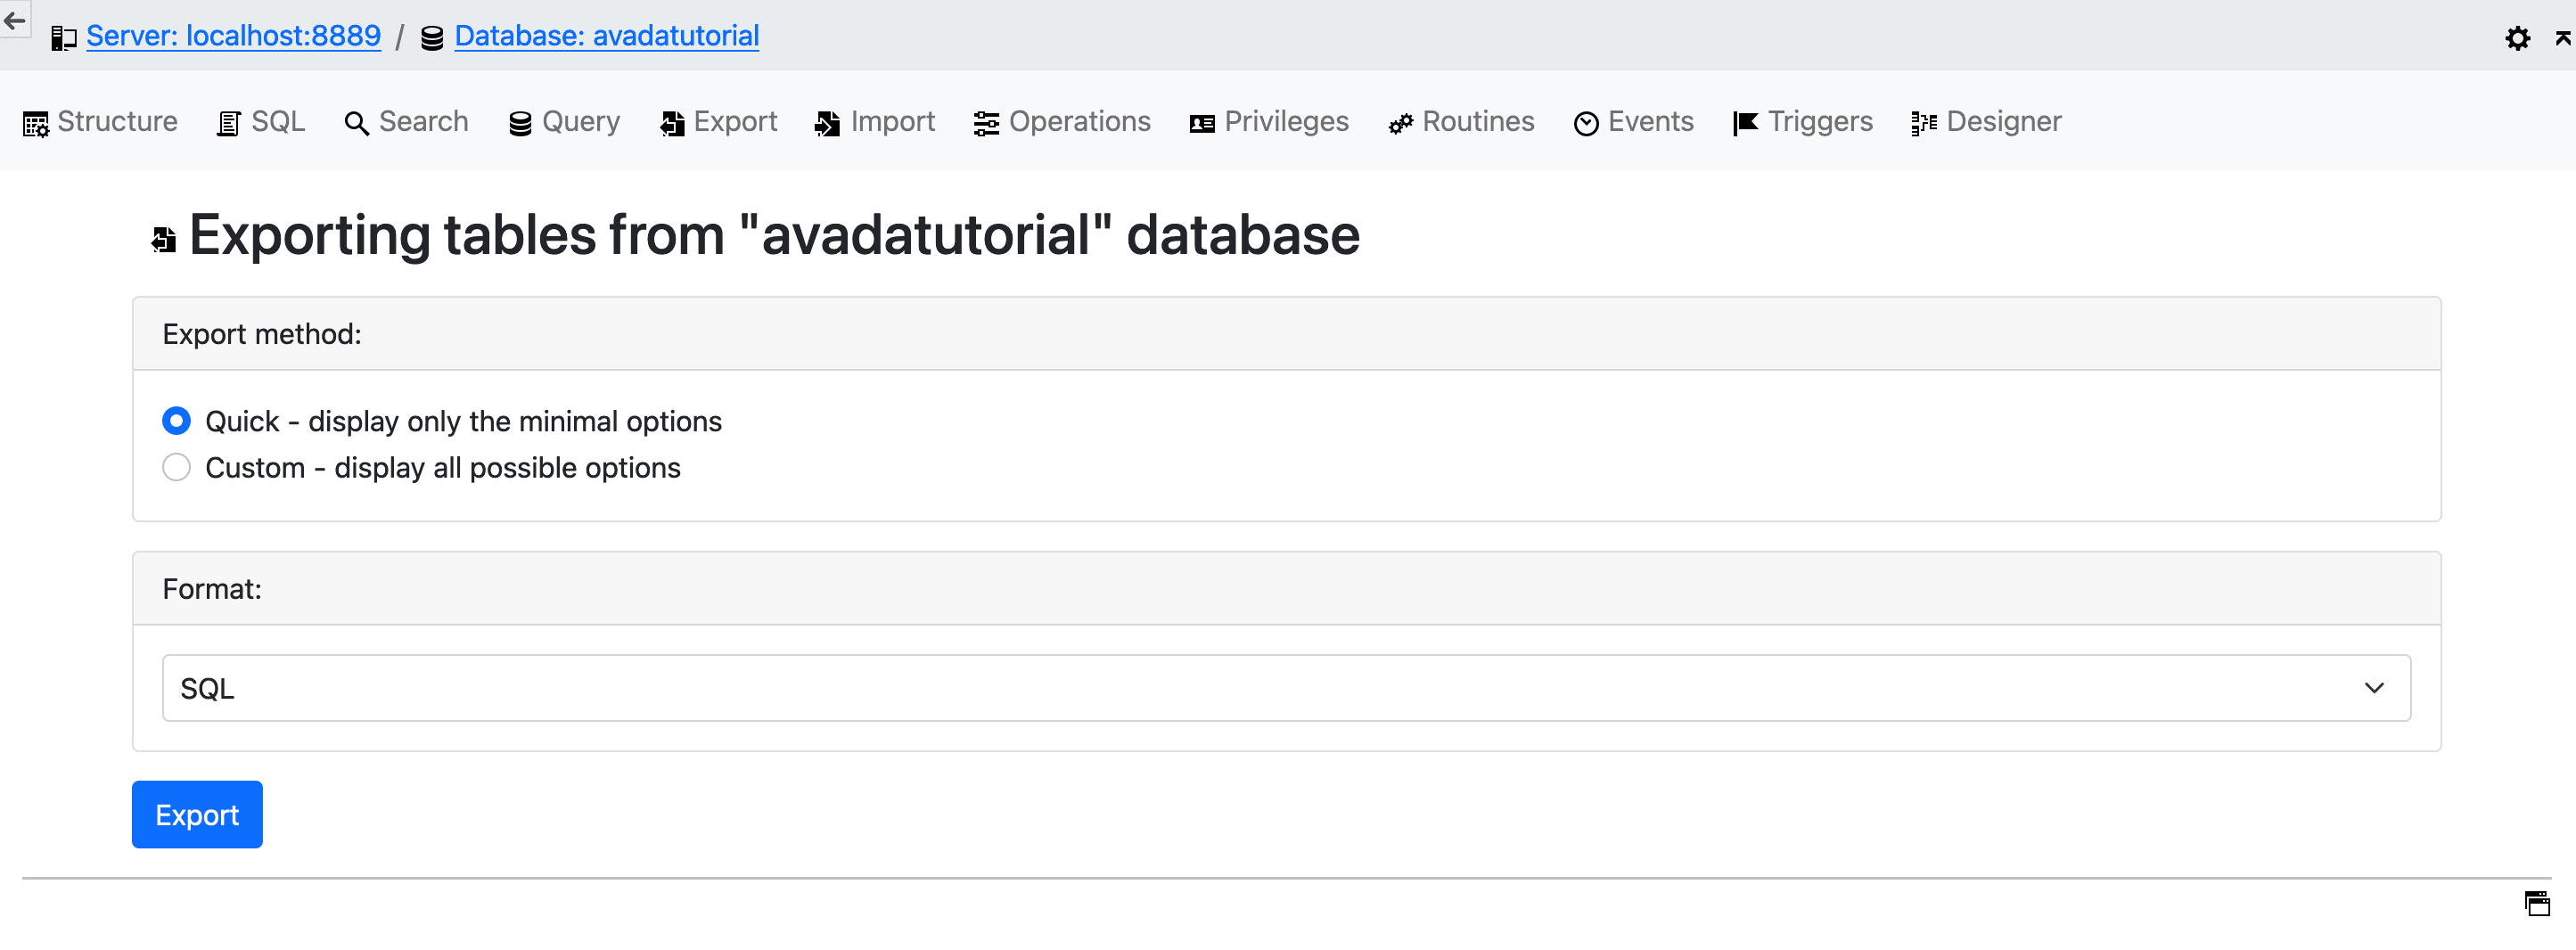
On the database export screen, we will choose the “Quick” option. The “Custom” option is for advanced users who want to change specific settings before export. Click “Export”, and you should now have a .sql file downloaded to your PC/Mac; for this example, the file is called “avadatutorial.sql”. Place the downloaded file in the “Migrate Website” folder created earlier, and we can then edit and make some small but necessary changes to it.
Adjusting File Paths
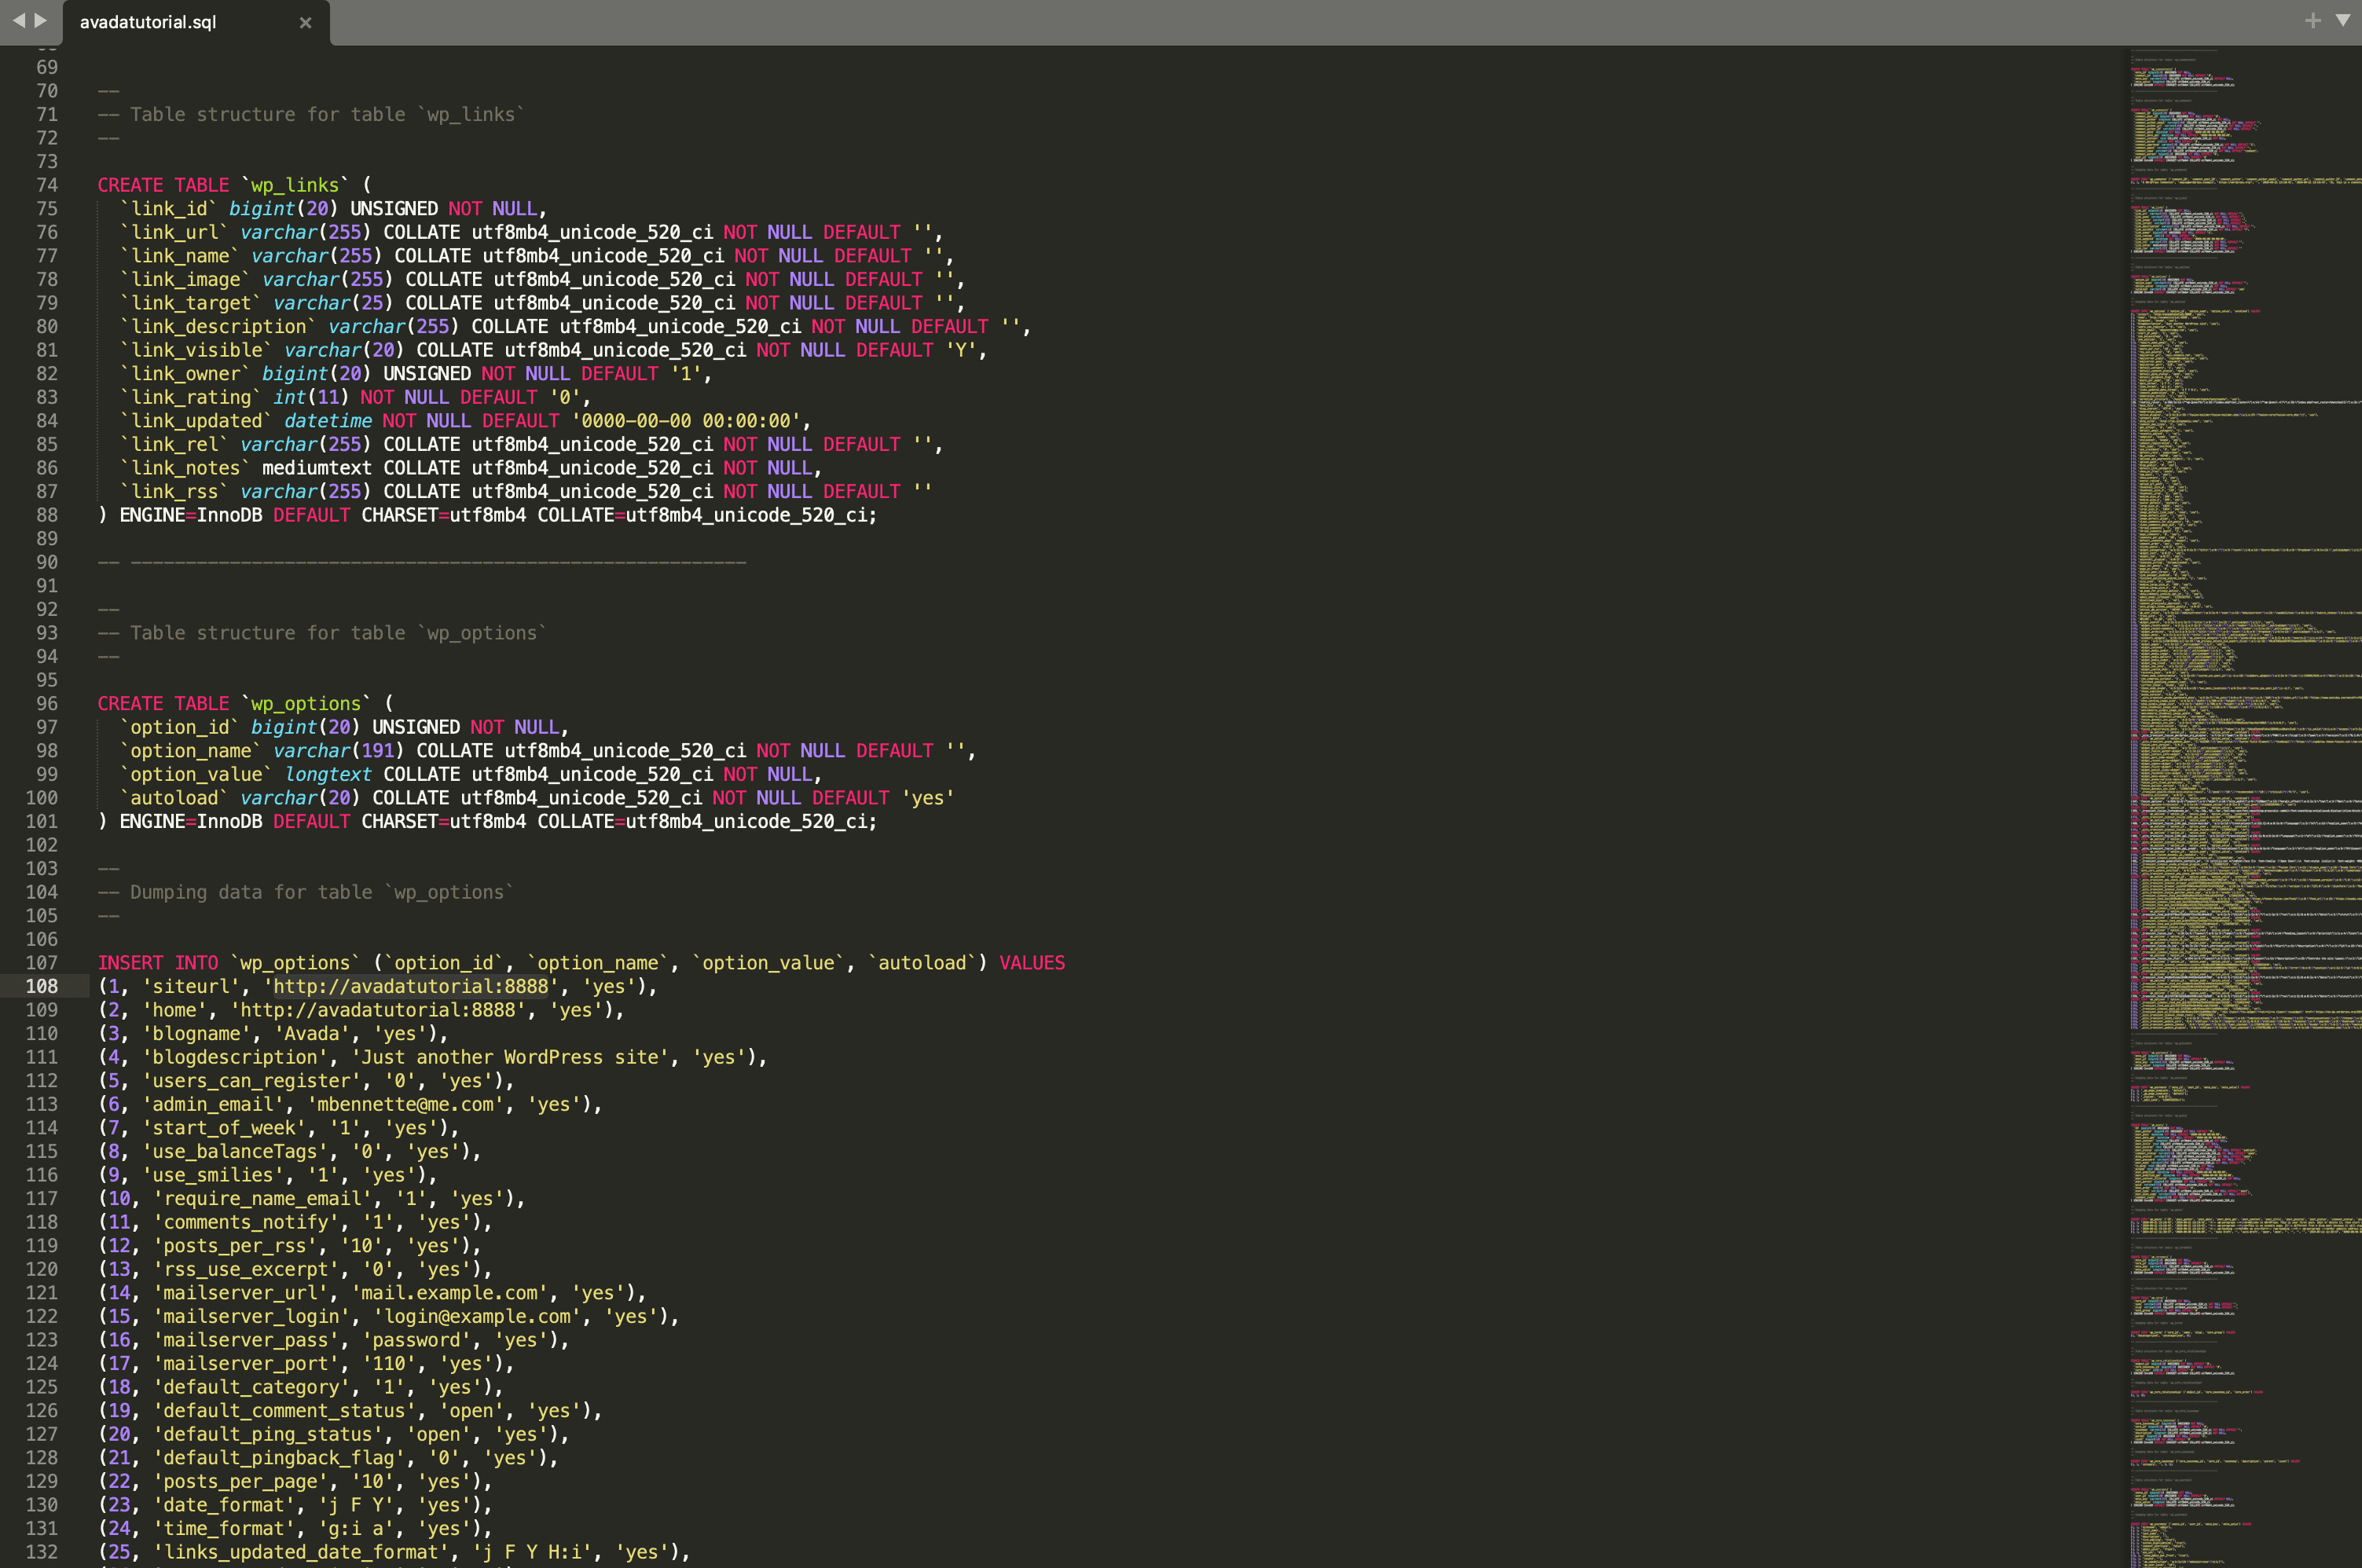
The file paths in your current exported database will be incompatible with the live site URL and must, therefore, be adjusted. Links to existing content will start with a local path such as “http://localhost”, which, naturally, will not be correct in the live online environment. We’ll change that now to save having to do anything too involved on the server.
Open your chosen text editor, then edit the exported .sql file so that we can perform a search and replace option to change specific information. In our current example (shown below), we will be replacing the localhost URL “http://avadatutorial:8888” with the website URL “http://www.avada.com”.
One excellent alternative to avoid doing this manually in a text editor or via phpMyAdmin is to use the WP Migrate DB plugin. To begin with, doing this in a text editor is a handy way to get a feel for what’s happening under the hood. However, manual editing files of this kind can lead to errors, so be aware of that.
Setting up the Live Database
We’re assuming that you’ve already signed up for a paid hosting solution with PHP and MySQL that matches the current WordPress hosting requirements. With WordPress powering 43% of all online websites with a content management system market share of 62.7%, it’s increasingly rare to come across a hosting company that doesn’t support these requirements, but it’s always best to check.
Log into your hosting account’s Dashboard and navigate to the database section to add/create a new database. Options for doing this will vary from host to host, but the requirements are the same. You must create a new database, database user, and password to access it.
Check with your hosting provider if you are unsure how to do this. They will usually have a simple set of steps to follow as in this Siteground example. The WordPress help pages also offer excellent detailed guides for doing this with cPanel and phpMyAdmin. Whichever solution you use here, note the database name, username, and password at this point.
Migrating Content to the Server
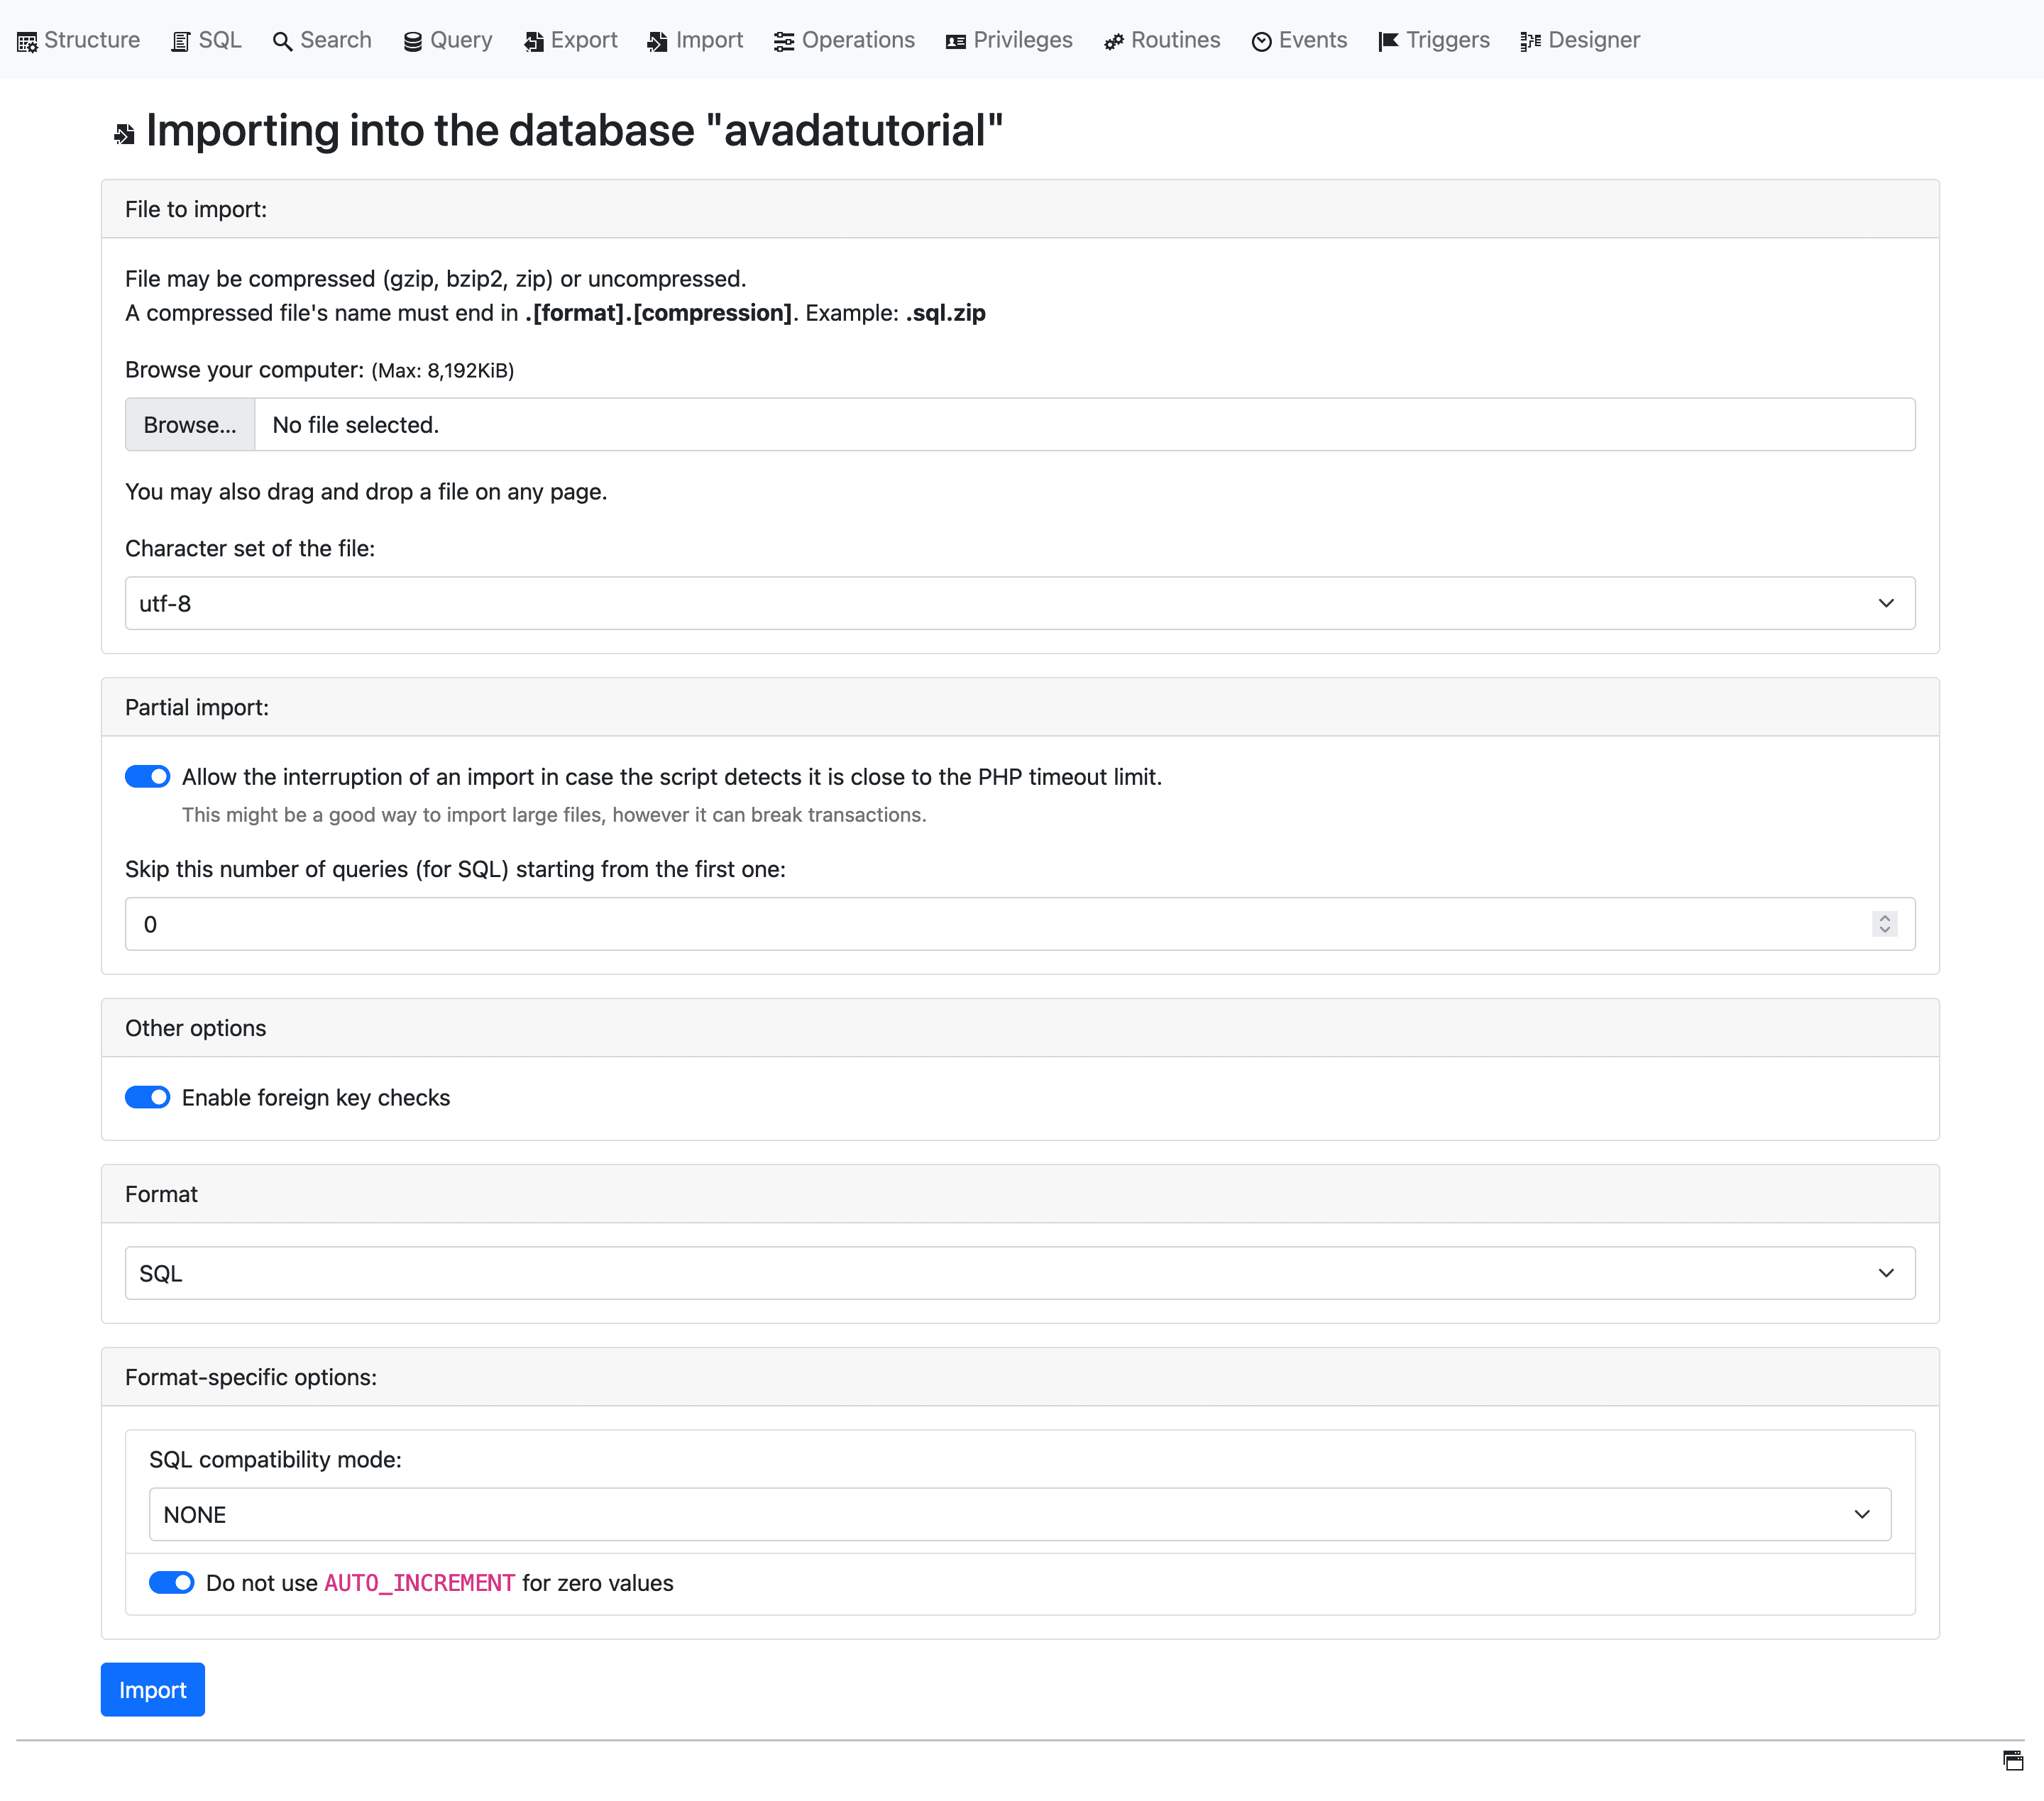
At this point, you should be ready to migrate our site. The first step is importing our local database. To do this, navigate to phpMyAdmin on the server, open the database you just created, and import the local .sql file (In our example “avadatutorial.sql”).
Our database is now imported to the web server and ready to go. Before we move the rest of our files across, one small item is to be taken care of locally – editing “wp-config.php” to include the correct database credentials. Open the “wp-config.php” file in your editor of choice and amend the following lines:
The final step is transferring the WordPress files to the web server. In this case, we’re assuming that there isn’t an existing WordPress install that we’re trying to target, so it’s simply a case of using FTP to transfer all the files in our local install into the remote root directory (or a specific sub-folder if you choose that option).
At this point, the WordPress site has been migrated over to the web server. The final step before testing is accessing the admin panel and refreshing the WordPress permalink settings to ensure they match what you had on your local setup. To do this, log into your new live site and navigate to “Settings > Permalinks”.
After that, it’s time to take a final tour of your live site and test core functionality to ensure that nothing is broken.
A Cautionary Note
With the range of potential local and remote setups possible, not to mention the options available within WordPress itself, the possibility of something going slightly awry along the way is not remote.
Learning to troubleshoot WordPress server problems calmly is a skill in itself and one that requires practice. If you run into problems, review the steps above first and then begin your troubleshooting with this excellent migrating WordPress guide and followed by a search of the FAQ troubleshooting support page. We can also recommend this detailed WordPress troubleshooting article.
Noting specific error messages you encounter along the way will also make tracking down root causes substantially simpler.
Automated Plugin Solutions
After you’ve gone through these manual migration steps a few times, you’ll naturally start looking for more automated solutions to help streamline the process and remove some of the potential for human error. Here’s a brief list of plugins currently available that are worth following up on after you are comfortable with the steps above:
Summary
Migrating a local site to a live server can be daunting if you’ve never done it before, but hopefully, the steps above have proved it’s not such a complicated process. You’ll learn more as you progress, but stick to the basic sequence outlined in this article, and you’re off to an excellent start. Let’s recap those points: