Share
The White Screen of Death (WSoD) is a horrible error for a website owner to encounter – one of the worst, in fact – especially if you don’t have the knowledge to fix it. With only a blank screen staring back at you, there’s no indication of what’s happened or no way of knowing what to do next.
However, like the childhood monsters lurking under your bed, there’s nothing to fear about the WSoD once you confront the problem head-on. It takes a logical process to root out the cause and get your website back online.
In this article, we’ll look at what causes the WSoD before running through six steps you can take to banish it forever, making everything right with the world once again. If you are looking for general WordPress troubleshooting steps, take a look at this article. Let’s get started!
Overview
What Causes the White Screen of Death?
In a nutshell, the WSoD is an entirely blank screen that greets you when trying to access your website. While there are many potential causes, you’ll commonly find the issue is down to one of the following three:

Based on these reasons, we can start to build a plan of attack for dealing with the WSoD – so, let’s get cracking!
6 Steps to Fix the WSoD on Your Website
You’ll potentially need to carry out six steps to fix your WSoD. We say “potentially” because it’s likely you won’t need to carry out every step to fix the problem, so you can breathe a little easier! Furthermore, there’s nothing stopping you from tackling these steps in any order you like if you suspect a certain cause—we’ve just presented them in a logical order based on the most likely issues.
Finally, you’ll need a File Transfer Protocol (FTP) manager to complete these steps. Don’t worry, they’re simple to use, and just as easy as finding files on your computer. Once you’re ready, you’ll need to open your FTP manager of choice – we prefer using the open-source FileZilla, though there are plenty of others out there to choose from.
Step 1: Modify Your Memory Limit
Your WordPress hosting provider will allocate a certain amount of memory to your installed plugins or files that execute scripts (such as JavaScript) to enable them to operate correctly. If this is set too low, it could potentially cause the WSoD or the nondescript 500 Internal Server Error. It’s worth mentioning that some hosts won’t let you alter your memory directly—in these cases, you’ll have to drop them a line and ask them to do it for you.
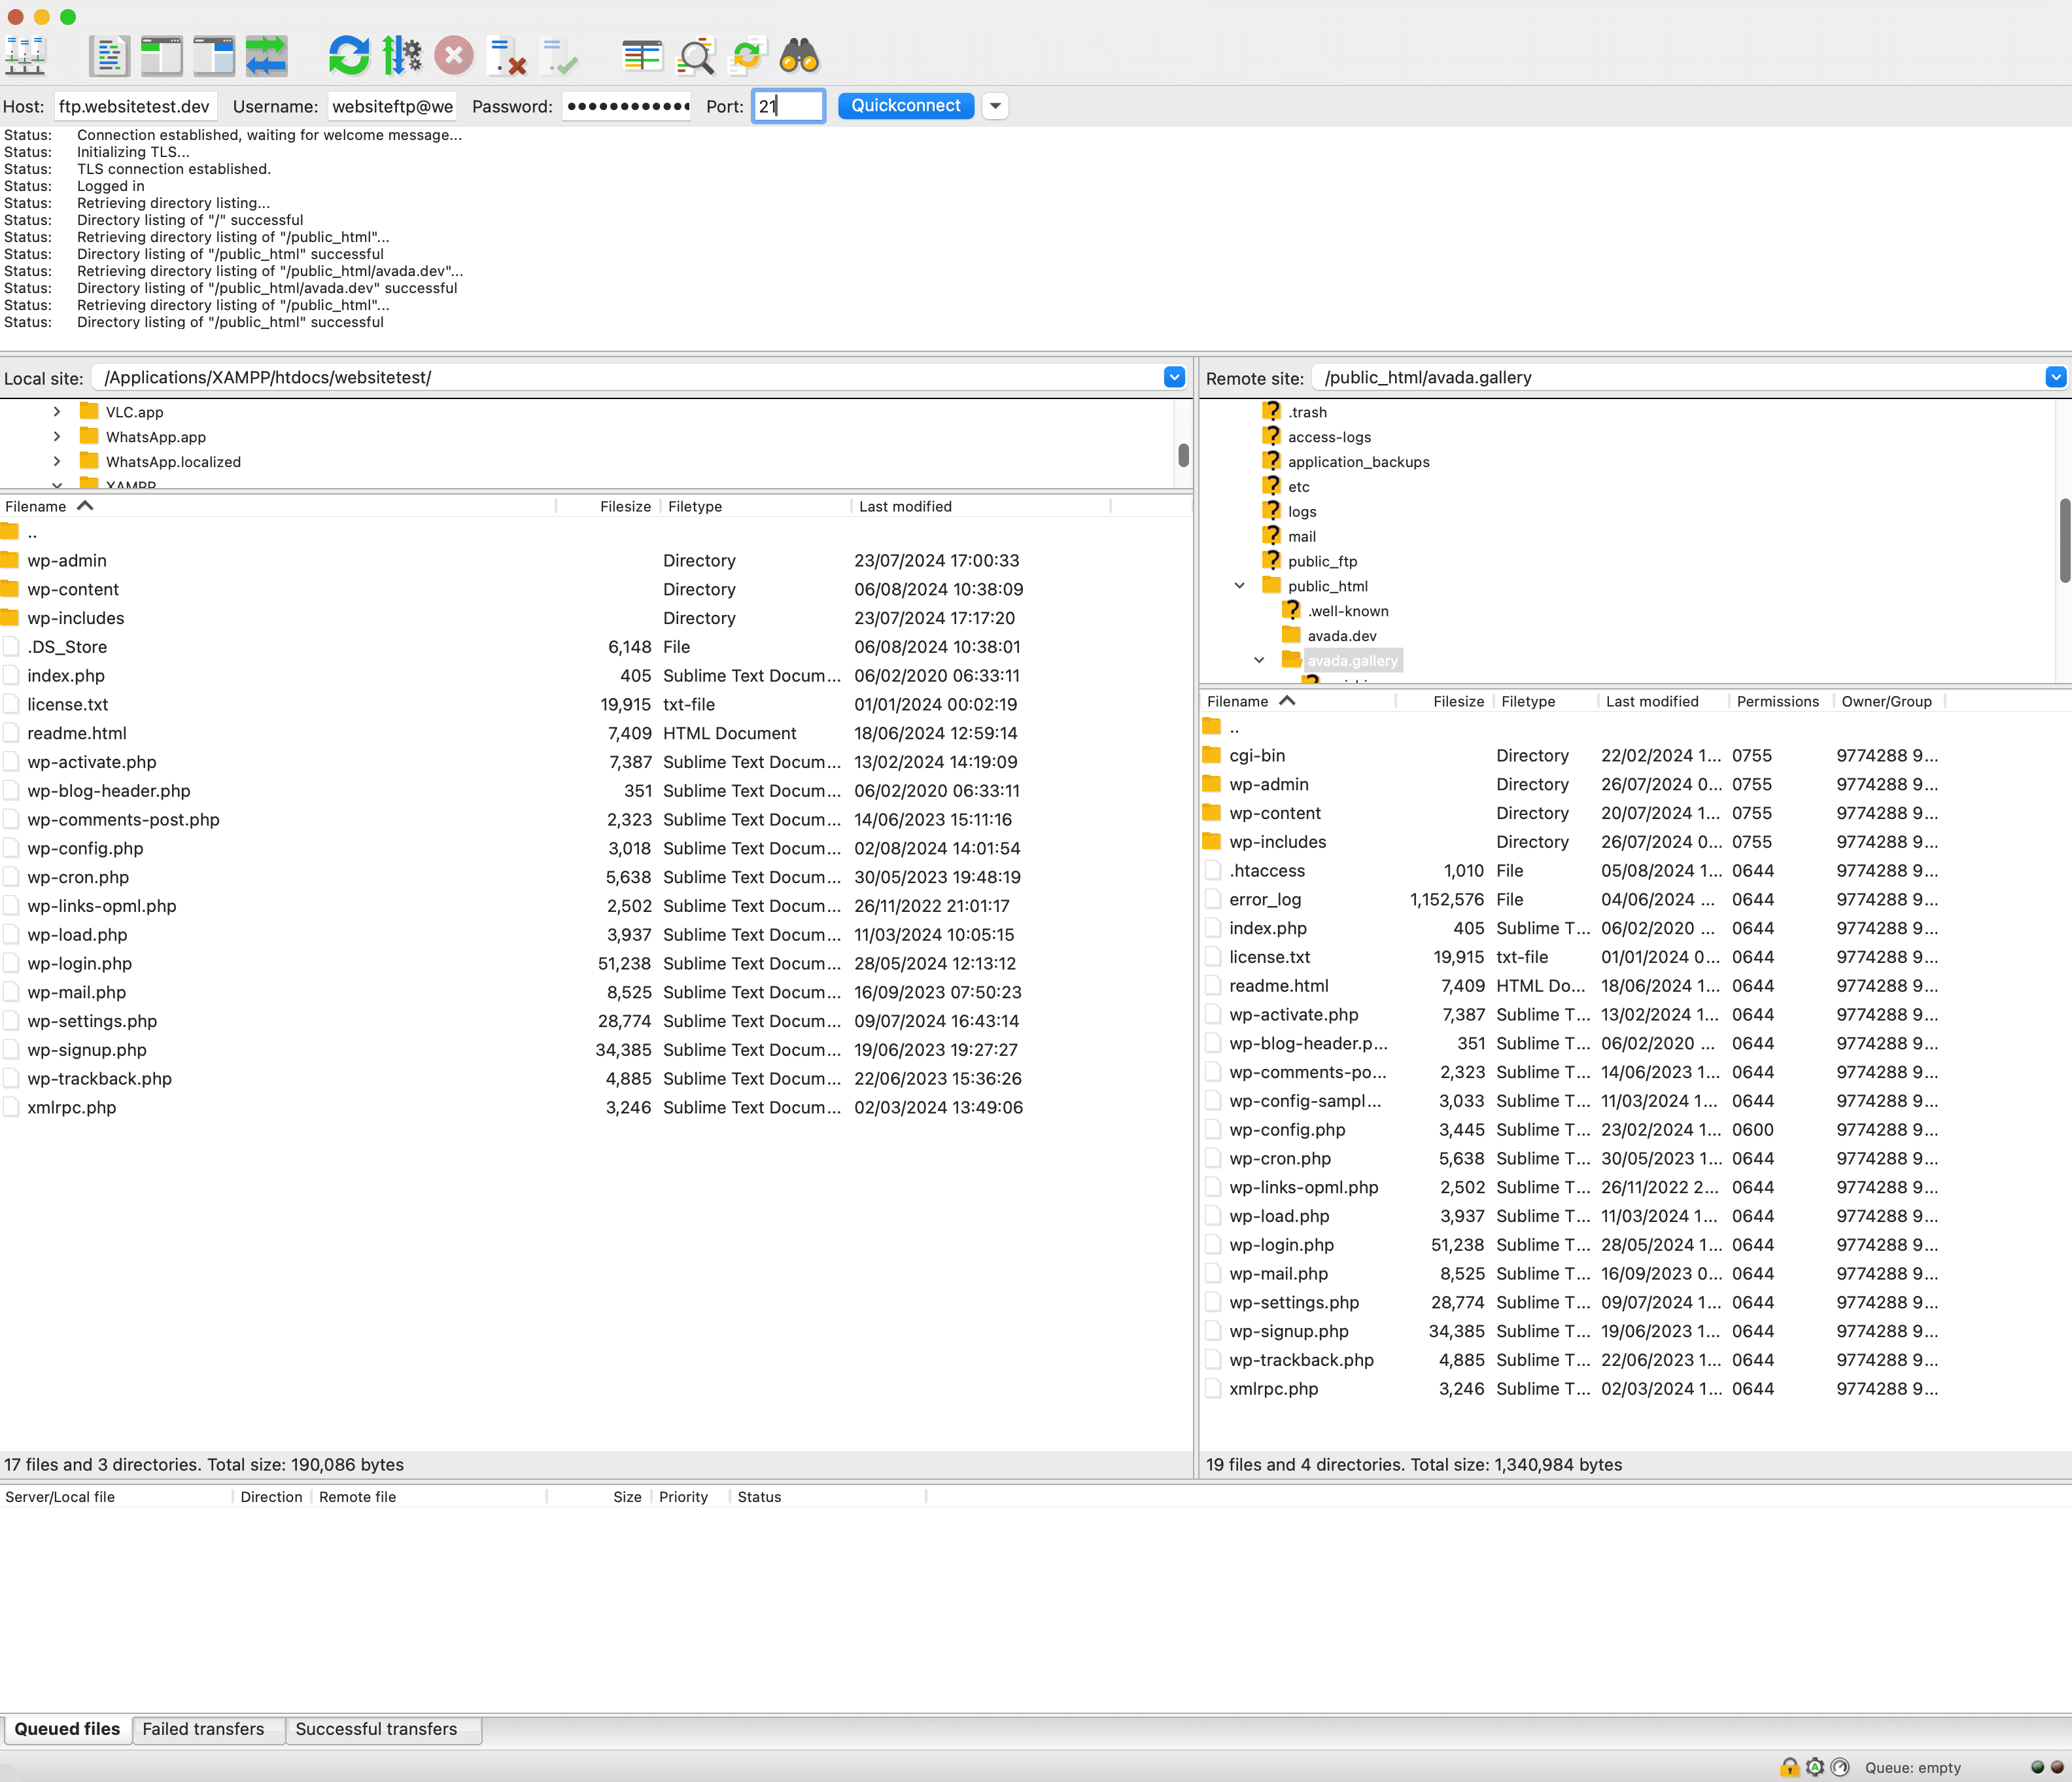
To change your memory settings, open up your FTP client and connect to your server using the correct credentials (usually found within your host’s admin panel). Once entered, click “Quickconnect”:
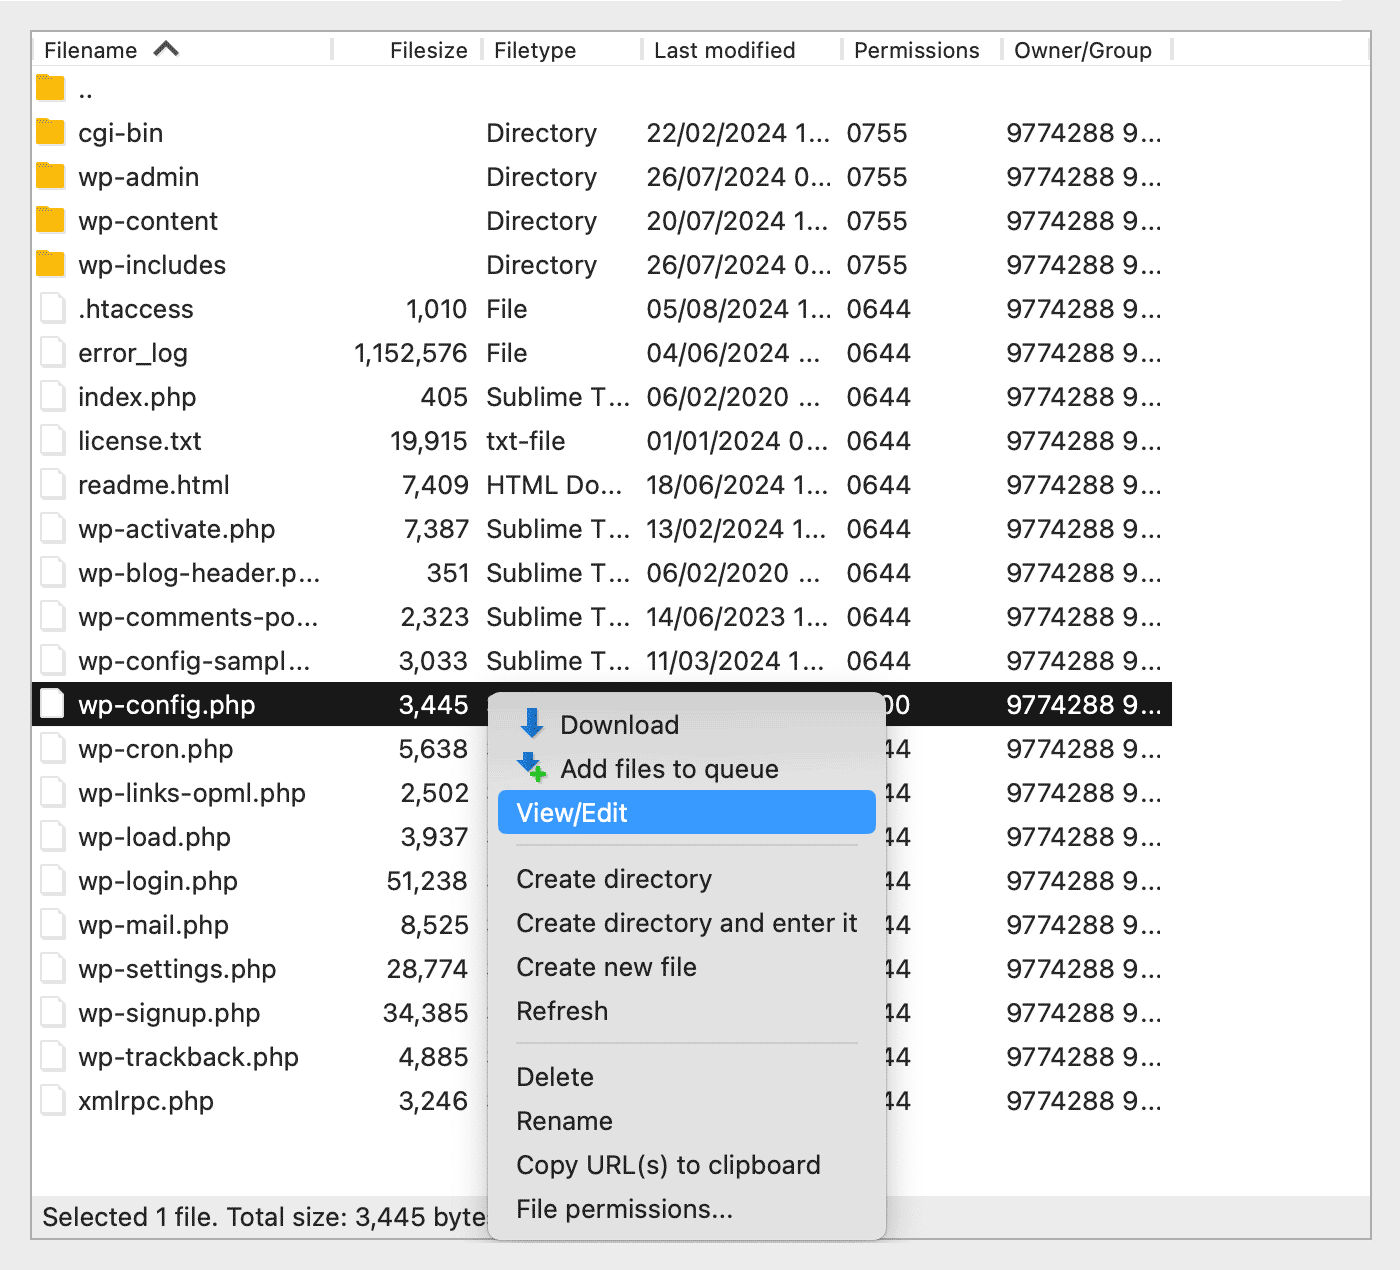
Your files and folders are displayed on the right-hand side. Navigate to your “Home” folder called /public_html/ or /www/, find the “wp-config.php” file, then right-click and select “View/Edit”, choosing the default text editor if prompted:
Once the file is open, type the following code on the next line after the opening PHP tag at the start of the file:
This tells your WordPress server to allocate more memory to your plugins. After saving and closing the file, browse to your website. If you’re still experiencing the WSoD, you must proceed to the next step.
Step 2: Check for Incompatible Plugins
Plugins are an inherent part of WordPress but can also cause website errors, including the WSoD. Fortunately, problematic plugins are quite simple to troubleshoot. Start by using your FTP client to navigate to the /wp-content/ folder.
Within the /wp-content/ folder, right-click on the /plugins/ folder, then select “Rename”. Append “_deactivated” changing it to /plugins_deactivated/.
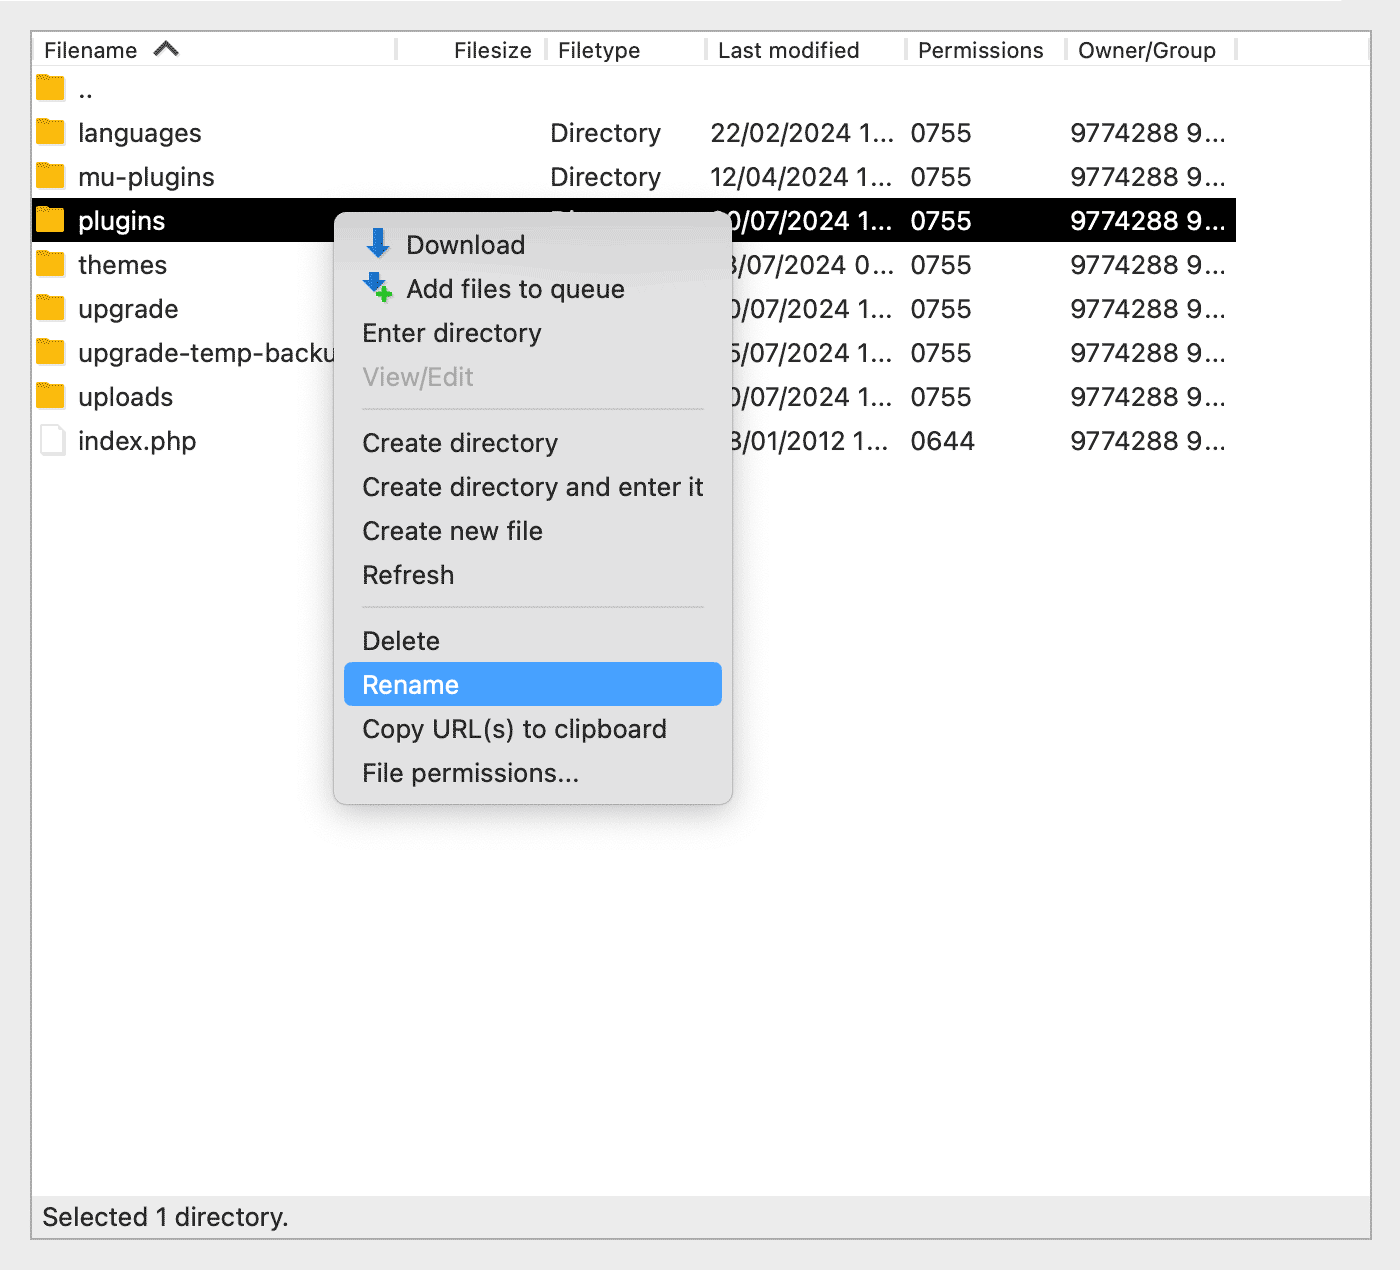
The idea is to stop WordPress from loading your plugins while you check for errors. Open your website again, and if it’s back online, a plugin was the cause of the WSoD. From here, rename the /plugins_deactivated/ folder back to /plugins/, which will reactivate everything – then follow the above renaming process for each plugin within your /plugins/ folder, one by one, until you find the one that causes the WSoD.
Once you’ve identified the faulty plugin, you’ll need to decide if the plugin is vital to your workflow. If it is, re-download the latest version, try contacting the developer for advice, or replace it with an alternative. Of course, if the plugin isn’t vital, trash it. It’s worth mentioning that there could be more than one plugin causing the WSoD, in which case, you’ll have to identify both using the above approach.
Step 3: Check for A Corrupted Theme
If the WSoD woes are not memory or plugin-related, the next step is to rule out the active theme. Fortunately, this follows the same process as plugins – navigating to /wp-content/ and renaming the current theme’s folder to force WordPress to load the default theme.
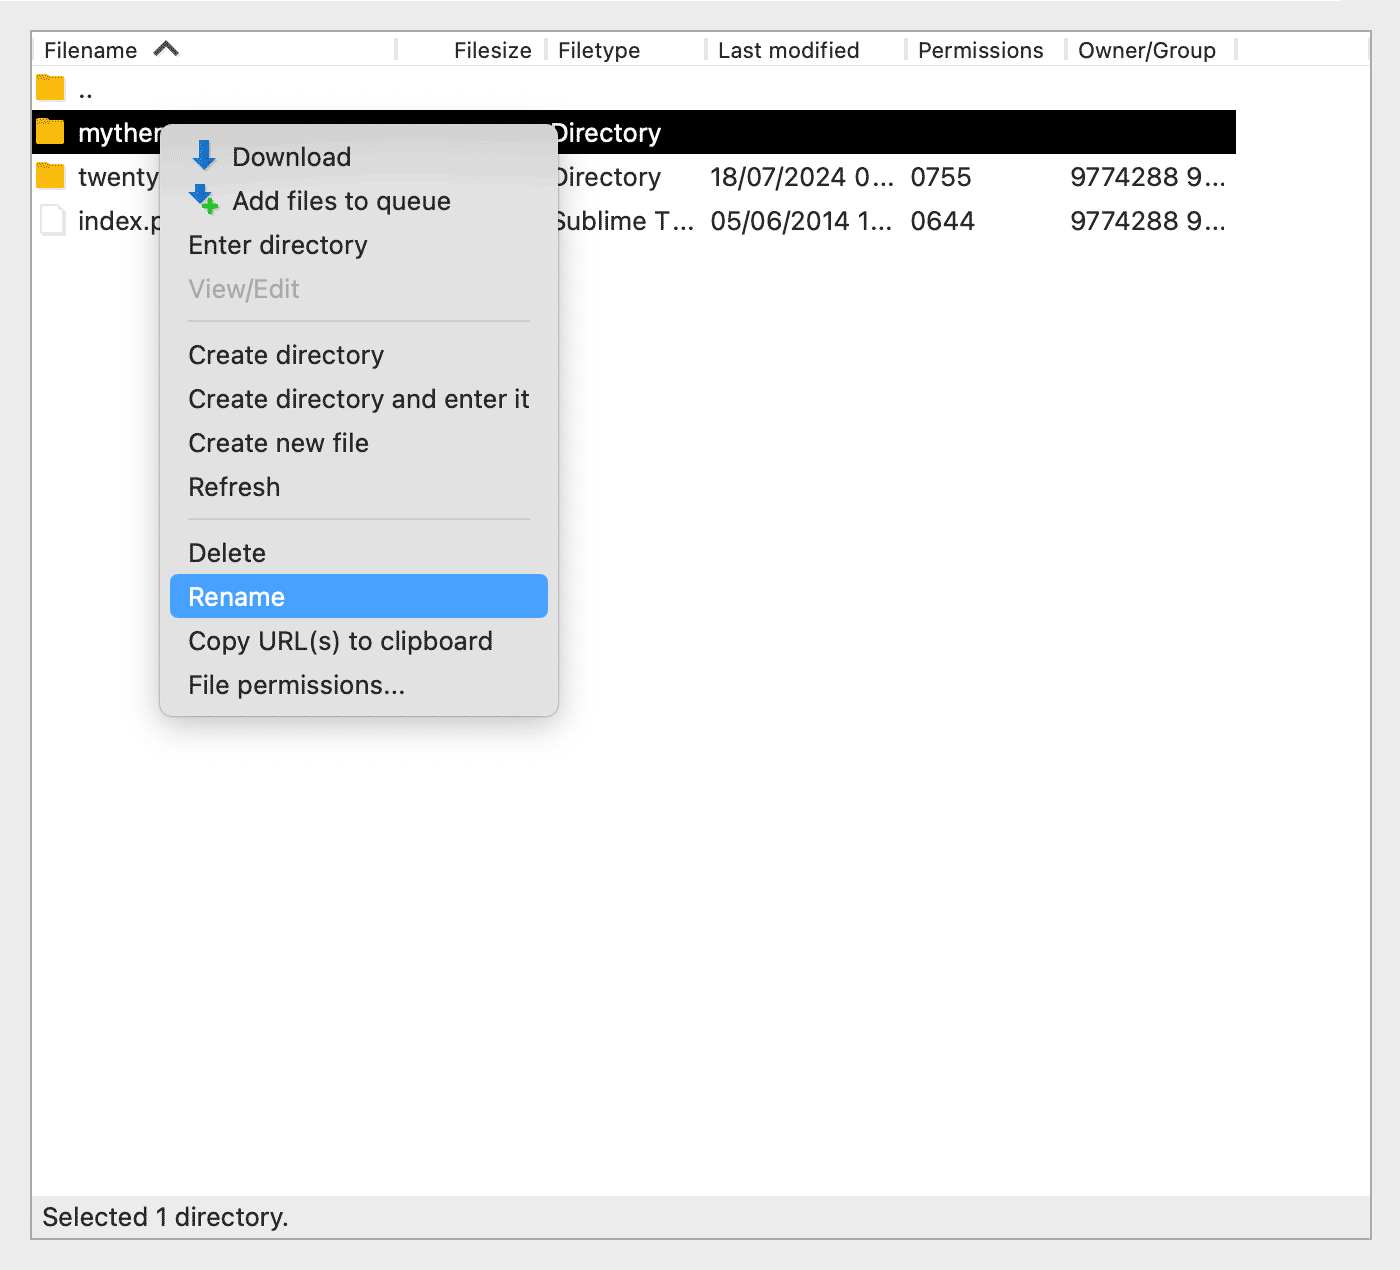
If you have deleted the default WordPress theme, you’ll need to upload it manually, using FTP, into your themes folder, or reinstall it by navigating to the WordPress Dashboard > Appearance > Themes page. Once done, check your site again. If it’s back online, a compatibility error between your active theme and WordPress is the likely cause.
At this point, you can attempt to contact the developer for advice or choose an alternative theme. We suggest one with world-class support and regular updates, such as Avada. If you’re still staring at a blank screen, it’s on to the next step.
Step 4: Check for Blank Space Within Your Files
If you’ve been editing specific files, such as “functions.php” or “wp-config.php”, blank lines within them can also cause the WSoD. This is relatively straightforward to fix for “wp-config.php”. Using your FTP client, navigate to the file and check for blank lines at the very start (before the opening PHP tag) and at the very end. Deleting them and then saving the file should be enough.
The “functions.php”file is found within the /wp-includes/ folder, and if you’ve been editing it, adding a rogue blank space is easy. Unfortunately, you may have trouble locating the offending line due to its size. The most practical solution is to replace your existing “functions.php” file with an unchanged version, then recheck your website to see if the WSoD has been resolved.
Step 5: Enable Error Reporting
WordPress’ debug mode is like a powerful telescope, enabling you to hone in on exactly what’s wrong with your website. This step is handy, even if your WSoD problems are sorted, so let’s look.
In your FTP manager, open up your “wp-config.php” file once more, and underneath the opening PHP tag, add the following code:
The first line activates the debug mode, the second tells WordPress to save a “debug.log” file in your home folder, and the third tells WordPress not to display these errors on your site for all and sundry to see.
Each error within your “debug.log” file is pretty easy to interpret – the error shows the location within your WordPress directory and a timestamp, and it will likely be a theme or plugin that slipped through the net earlier in the investigation. Follow the previous steps to remedy it, and the WSoD should be banished for good.
Step 6: Check Your File Permissions
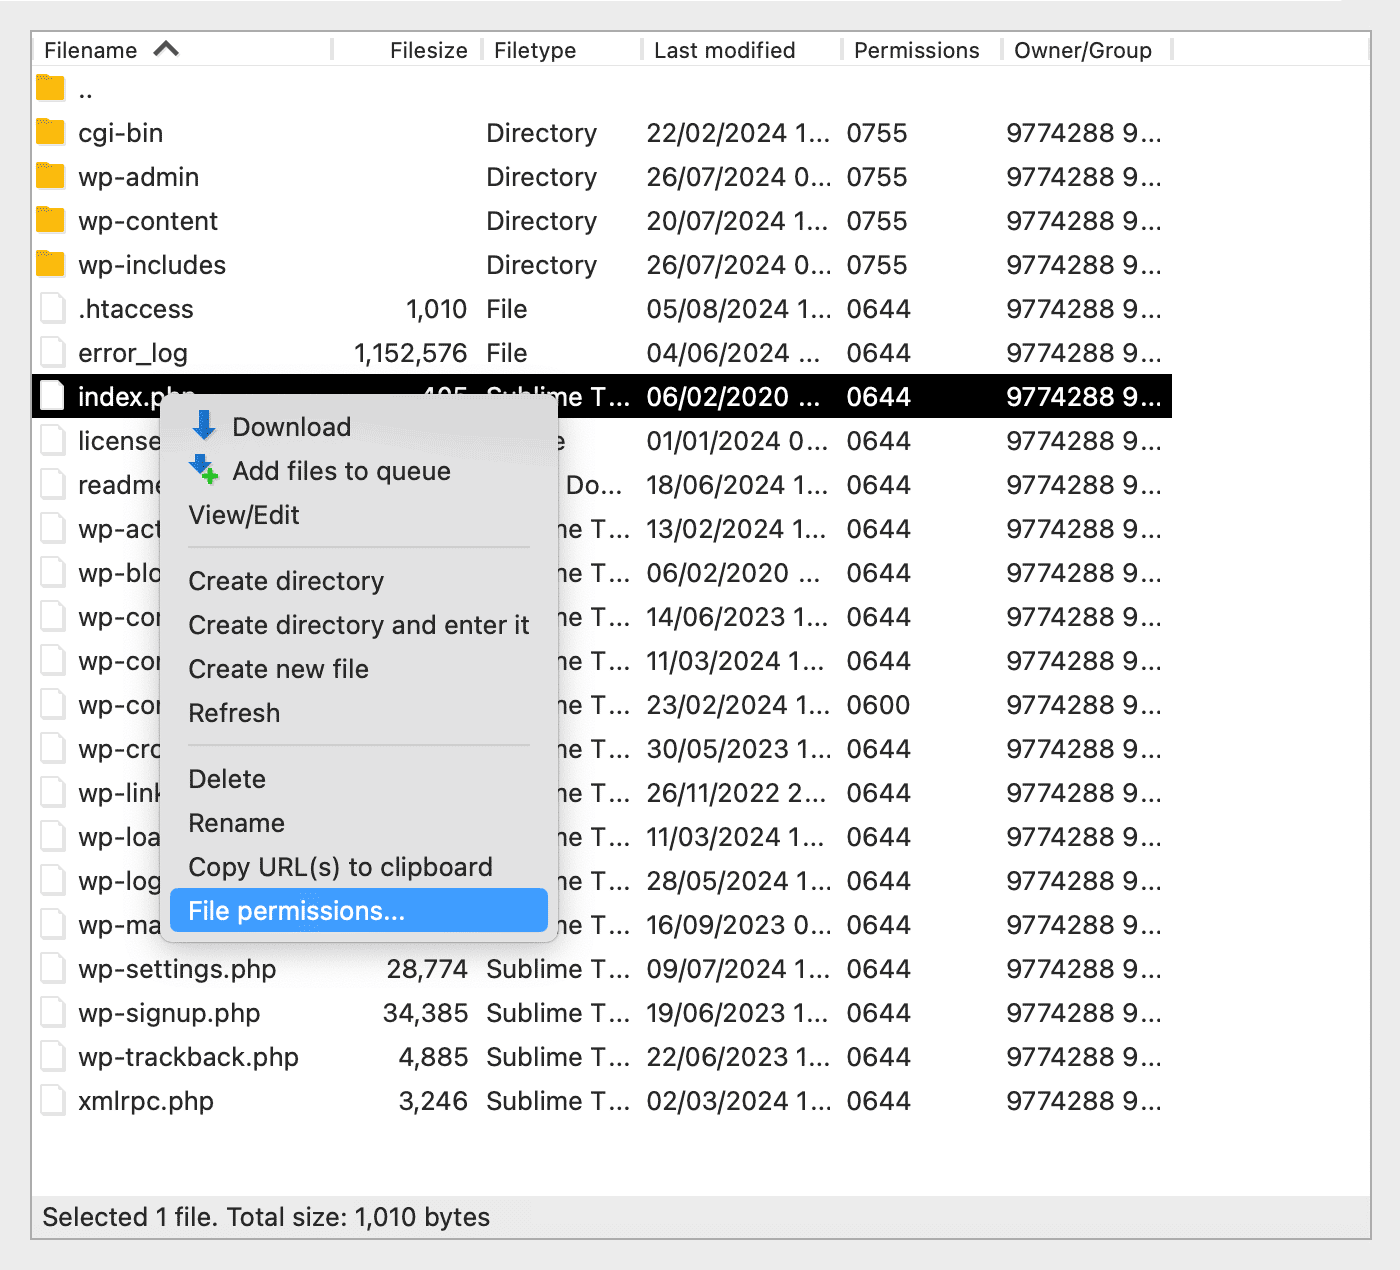
Finally, while very rare, your WordPress install may have the wrong file permissions set somewhere along the line. You can view the permissions for a file or folder by right-clicking “File permissions” within your FTP client.
Folders and files have different permissions represented by a number. Folders should be set to 755.
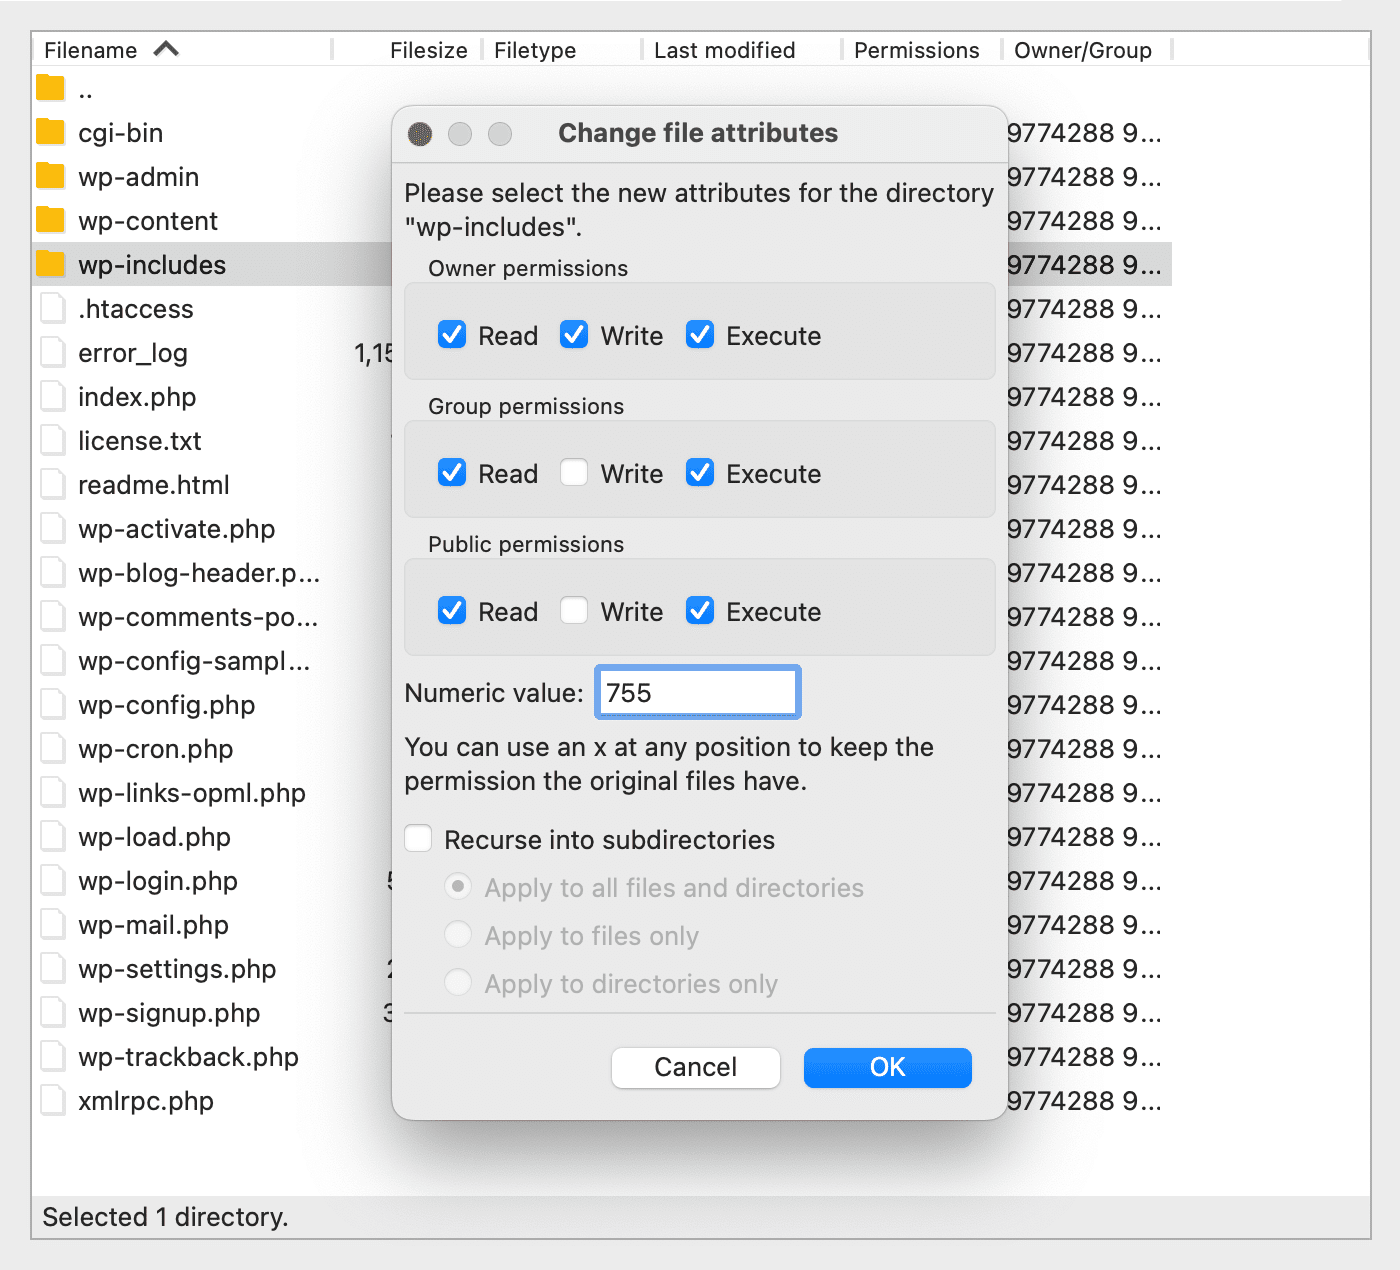
And, files should be set to 644.
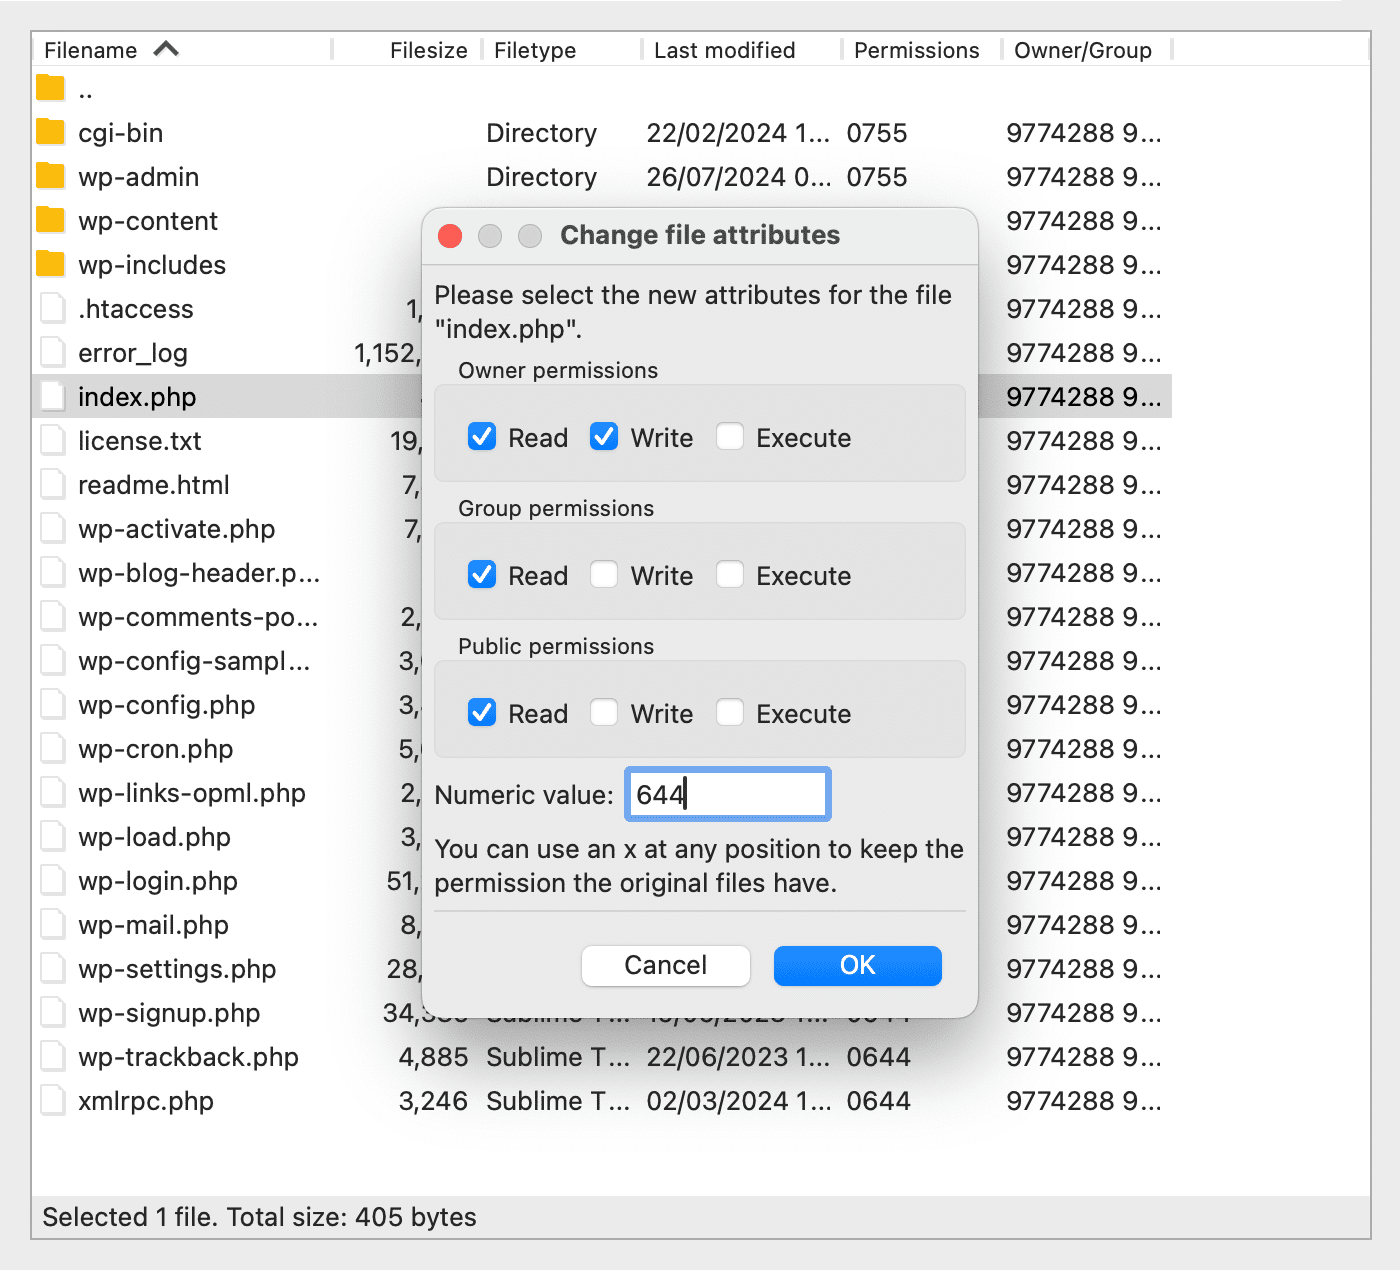
Going deep on file permissions is outside the scope of this article – for an in-depth read, check out this article if you wish to understand them further. Because it’s a rare cause of the WSoD – not to mention the unenviable job of checking each file – if you’re uncomfortable with this step, you may want to skip to our final section.
What to Do if You Can’t Fix the WSoD
If you’re still experiencing the WSoD after carrying out all of these steps, other than clearing your browser’s cache, you may need to bite the bullet and contact your hosting provider for support.
If you’re using a trusted hosting provider (SiteGround is an excellent choice), you’ll find the resolution quick and painless – and more importantly, you’ll finally have your website back online. We can also suggest that you take a closer look at The basics of WordPress troubleshooting article.
Summary
99% of the time, your WordPress website will work flawlessly. However, it’s the 1% that’ll potentially leave you tearing your hair out – especially when dealing with the White Screen of Death (WSoD), which doesn’t offer many clues as to how to rectify it. You may not have known how to fix it previously, but with our guide, you’ll be back on track quickly. Let’s recap the steps you need to take:
