Translating Avada Core
Last Update: October 29, 2025
Within this section, you’ll find everything you need to localize and internationalize the Avada Core Plugin that is bundled with the Avada Website Builder into your language. It is split into several subsections to help you easily find what you need. The process of translating the Avada Core plugin is very similar to translating Avada, except for some naming conventions. Let’s take a look at translating the Avada Core plugin!
Translatable Avada Core Features
Plugin Translation Basics
To further understand how translating the plugin works, we’ve included this section to explain where you can find the files needed for translation and what these files are for. Avada Core comes with a steadily growing number of available languages, which can be downloaded from our public GitHub Repo. These are predefined translations, powered by our user base. You can see usage details here: Included Language Files
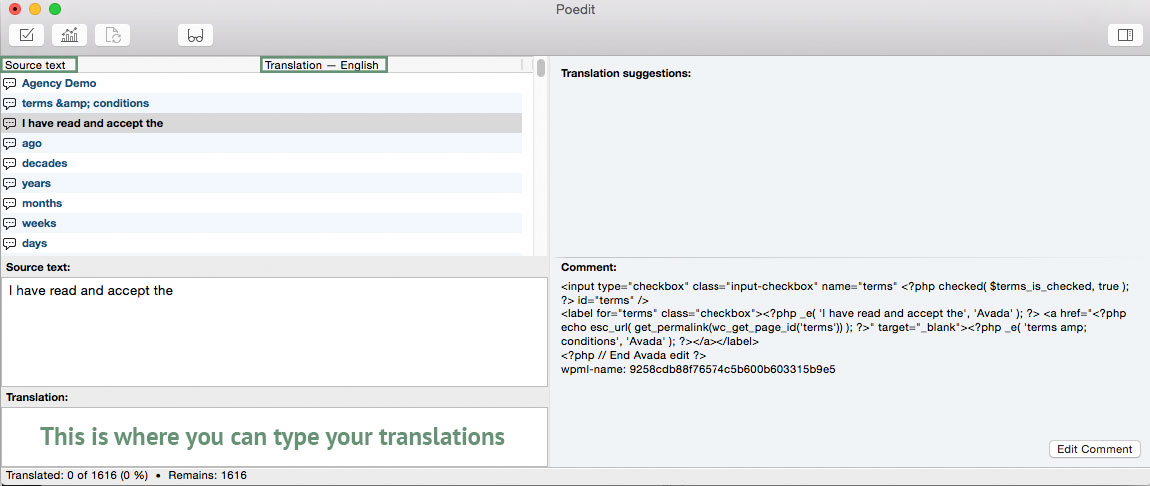
If your language is not already part of our repository, you can easily create your own translation files. Inside the Avada Core main plugin folder, you will find a folder called languages, and inside of it this file:
This file can be used as a starting point to create your own translations, using e.g. a third party tool like POEdit.
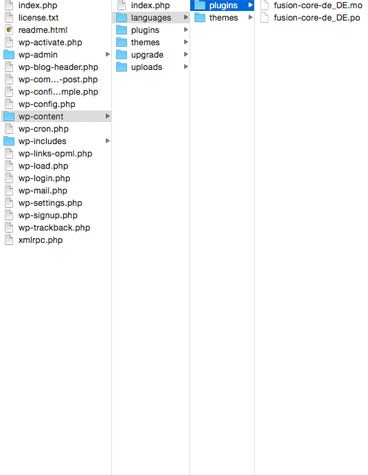
In order for WordPress to recognize the resulting language files, you must name them accordingly using the ISO Language Codes. For example, if you wanted to translate Avada Core to the Deutsch language, the filenames would be fusion-core-de_DE.po and fusion-core-de_DE.mo. View screenshot here.
Please see the next sections for detailed instructions on how to do so.
Language Code
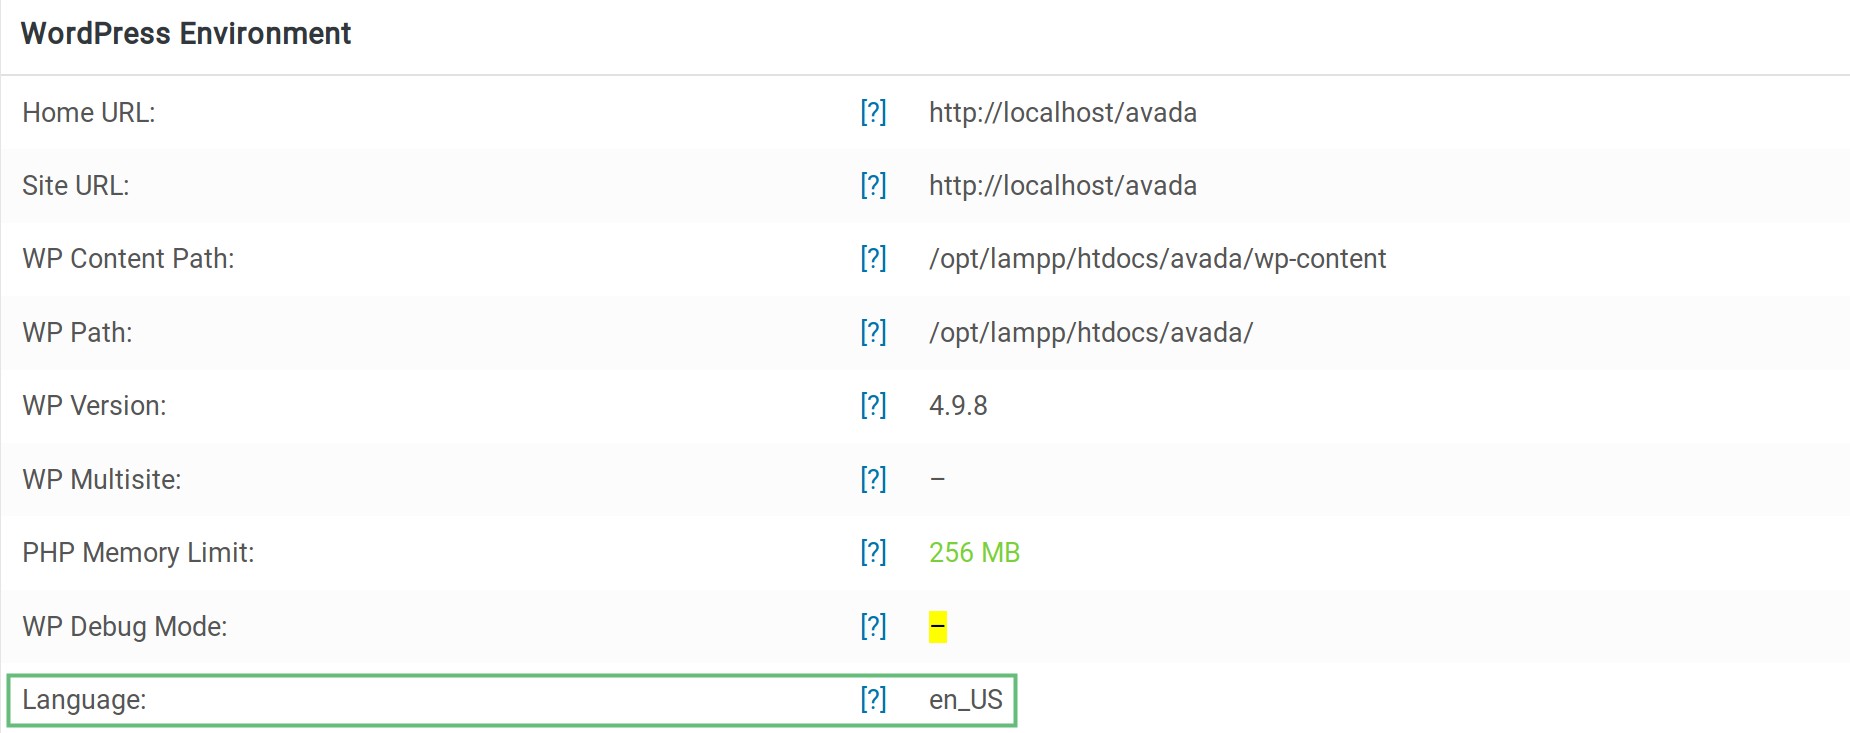
Using the correct language code is an important factor to successfully translating the plugin. With the System Status tab you can easily see which language code you’re using. Please continue reading below for more information on how this is done.
How To Identify The Language Code You’re Using
The Translation Process
If your language is not already included, the only thing you have to do is to create a new .po file from the original fusion-core.pot located in the languages folder, translate all text strings, then save the .po file with your language code and make sure the corresponding .mo is created, which can be read by WordPress. The next subsection will explain this in detail. If you only want to change translated strings in an included .po file, the same steps apply.
Either you are setting up a completely new language file or you just want to edit translated prebuilt language files, the steps to take are easy and more or less the same.
The language files can also be used if you only want to translate a small portion of the theme, or one specific area. You do not have to translate the entire plugin, you can choose what you translate inside the Avada.po file. This is the preferred method for translation.
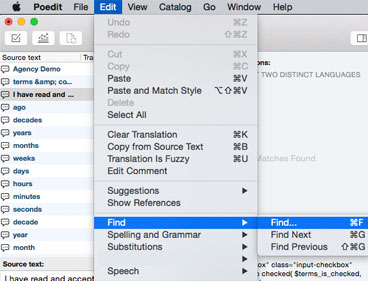
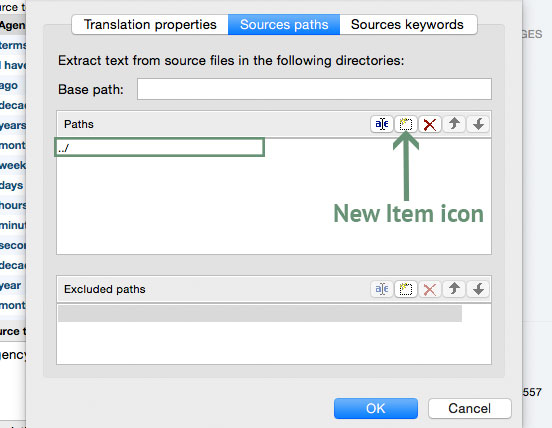
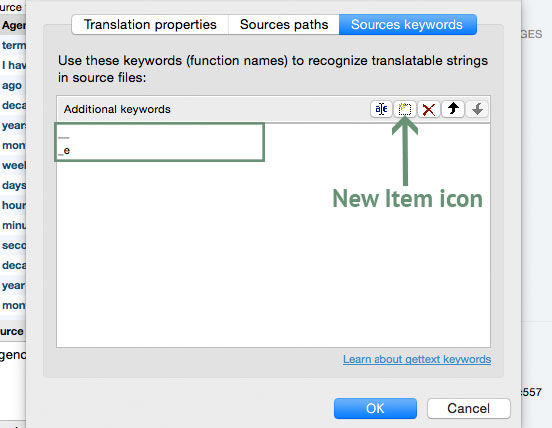
How To Edit The .po file With 3rd Party Software
There are different editors out there for the purpose of editing .po files, but POEdit is easy to use, it is available for all platforms and it is freeware. To download POEdit, follow this link.
How To Start A New Language From Scratch

How To Edit A Pre-Built Language File
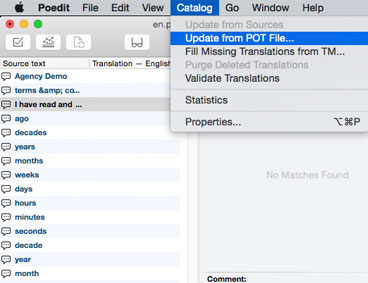
Updating The Translations Catalogue
Updating the Translations Catalogue usually isn’t required. However, if you want to retain your customized Language file, and new strings have been added to a new version of the plugin, then you can choose to update from the .pot file to include the new strings to your current Language file. Another reason why updating the Translation Catalogue might be a good idea is if text strings have been added or edited through a Knowledgebase fix. You may need to update the catalogue of your existing .po file to reflect these changes.


