How To Use Contact Form 7 With Avada
Last Update: December 5, 2025
Avada includes a built-in Form Builder designed specifically for Avada websites. It is intuitive, highly flexible, customizable, and responsive across all devices from mobile to desktop. However, if you prefer, you can use the Contact Form 7 WordPress plugin, which works well with Avada. Let’s look at how you install and use this plugin on your Avada website.
Installation
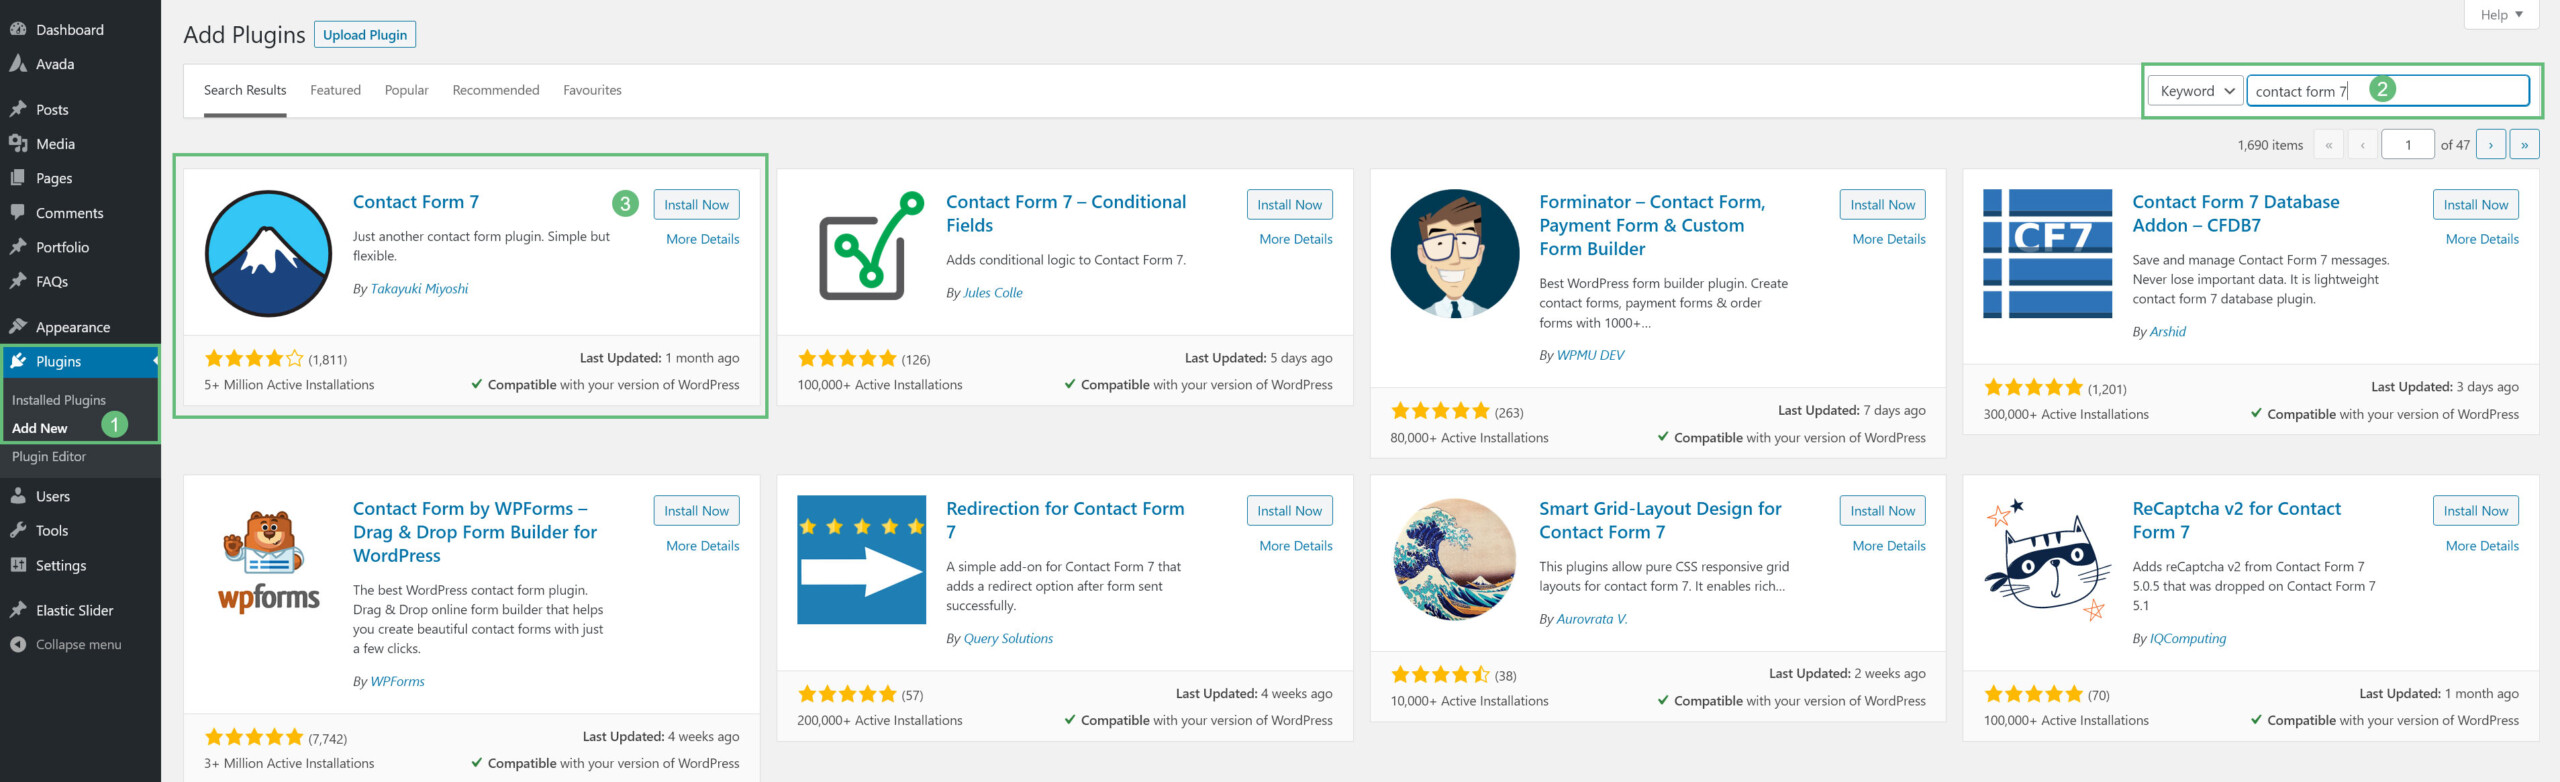
To install Contact Form 7, simply head to Plugins > Add New from the WordPress dashboard, search for Contact Form 7. and click the Install Now button. Then activate it.
Settings
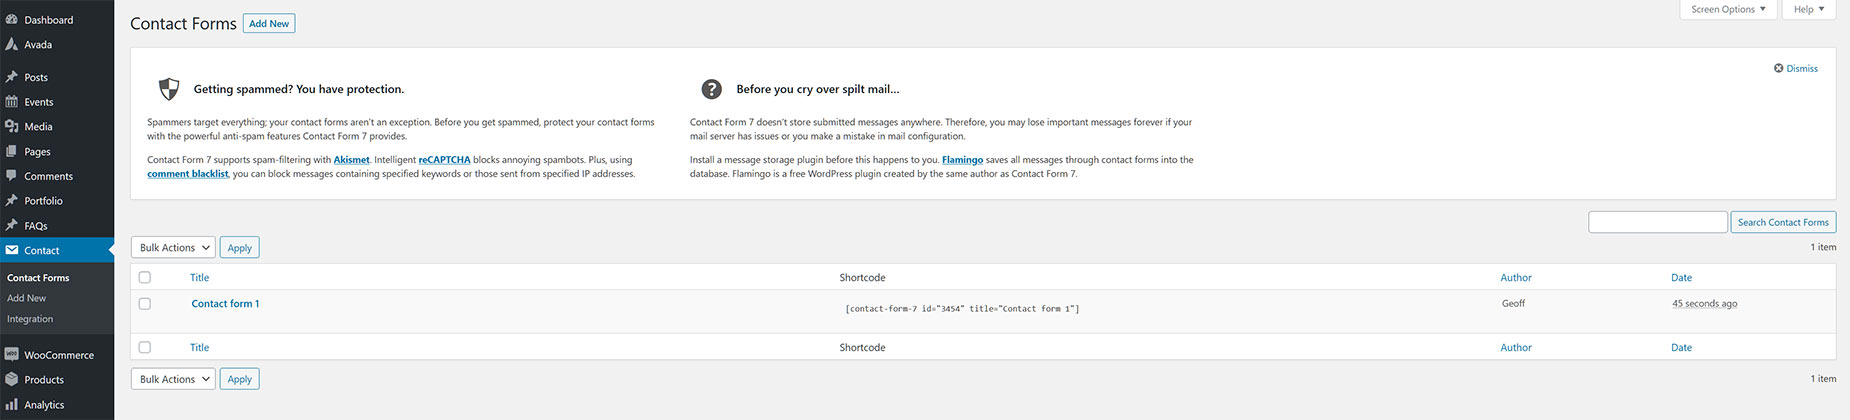
Once Contact Form 7 is installed, you will find a sample form under Contact > Contact Forms. All settings for the plugin are found in the actual forms themselves.
Using The Plugin
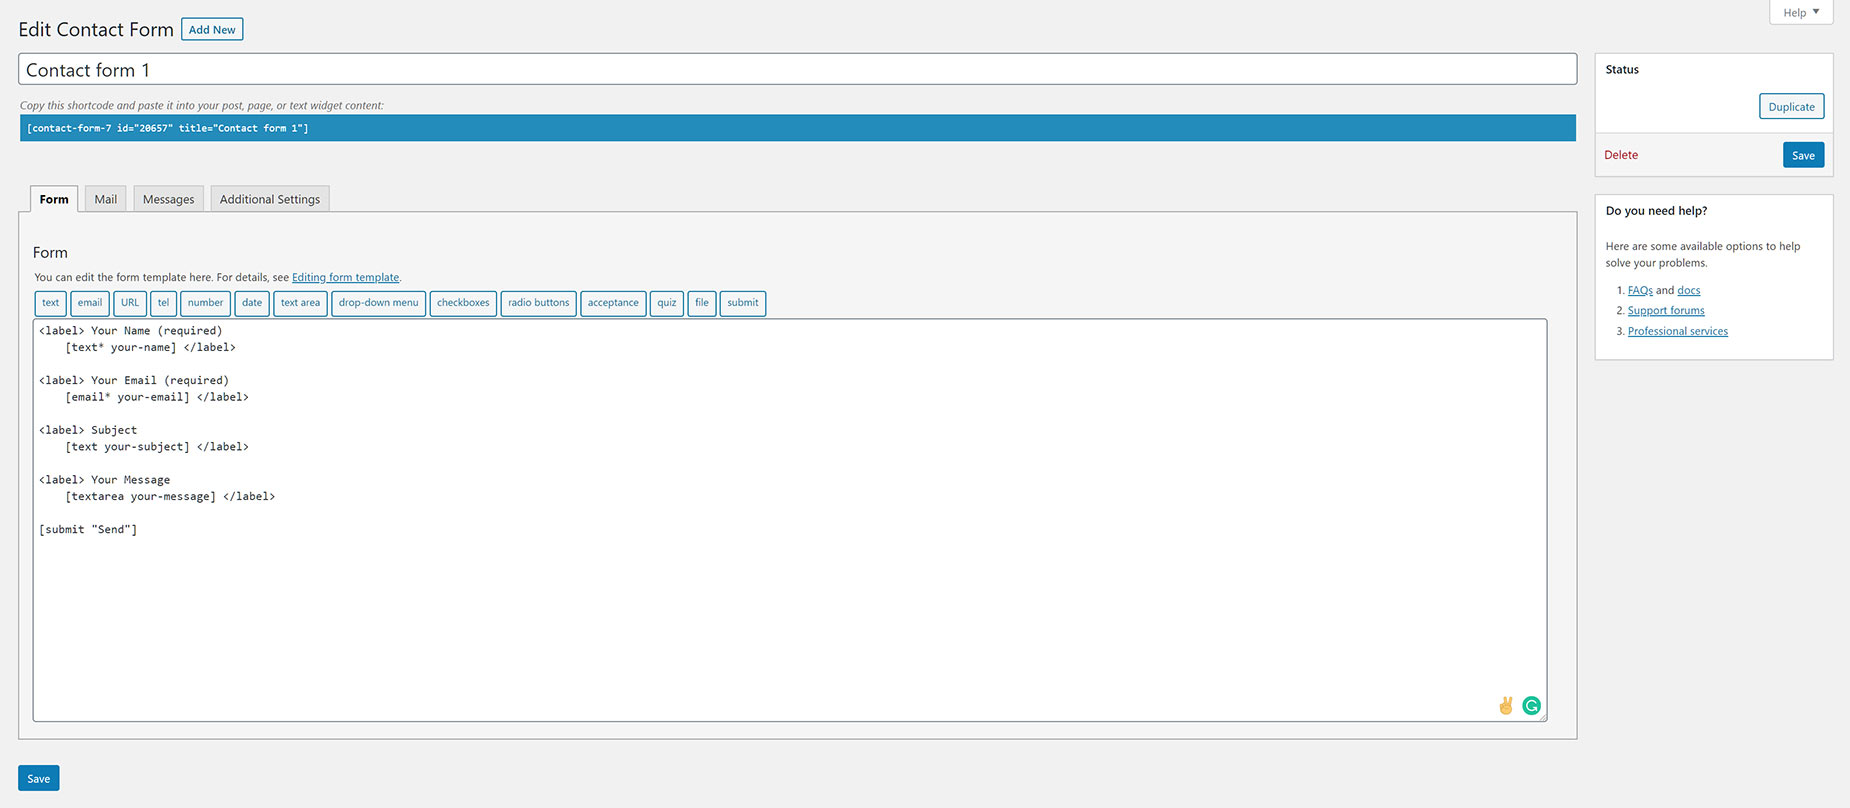
Whether you add a New Form, or edit the sample form, you come to the Form Editor, and here, there are four tabs to help you configure your form and its settings.
Form
The first tab is Form. Here, you create the form template with use of form tags. The sample form is a basic contact form with fields for Name, Email, Subject, a Message area, and a Send button. You can add further form fields by clicking on and configuring the corresponding Form Tag Generator button above the form template area.
On the right hand side, you will see links to the Contact Form 7 FAQs, Docs and Support Forums.
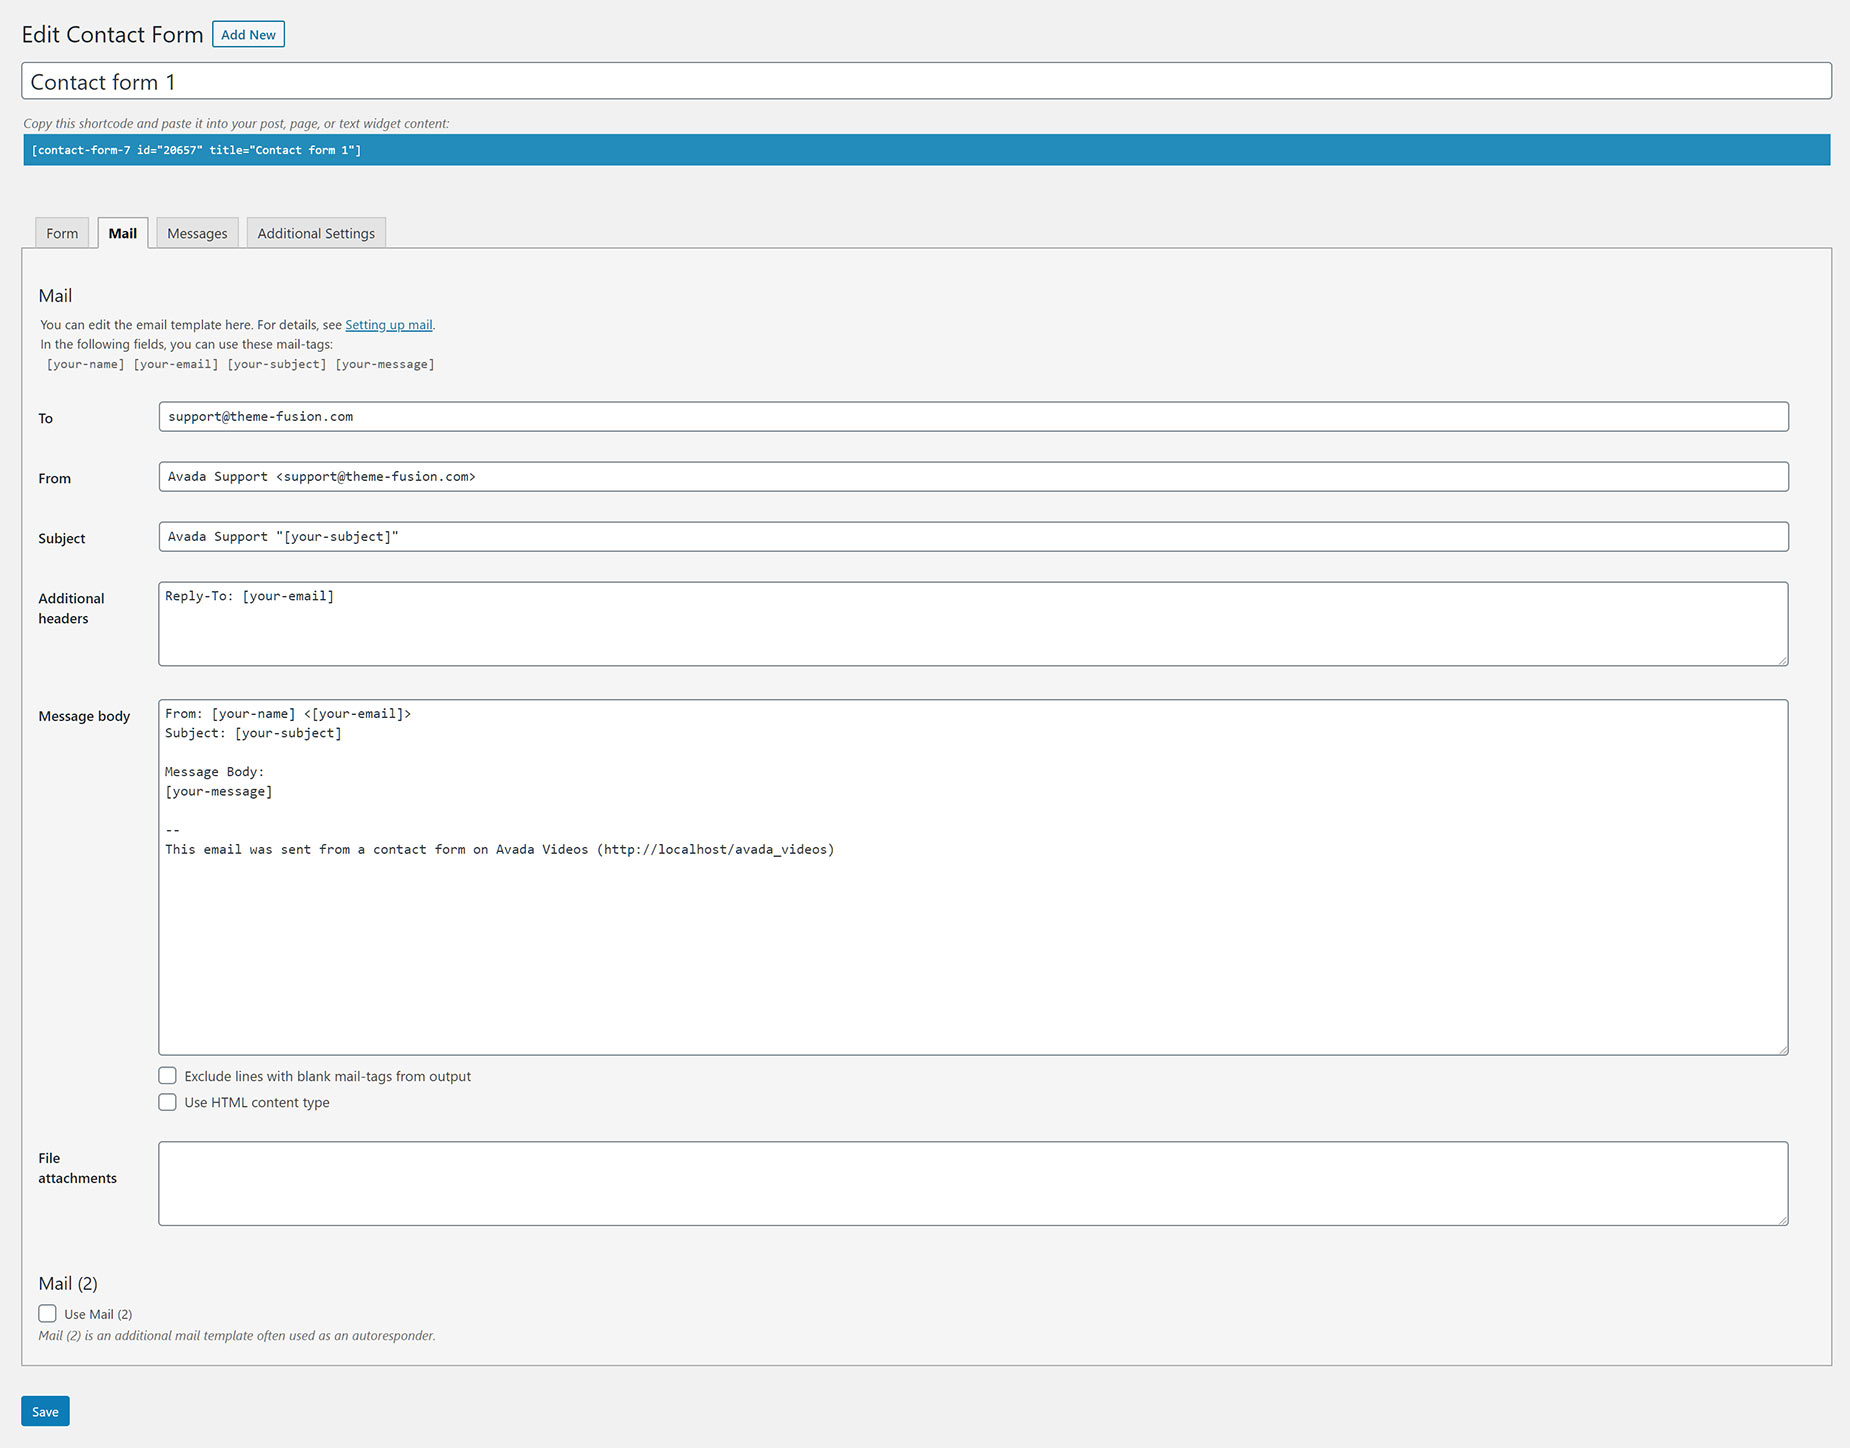
Once you have completed your form fields, you can configure the form as a whole in the Mail tab. this tab configures where the form is sent, and the content the mail will have. You can also use mail tags in this template to customize how the mail appears.
The ‘To’ email address can be any email address, but the ‘From’ email address should be one on the same domain as the form. In the Message Body, you can edit the template, and add any of the [your-name] [your-email] [your-subject] [your-message] mail tags to control the content.
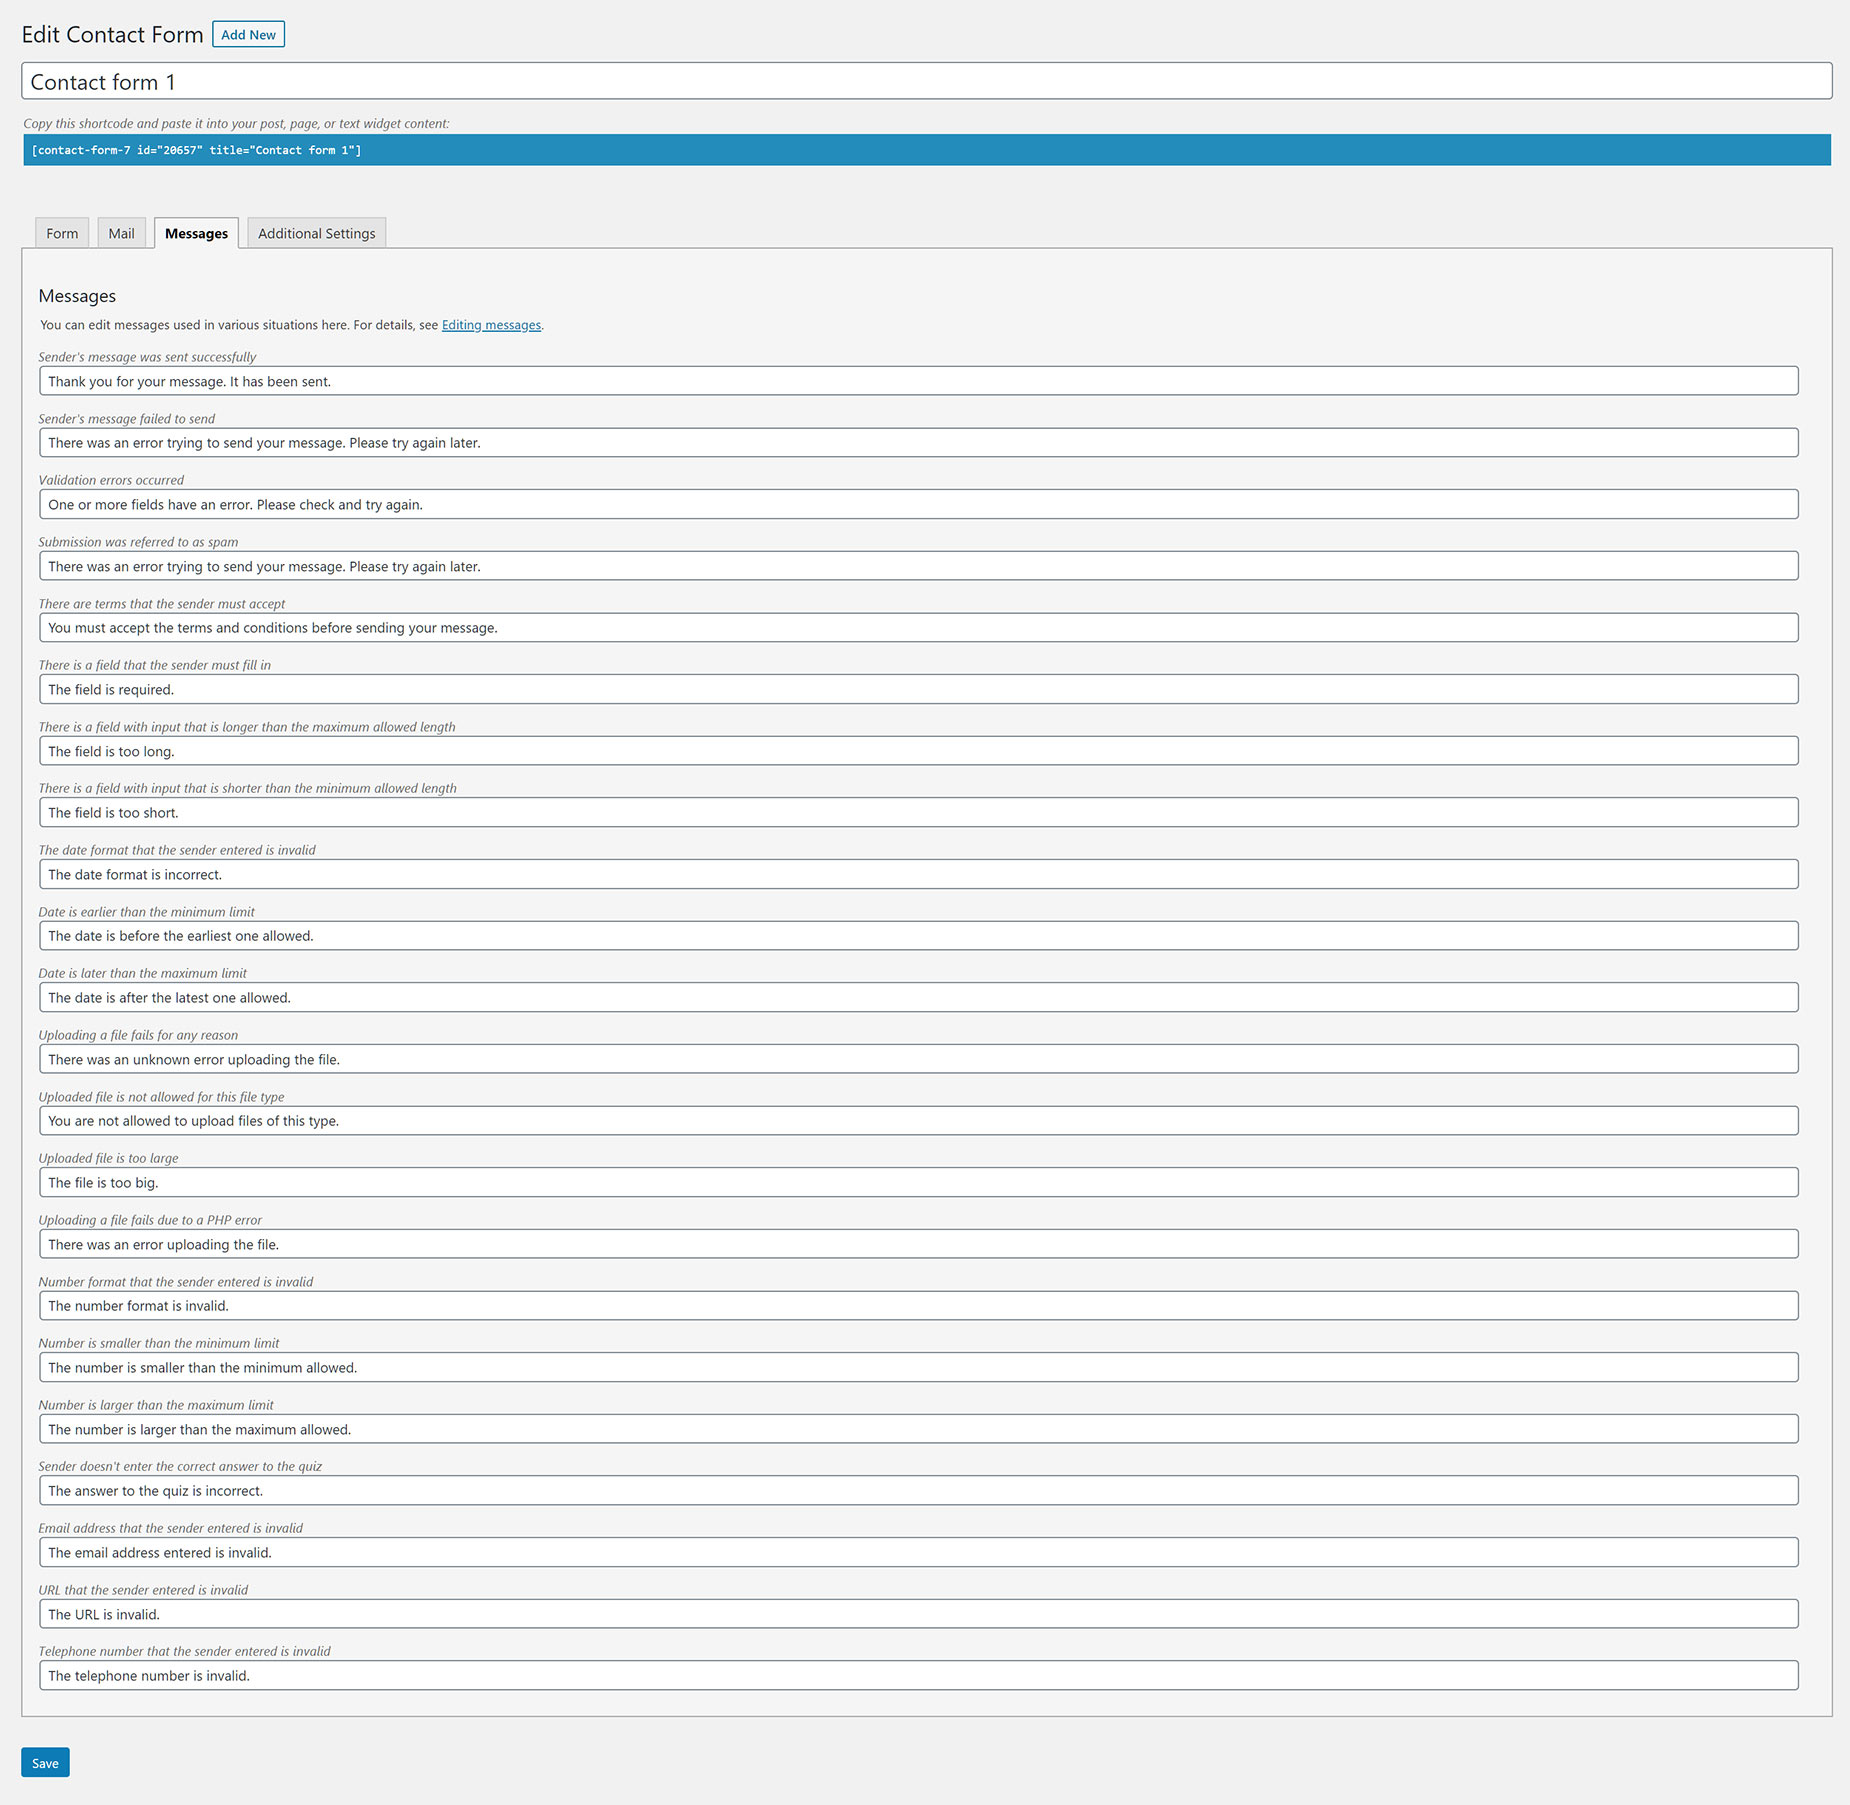
Messages
The Messages Tab is where you configure the various messages the form can give off in certain situations. There are default values in all of them, but you can, of course, customize these to whatever you like.
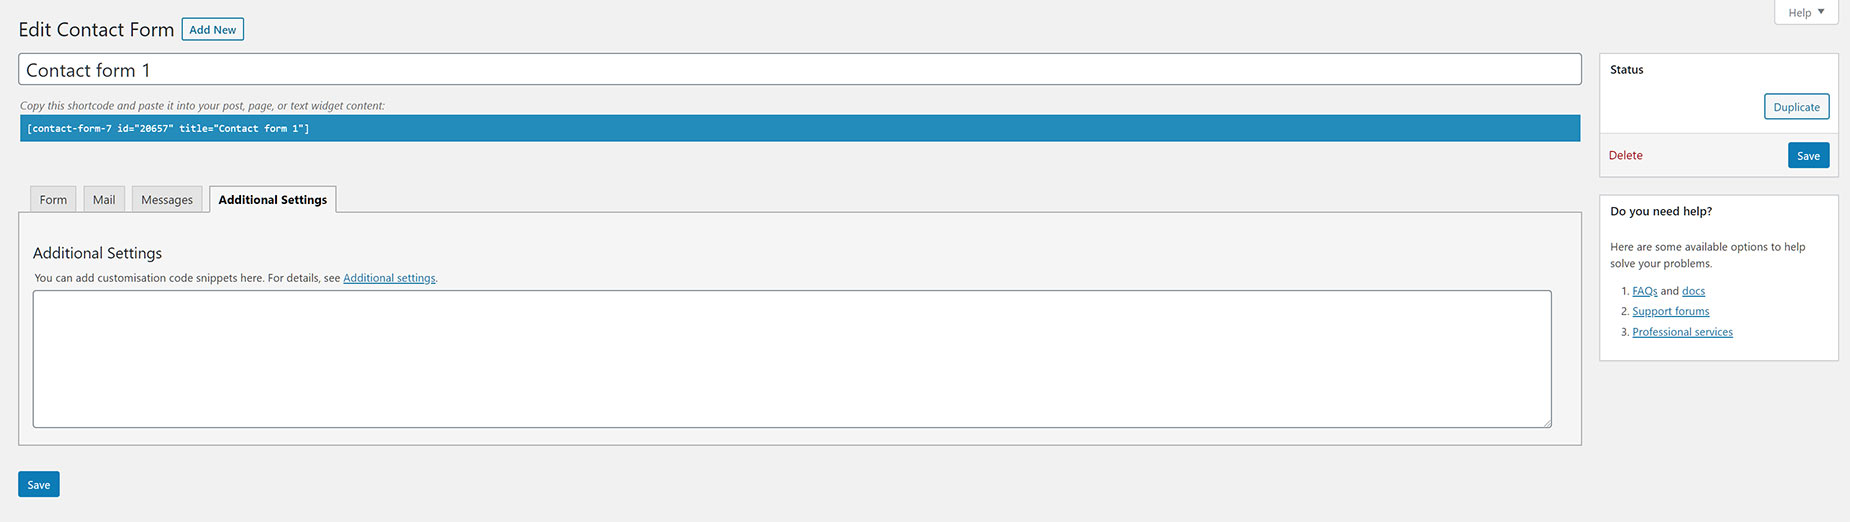
Additional Settings
There is a final tab called Additional Settings, where you can add customization code snippets. This is for advanced users, and is not at all required for the forms to work. Follow the Additional Settings link on the tab for more information.
Adding The Form To A Page
At the top of every form, above the tabs, is the specific contact form shortcode. This is the way to add your form into your content. Just use a Code Block or Text Block Element, and paste the shortcode in, or you can use the Contact Form 7 Element.
Conclusion
Contact Form 7 is a popular form plugins for WordPress, and works well with Avada. To style it however, as this is a third party plugin, will require the use of custom CSS. For much more flexibility and integration with Avada Builder, we advise using Avada Forms. See The Avada Form Builder documentation for more information on our integrated form solution.


