One of the strengths of HubSpot is that is is a great tracking tool for your communication with leads and clients, even directly from your website. When using the HubSpot plugin in Avada, you can create and add HubSpot forms into your website to gather leads and communicate with your clients. These forms then connect directly with your HubSpot account. Let’s see how this is done.
Create Your Form
Once you have installed the HubSpot plugin and connected your account (see Setting Up Hubspot in Avada for more info on those steps), you are ready to create your first form. Let’s walk through it.
Step 1 – You start the process by going to Hubspot > Forms, from the WordPress dashboard.
Step 2 – At the top right, click the Create Form button.
Step 3 – This takes you into a form wizard. You can create regular or pop up forms, and there are a number of templates you can take advantage of to get started, or you can start from scratch.
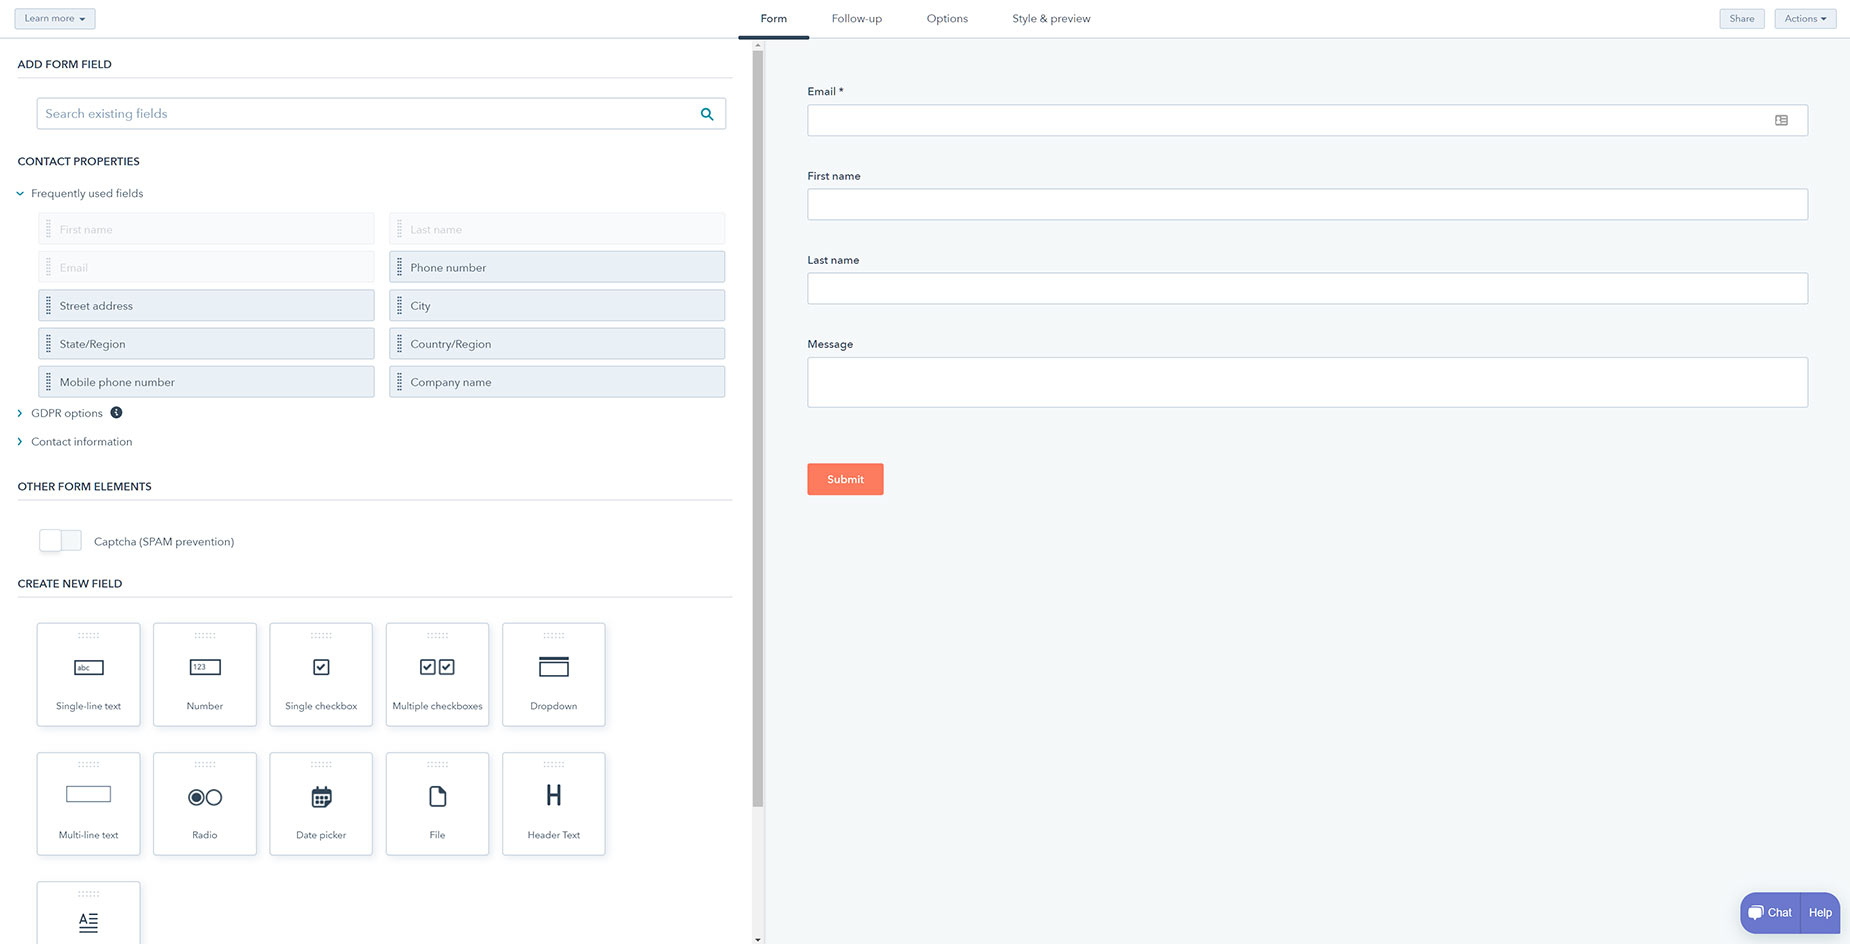
Step 4 – Once you’ve chosen your starting template, this leads you into the Form Editor, where you can make any number of changes to your form.
Customising The Form and Its Options
Step 5 – Once you have configured the fields in the form, you can move on to the other tabs along the top of the form editor. Here you can set up a follow up mail, set various options relating to what happens when the form is submitted, and language options, and then the Style & Preview tab, where you can adjust styling options and preview the final form. With the free version of HubSpot, there is a logo at the bottom of the form, which can only be removed on premium plans.
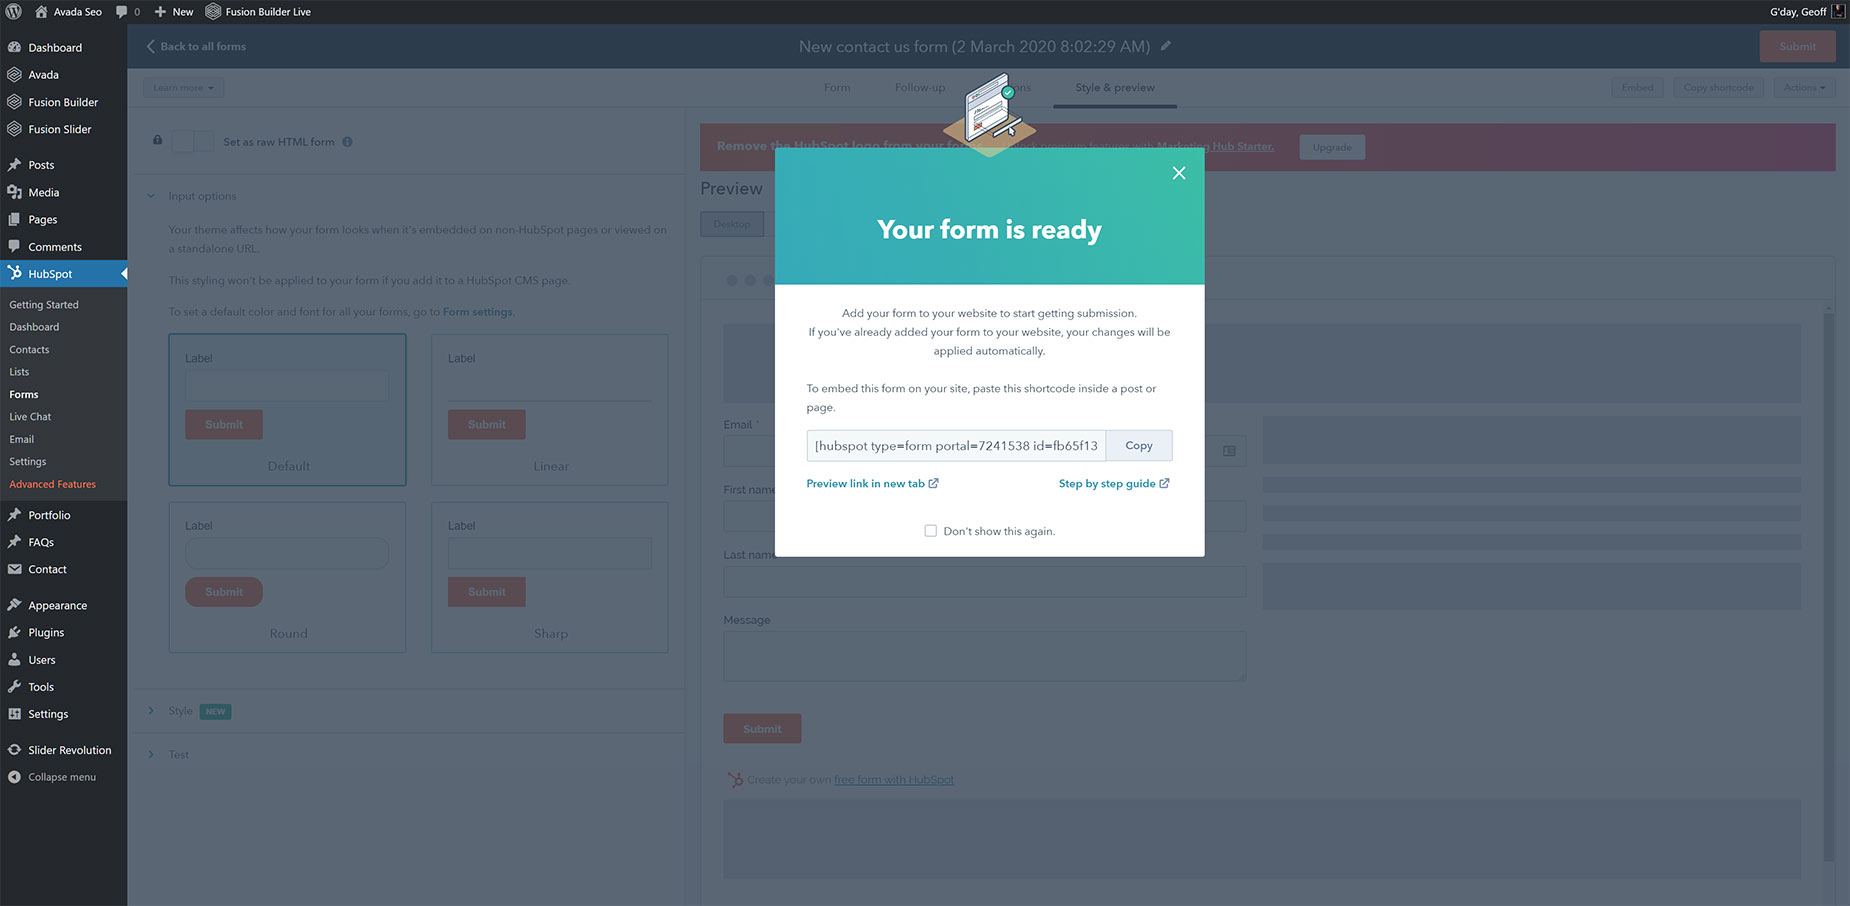
Step 6 – Once you are happy with your form, click Publish at the top right of the page. You will get a popup with a link to the form on HubSpot, and an embed code that will allow you to place the form easily on your Avada website. Let’s look at how this works.
Insert Form
Step 7 – On your Avada website, it’s simply a matter of creating the page you want to add the form to and in the column you have chosen, add the Code Block Element, and paste the embed code into the element. Here it is in a one half column, added into the SEO demo.
Non HubSpot Forms
It’s also possible to connect non-HubSpot forms with your HubSpot account. With the HubSpot tracking code installed on your site, submissions to non-HubSpot forms will be collected in HubSpot.
In order for form submissions to be collected in HubSpot, your form must:
be wrapped in HTML < form > tags.
not be in an < iframe >.
have an email input field.
To enable or disable the collection of information from non-HubSpot forms on your pages:
In your HubSpot account, click the settings icon settings in the main navigation bar.
In the left sidebar menu, navigate to Marketing > Forms.
Click the Non-HubSpot Forms tab.
Click to toggle the Collect data from website forms switch on/off to enable/disable non-HubSpot forms.
You can also convert your non HubSpot forms to HubSpot ones, and much more. For more details on this, please see the HubSpot Knowledgebase.