How To Adjust WooCommerce Product Image Size Settings
Last Update: February 19, 2026
WooCommerce includes settings to change the size of product images for Catalog images and Single Product images. There are specific Avada settings that work in conjunction with the WooCommerce image sizes. When configuring these image size settings, it’s important to consider the Avada Global Options settings as well.
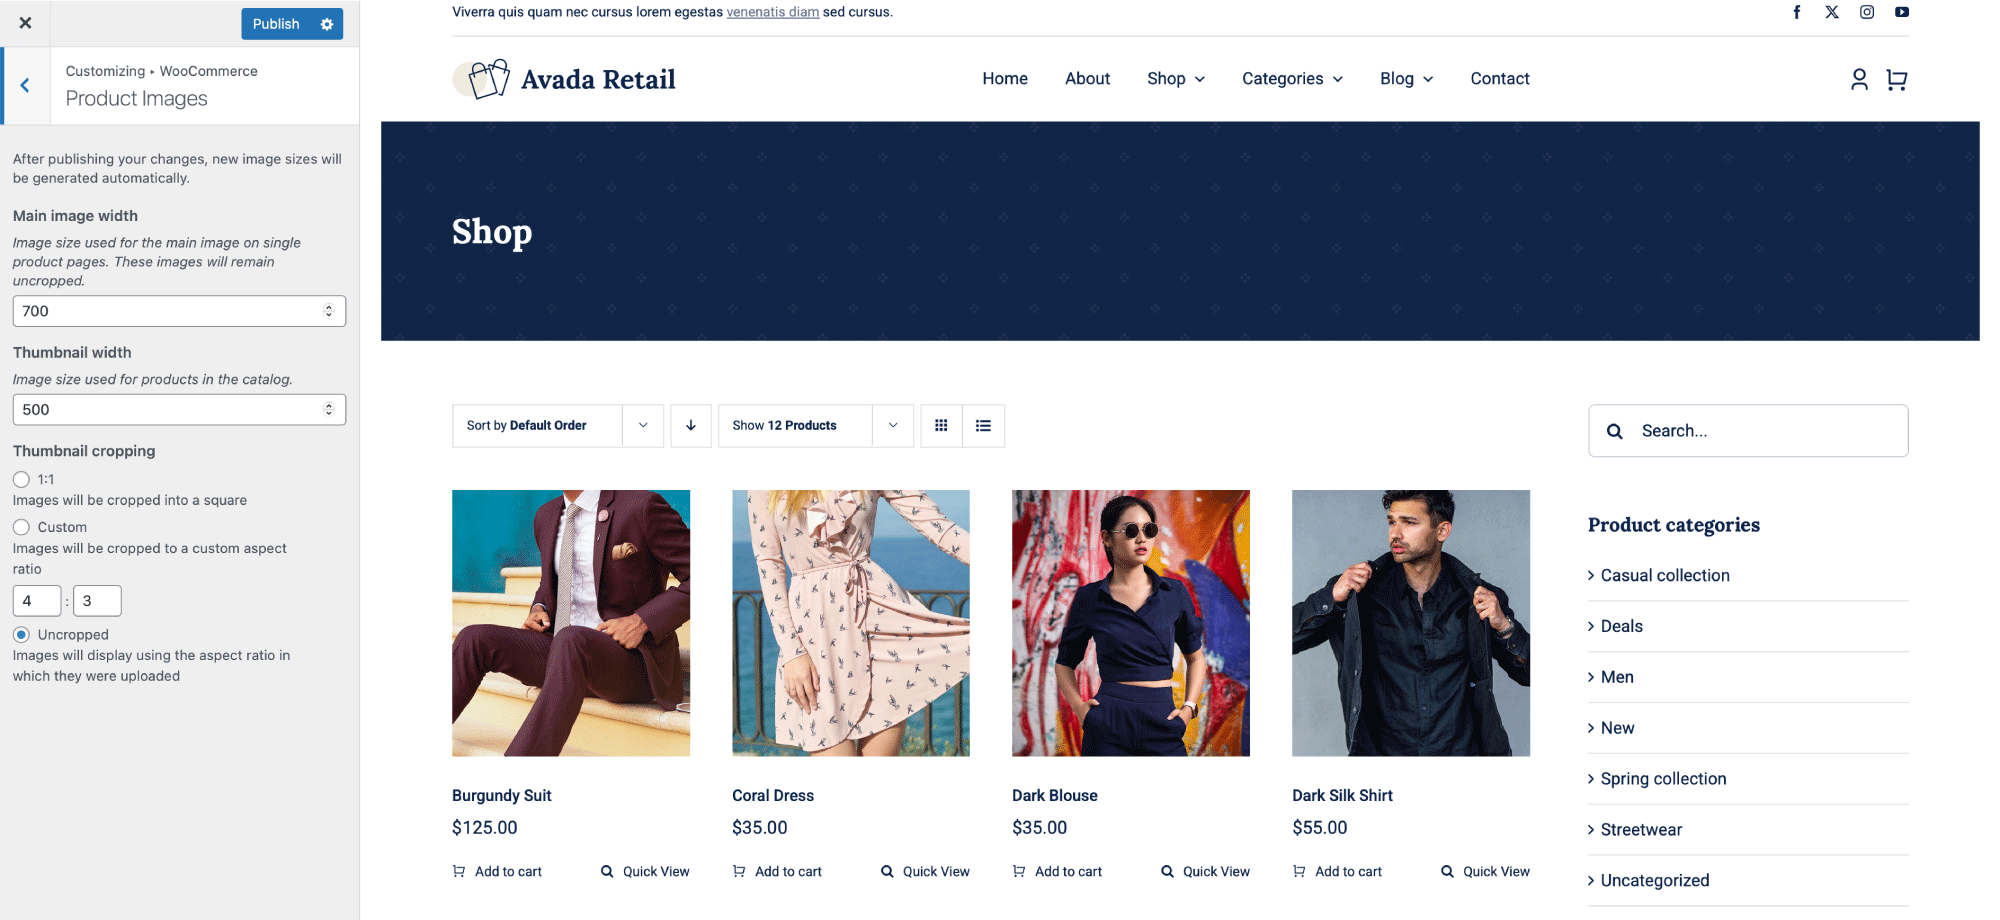
When setting up a shop, be sure to consider both WooCommerce’s image size settings and the actual size of your images. In summary, your images should be at least as large as your WooCommerce image size settings.
After changing the Woo product image sizes, you’ll need to regenerate your thumbnails for the changes to apply to previously uploaded images on your site. We recommend using the Regenerate Thumbnails plugin to regenerate the image sizes. Please see the steps below for details on changing WooCommerce image sizes.
Regenerating The Thumbnails
When you change the WooCommerce product image sizes in WordPress, those new dimensions only apply to images uploaded from that point forward. Any product images uploaded before the change will continue to use the old cropped versions, which can lead to inconsistent sizing, blurry thumbnails, or layout issues on your shop and product pages.
Regenerating thumbnails solves this by recreating all existing image sizes based on your updated settings. This process traverses your media library and generates new versions of each image based on the current WooCommerce and theme image dimensions. Once complete, your shop grids, product galleries, and thumbnails will display correctly in the new sizes, ensuring a consistent, professional appearance across your online store.


