Avada Builder Plugin
Last Update: October 30, 2025
The Avada Builder plugin, and one of the two required plugins with Avada, is our very own stand-alone page builder plugin, packed with innovative features and options. With Avada 6.0 and above, Avada Builder now comes in two interfaces in the one plugin, the traditional back-end wireframe editor, and the front-end Avada Live.
As is the case with all plugins, you will have to install and activate it first in order to use it. To learn how, please continue reading below.
How to Install And Activate The Avada Builder Plugin
Once finished, you can now use the Avada Builder throughout your site, on any post types you enable in the Avada Builder Options.
Updating Avada Builder with Earlier Versions of Avada
Updating to Avada 5.0+
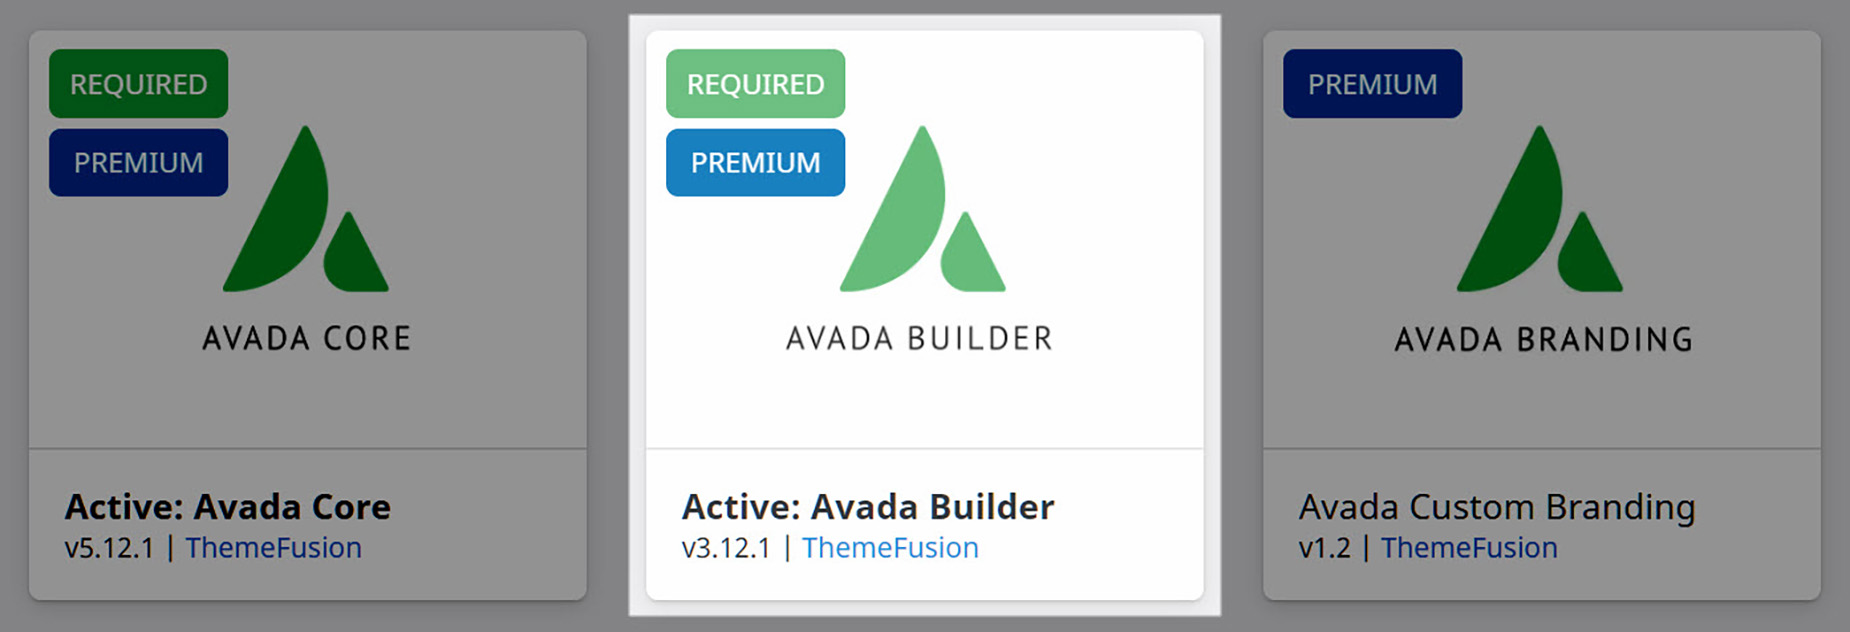
In the Avada > Plugins / Add-ons section you will see Avada’s two required plugins, the Avada Core and the Avada Builder plugin. The ‘Install’ button for the Avada Builder plugin is disabled to ensure that the Avada Core plugin is updated first. Doing it in this order is very important and will prevent fatal errors on your site. If you accidentally installed the Avada Builder plugin before updating Avada Core, please see our ‘Troubleshooting’ section below.
New Avada 5.0+ Install
In the Avada > Plugins section you will see Avada’s two required plugins, the Avada Core and the Avada Builder plugin. The installation and activation order of the the Avada Core and Avada Builder plugin does not matter, provided it’s a fresh install and you’re not updating from a later version. Make sure both are active for Avada to work correctly.
Troubleshooting
If you have updated to Avada 5.0+ and somehow managed to install and activate the Avada Builder plugin before updating the Avada Core plugin, you may experience fatal errors on your site. To learn how to remove these errors and to update correctly, please continue reading below.
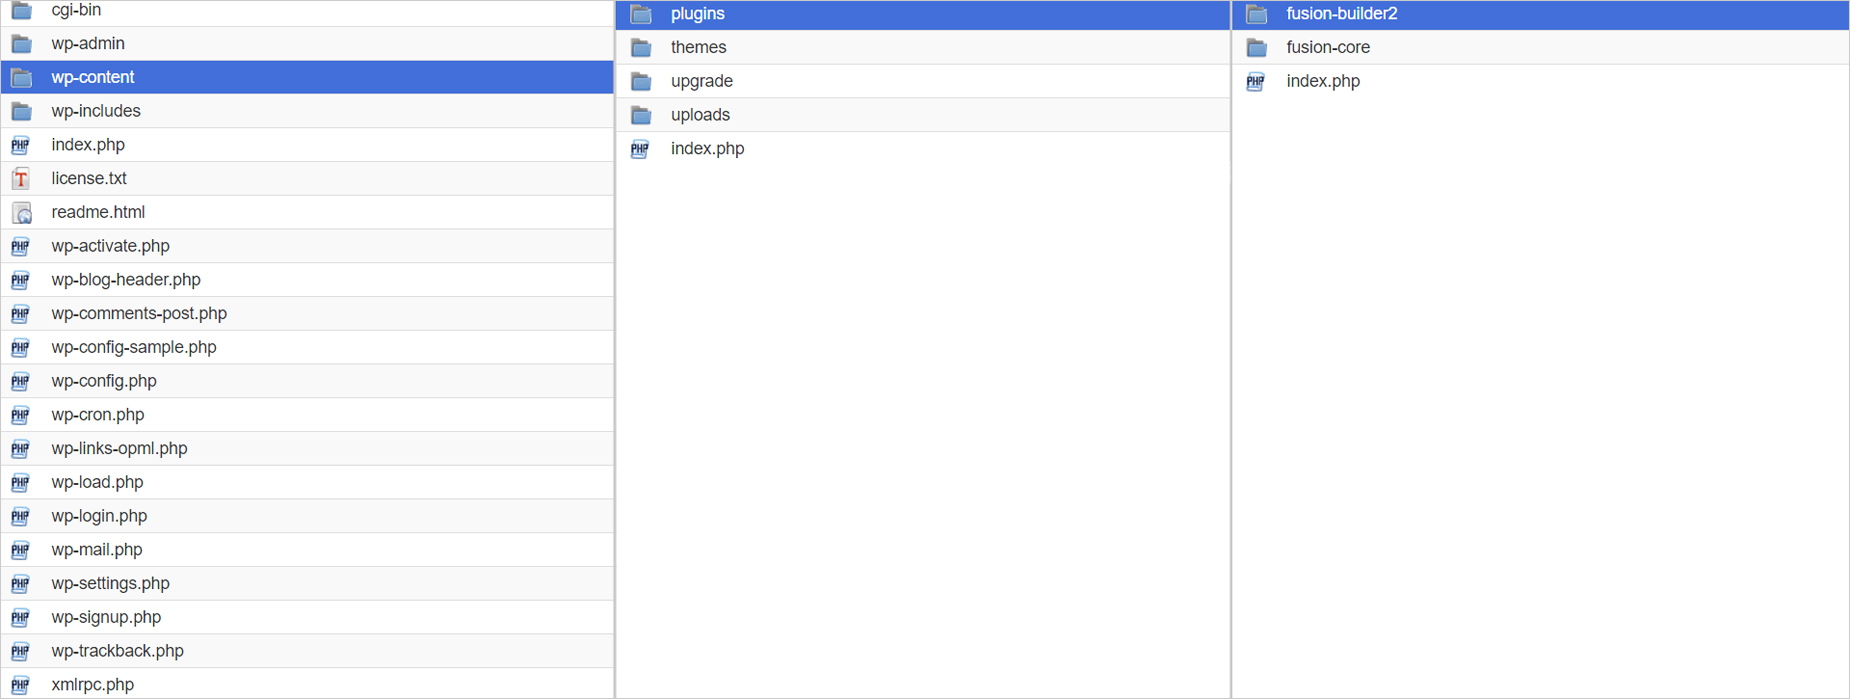
Step 1 – Log into your server using FTP and navigate to your WordPress installation’s wp-content/plugins folder.
Step 2 – Locate the Builder plugin folder named fusion-builder and temporarily rename it to something else. For example, fusion-builder-dis.
Step 3 – After that is done, log into the WP Dashboard of your site and navigate to the Avada > Plugins tab. Locate the Avada Core plugin and update accordingly.
Step 4 – Once more using FTP, navigate to the wp-content > plugins folder and rename the Avada Builder plugin folder back to it’s original name, fusion-builder.
Step 5 – Lastly, log into your site’s WP Dashboard and navigate to the Avada > Plugins tab. You will see the Avada Builder plugin is automatically enabled.