How To Use PWA (Progressive Web Apps) With Avada
Last Update: November 3, 2025
The Progressive Web App (PWA) is one of the performance based features provides caching strategies to the Avada experience, and also allows your users to install your website as an app, for deeper user engagement. Read on to find out more about how to implement and use this exciting new tool.
Installing and Enabling Progressive Web App
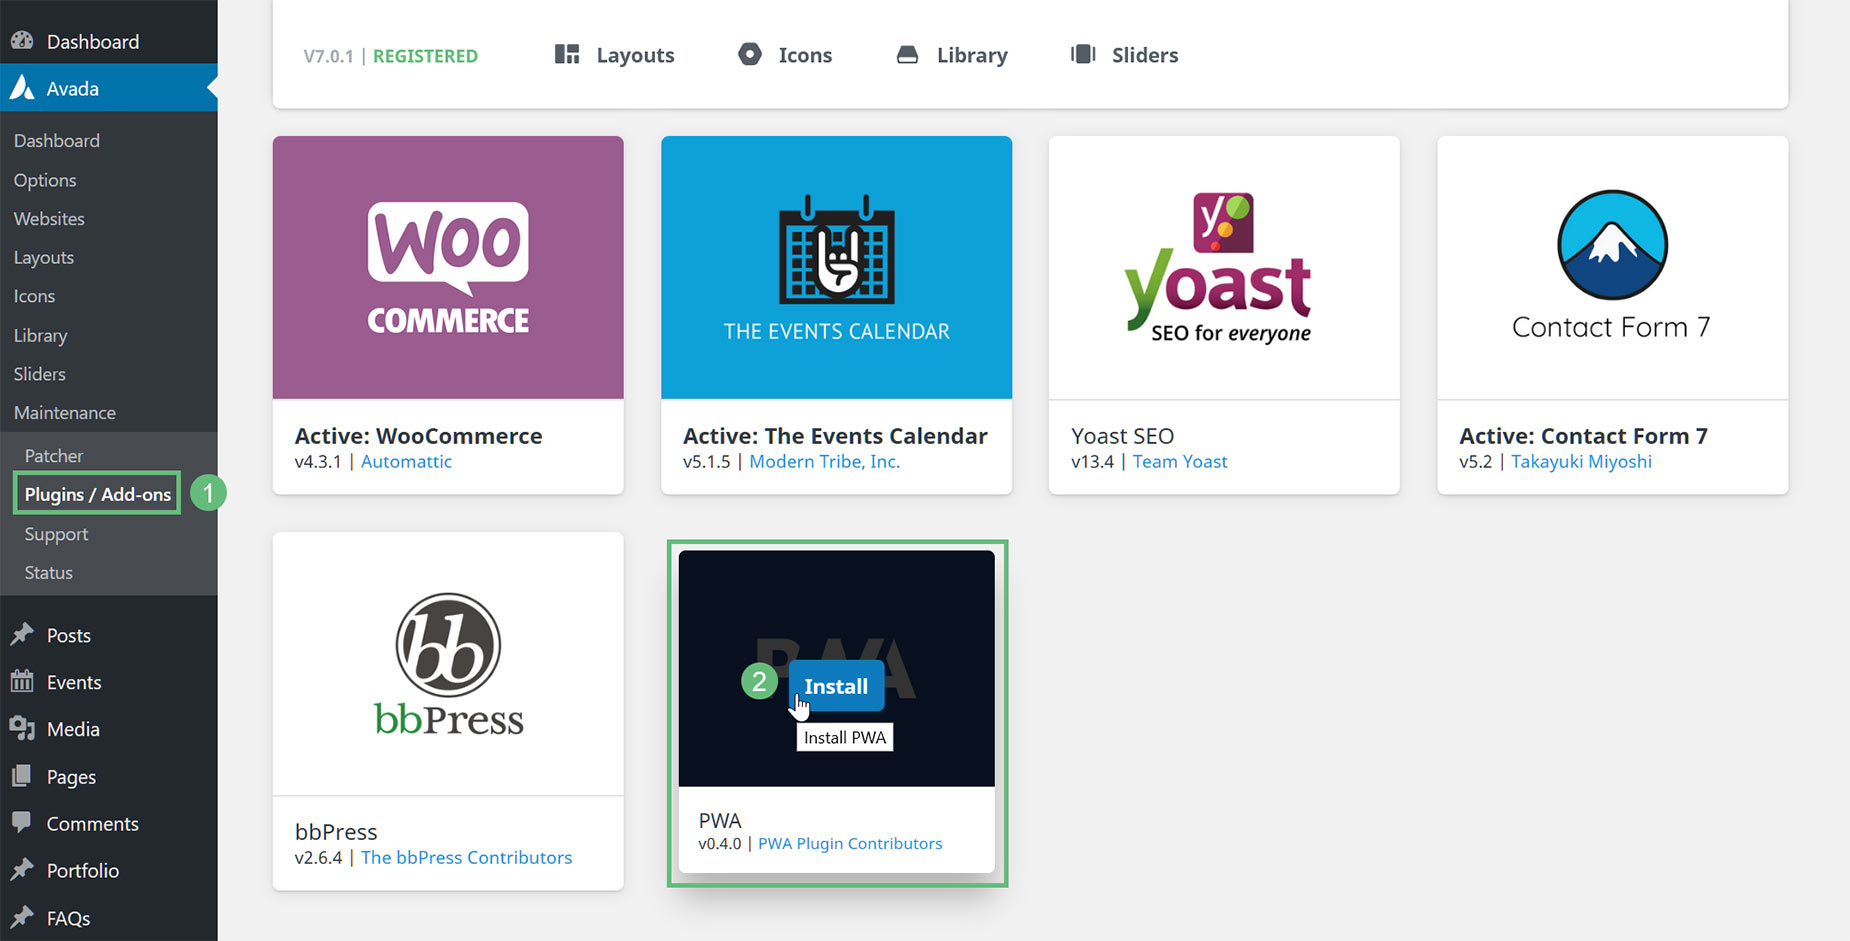
To enable the Progressive Web App, you first have to install the PWA plugin. To do this, head to Avada > Plugins / Add-ons, and install and activate the PWA plugin. This is a one click process.
Once the plugin has been installed and activated, you can enable PWA and set your options. To do this, head over to Avada > Options > Performance > Progressive Web App. At the bottom you will see the Progressive Web App section, and the Enable Progressive Web App option is the first one. By default, this option is turned off. Select On, and save your theme options to enable the Progressive Web App.
Caching Options
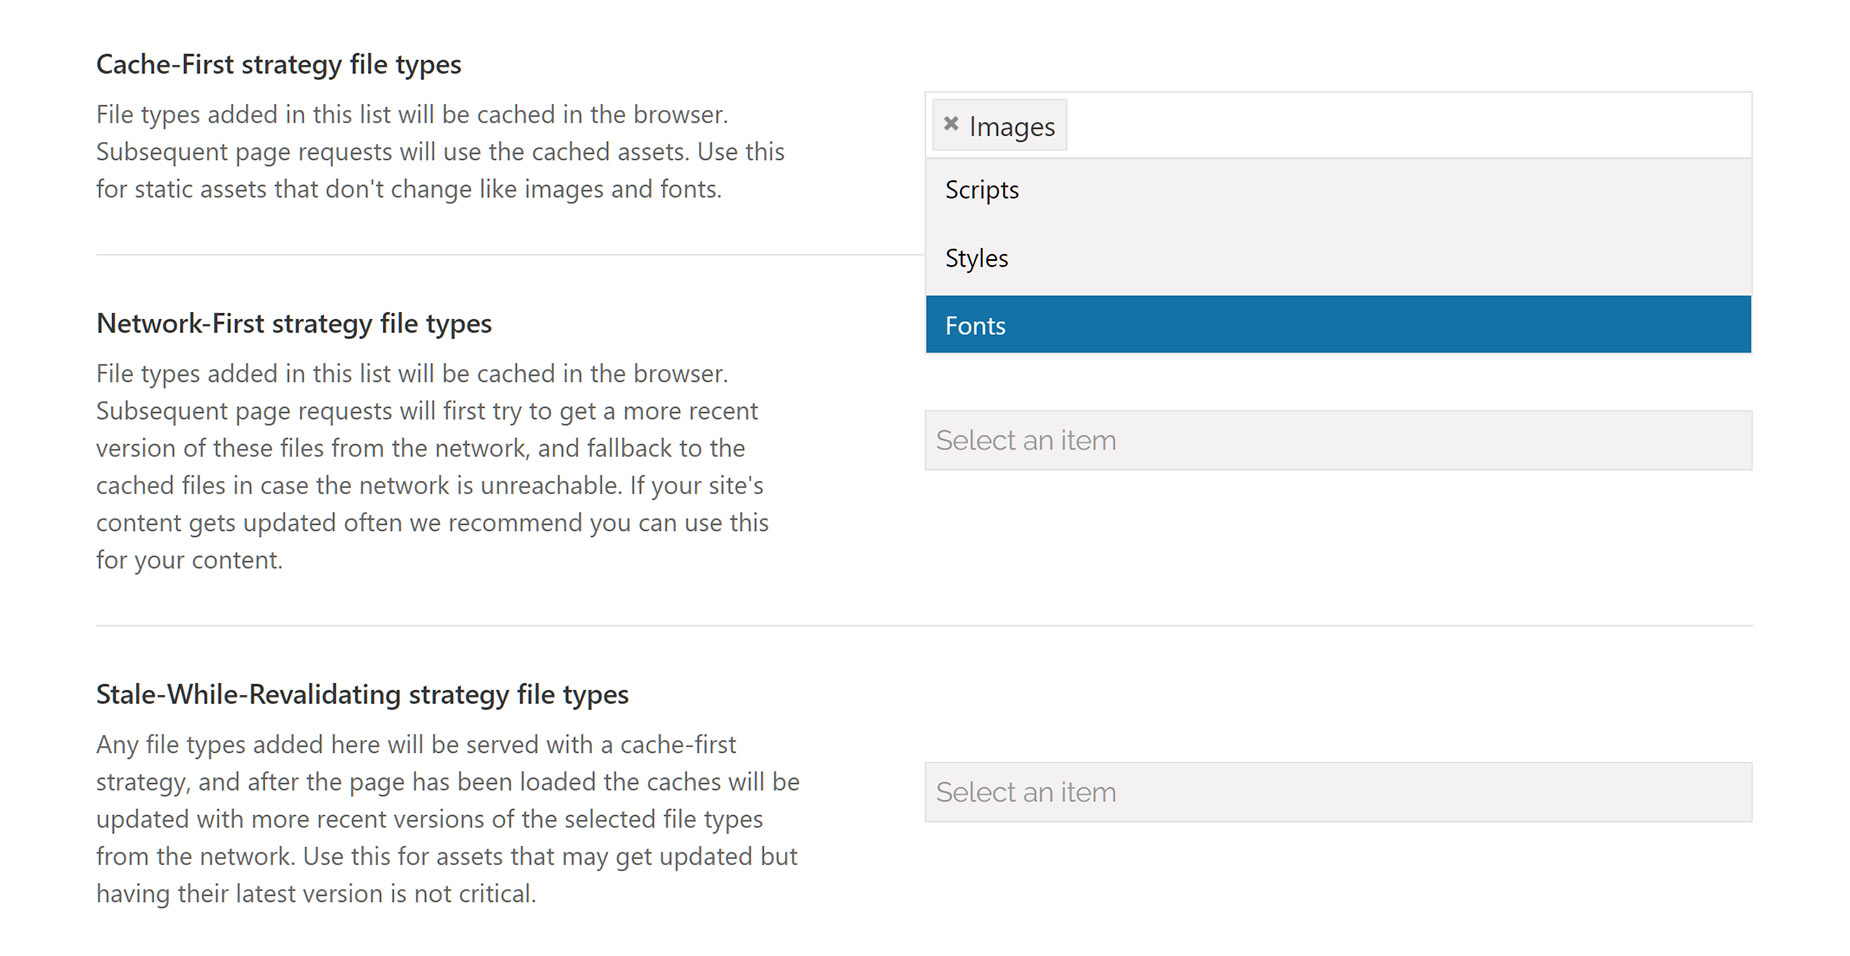
Once you have installed and enabled the Progressive Web App, you can choose your preferred caching strategy for each of the file types – Images, Scripts, Styles & Fonts. For specific details of each strategy, please see this Google Document, but basically, the strategies can be summarized like this:
App Options
With PWA, it’s also possible for the user to add your website as an app. It must be noted, that this is a developing technology, and the implementation for this feature is different across platforms and browsers. With Android and Chrome, for example, the user will get a prompt to install the site as an app, but on iOS, the feature only works on Safari, and there is no prompt. Users have to choose the Share option and select ‘Add to Home Screen’.
The last three options allow you to choose a splash screen logo, select the App Display mode, and the App theme color. Again, implementation of these options are mixed. On iOS for example, fullscreen and minimal-ui won’t work (fullscreen will trigger stand alone, and minimal-ui will be just a shortcut to Safari), nor will the color options.
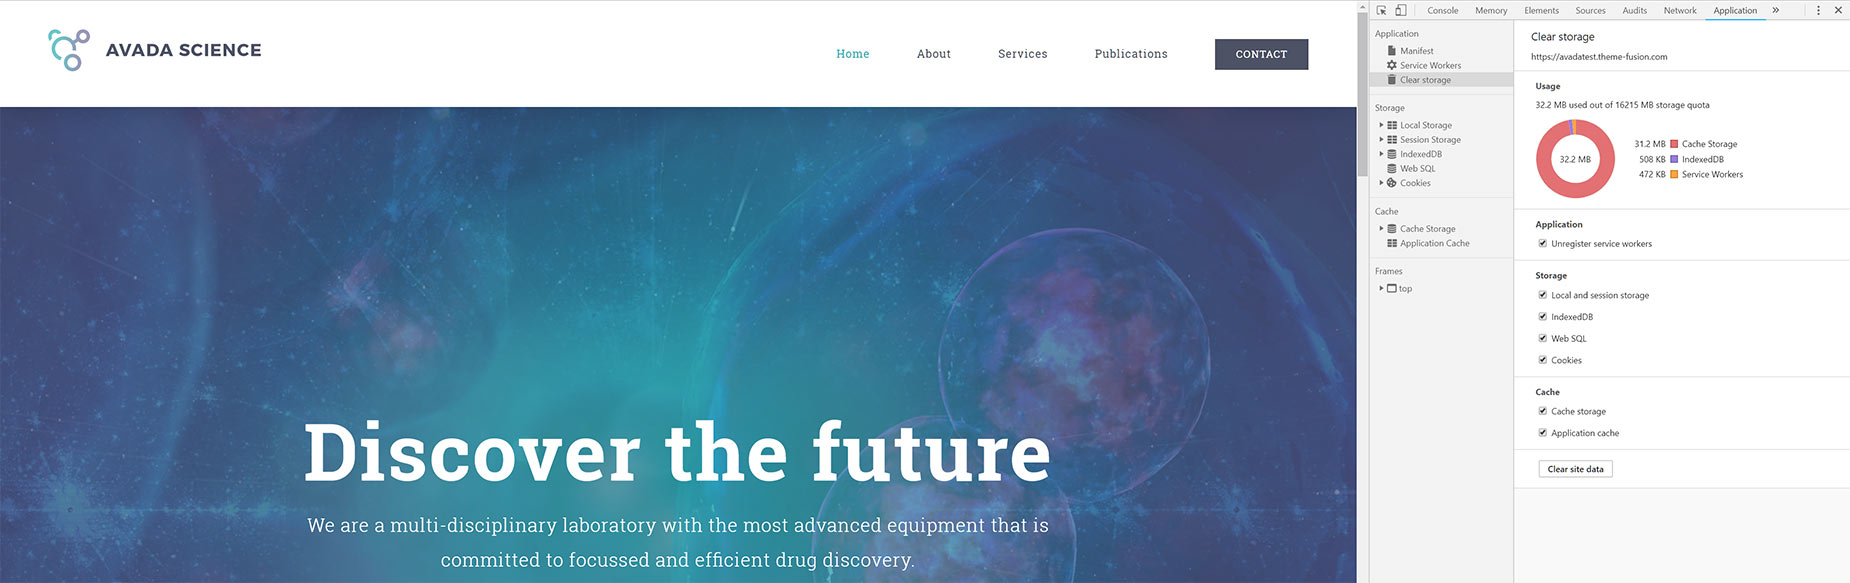
Clearing Persistent Cache
Service-worker caches are very persistent, so if you have the PWA plugin enabled, and you are debugging a website, you may want to reset caches from a separate tab in Chrome.
Filters
File: Avada/include/class-avada-pwa.php
Description: Used to add new filetypes or to edit existing filetypes that can be used in Avada's PWA
Default Value: Array of arrays with the parent level incides of images, fonts, scripts, styles, which hold the properties of these filetypes.Examples
Adding a new file-type
This will add the rules we want, and also make “PDF” available in the list of options we can choose from.


