Adobe Font (TypeKit) Integration With Avada
Last Update: November 30, 2025
Font choices just got even better with Avada with the integration of Adobe Fonts (formerly TypeKit).
So, not only can you use standard and system fonts, the full range of Google fonts, and upload your own custom fonts, you can now connect your Adobe Web Projects to Avada and display a selected range of Adobe fonts on your website. Let’s have a quick look at how this works.
Creating An Adobe Font Project
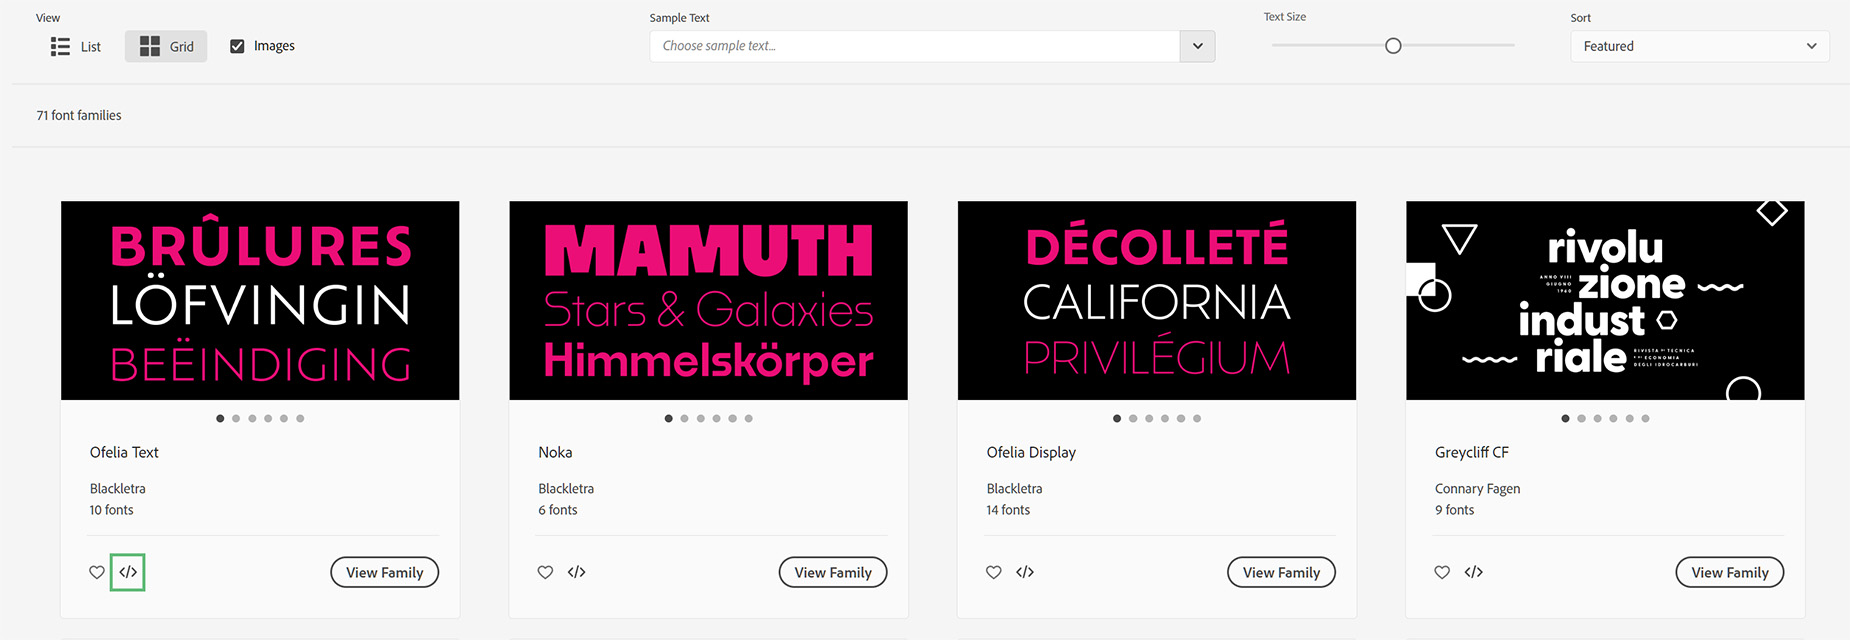
The first thing you need to do to use Adobe fonts on your website is to add some fonts to an Adobe Web Project at https://fonts.adobe.com/. You don’t need to be an Adobe subscriber to do this, but you do need to create a free account with them. Once you are signed in, simply browse, filter or search the vast range of Adobe Fonts, and add your individual chosen fonts to a Web Project. To do this, simply click on the </> symbol at the bottom of the font, as seen below.
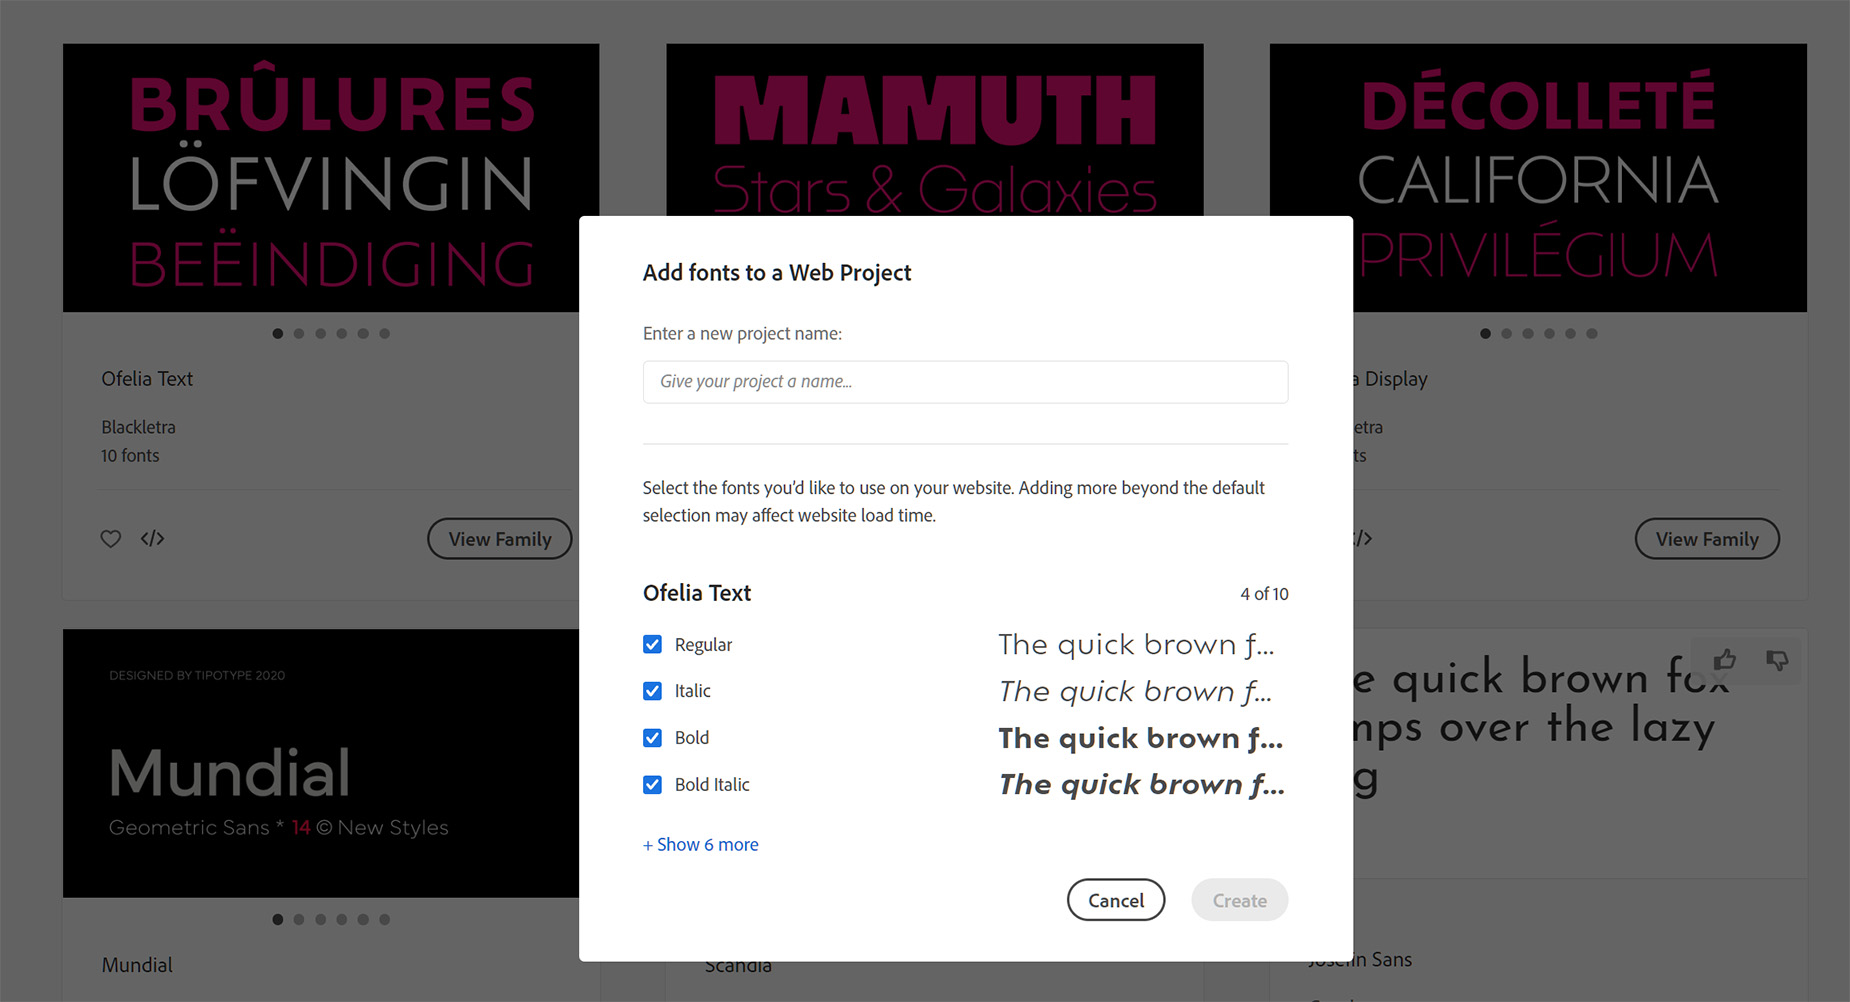
This prompts a dialog, where you can give your web project a name and decide what font variants you want included. You can add multiple fonts to a project.
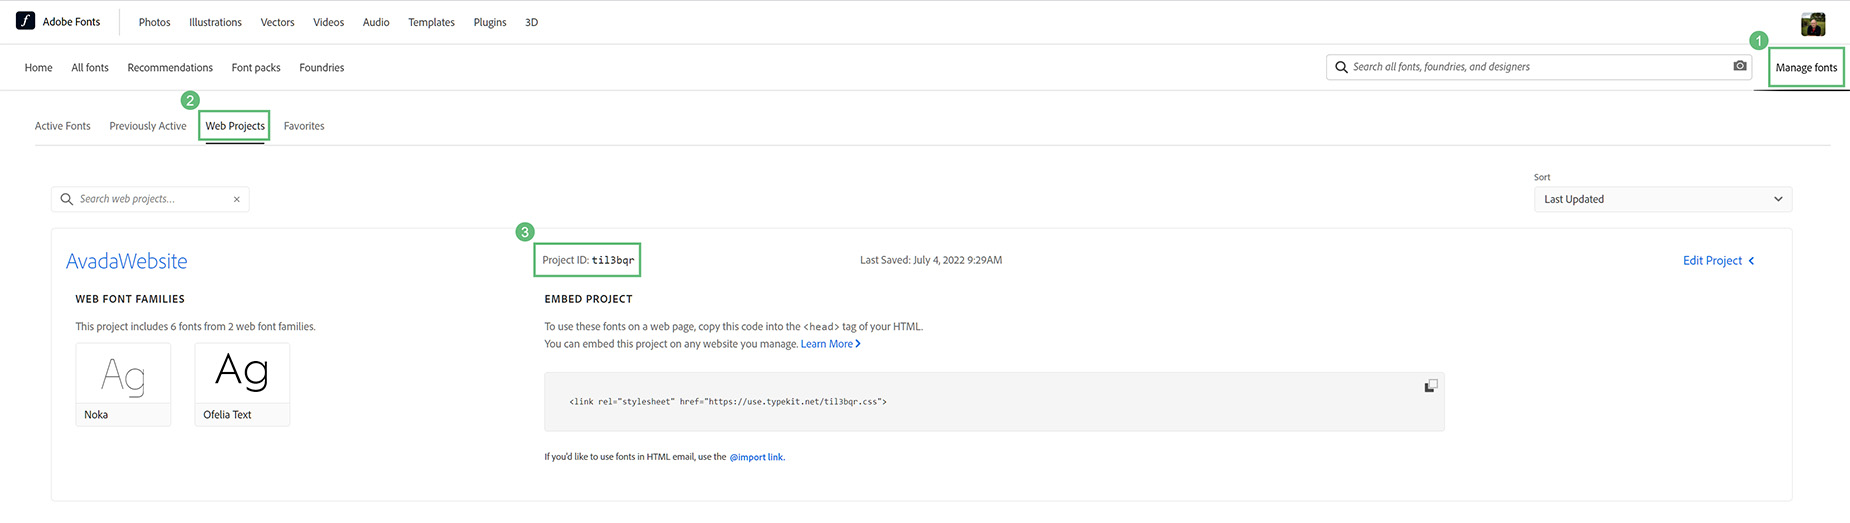
When you have completed adding fonts to your Website project, go to Manage Fonts, and the Web Projects tab, and here you see the Project ID. Copy this and head to the Global Options > Typography > Custom Fonts on your Avada website.
Connecting Your Adobe Font ID
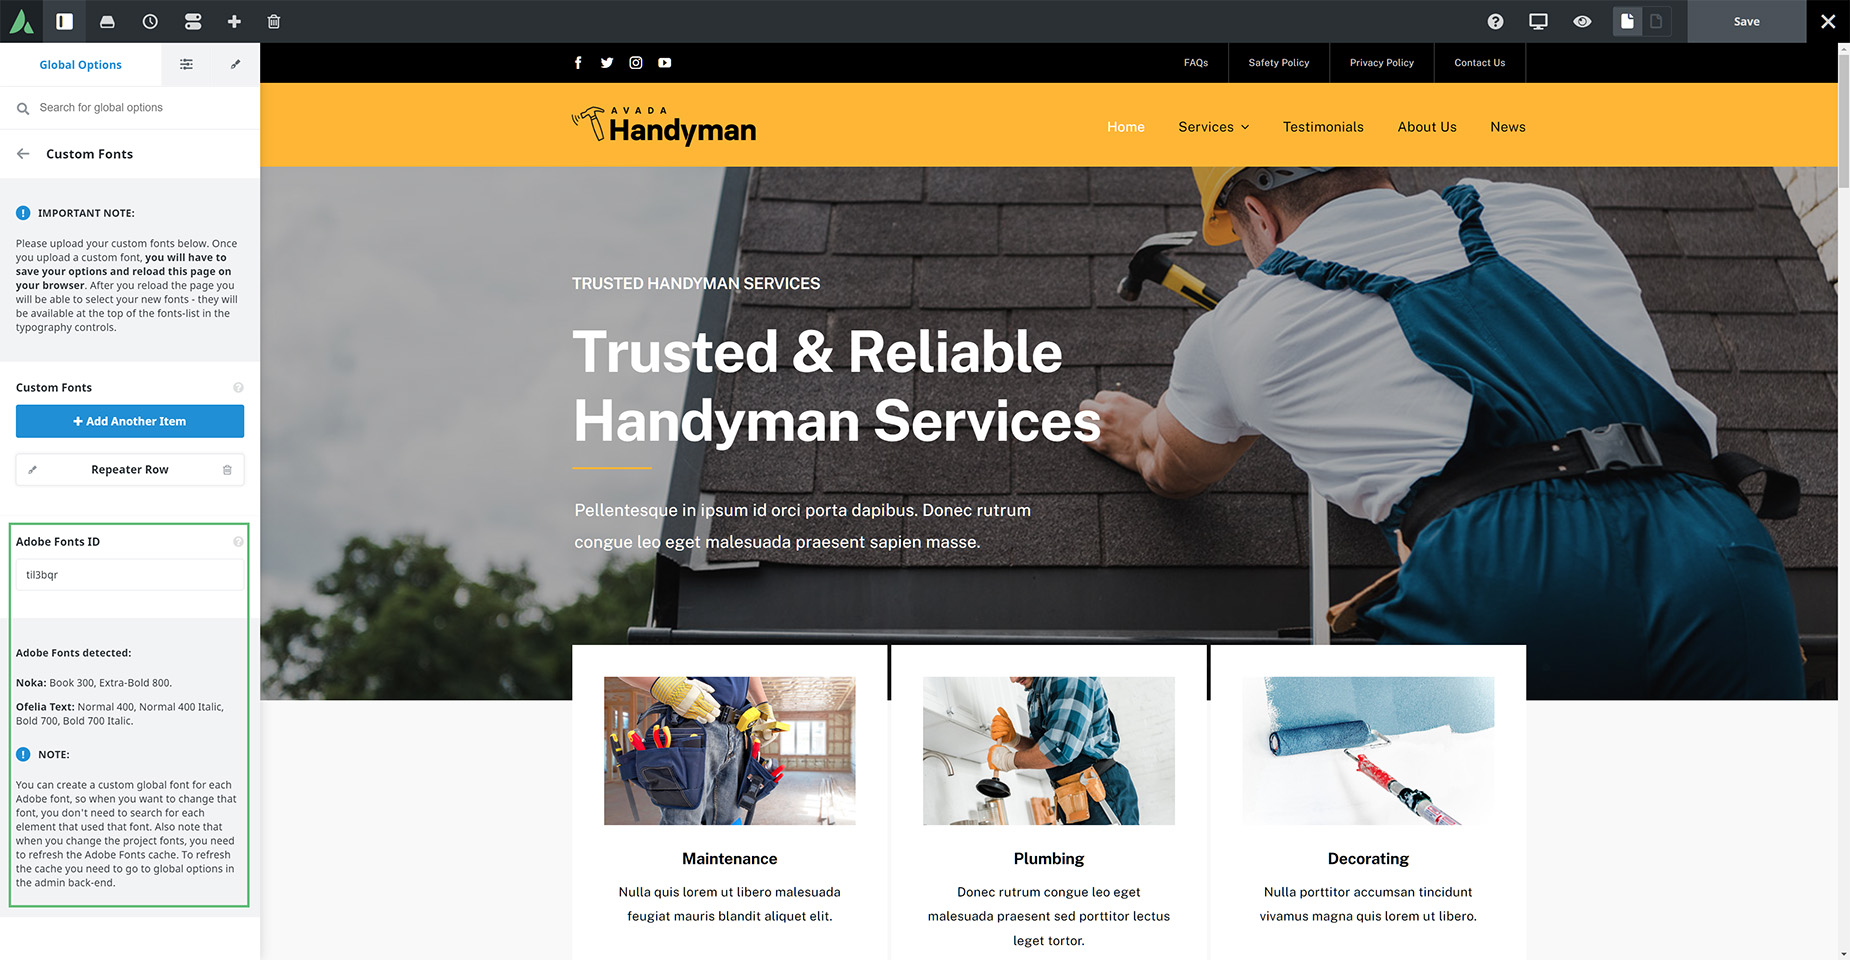
At the bottom of the Custom Font tab is an option to enter your Adobe Fonts ID. Simply enter your specific Web Project ID, and save your changes. Then just refresh your page, and the Adobe fonts will be listed. There is also a Refresh TypeKit Fonts Cache button, that you can use if you change the contents of your linked Web Project (only available in the back-end global options).
Using Your Adobe Fonts
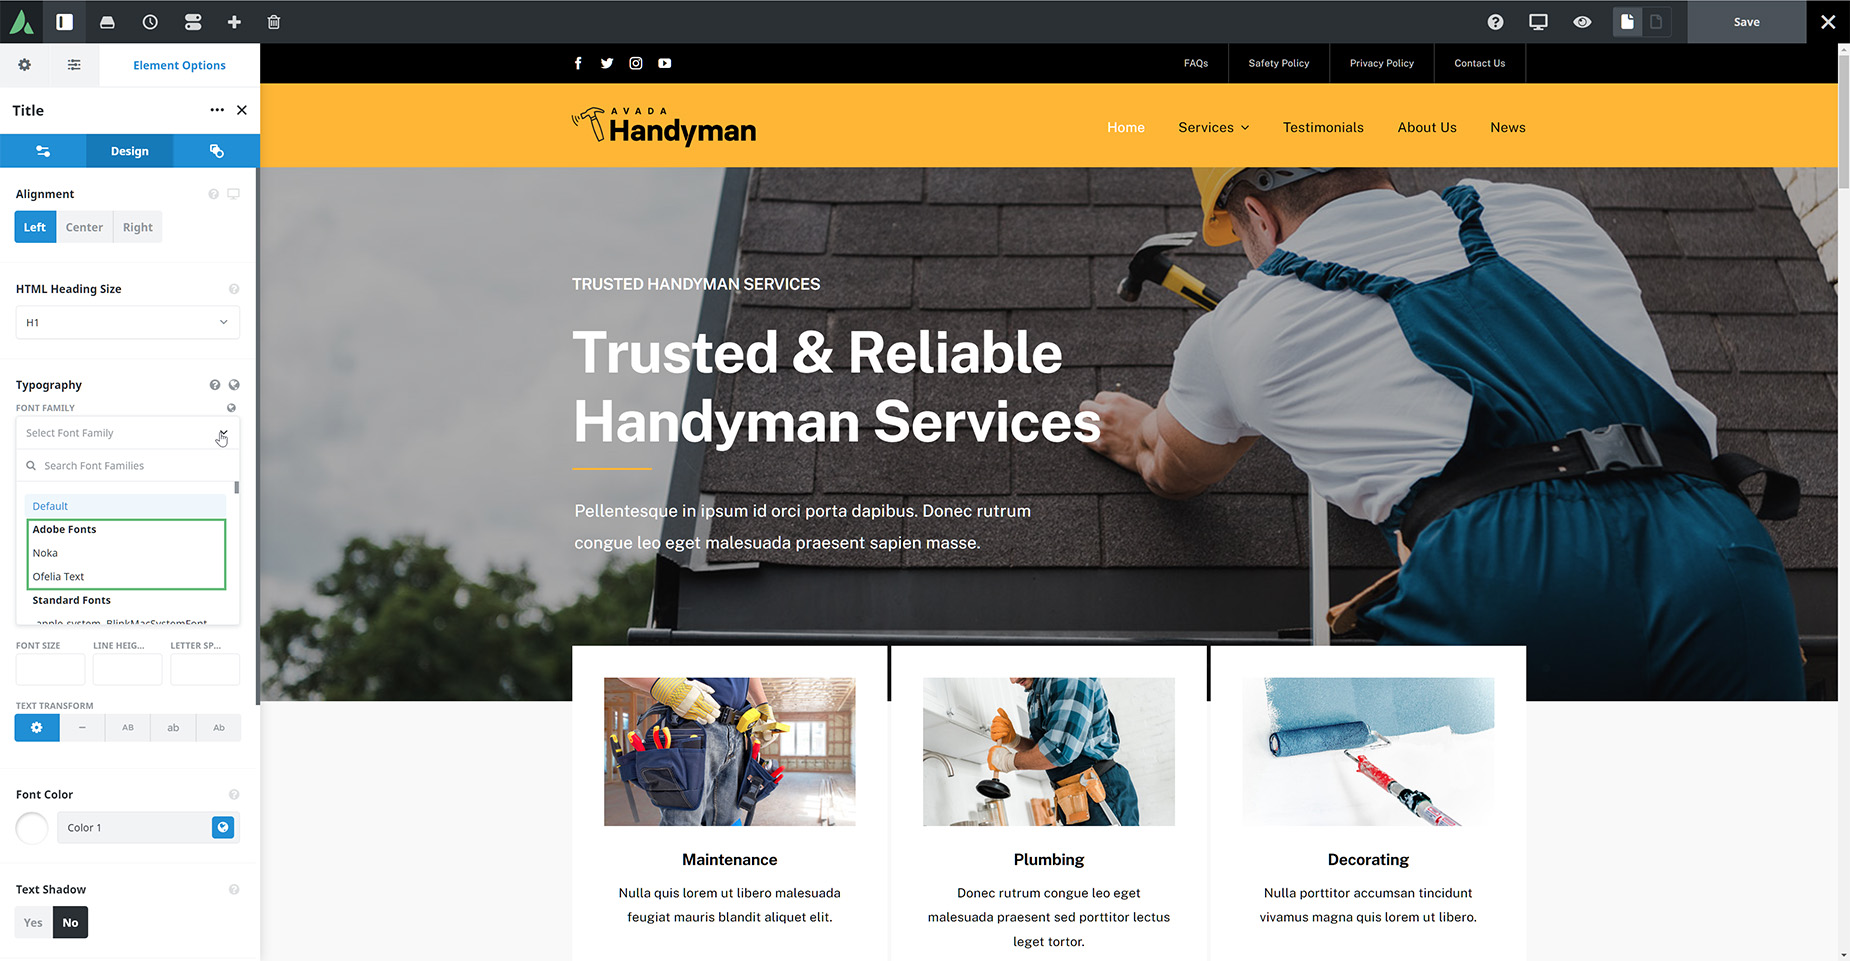
Once your Web project is connected, your added Adobe fonts are available to use anywhere you apply fonts. The Adobe fonts will be listed at the very top of the font selector, as seen below.
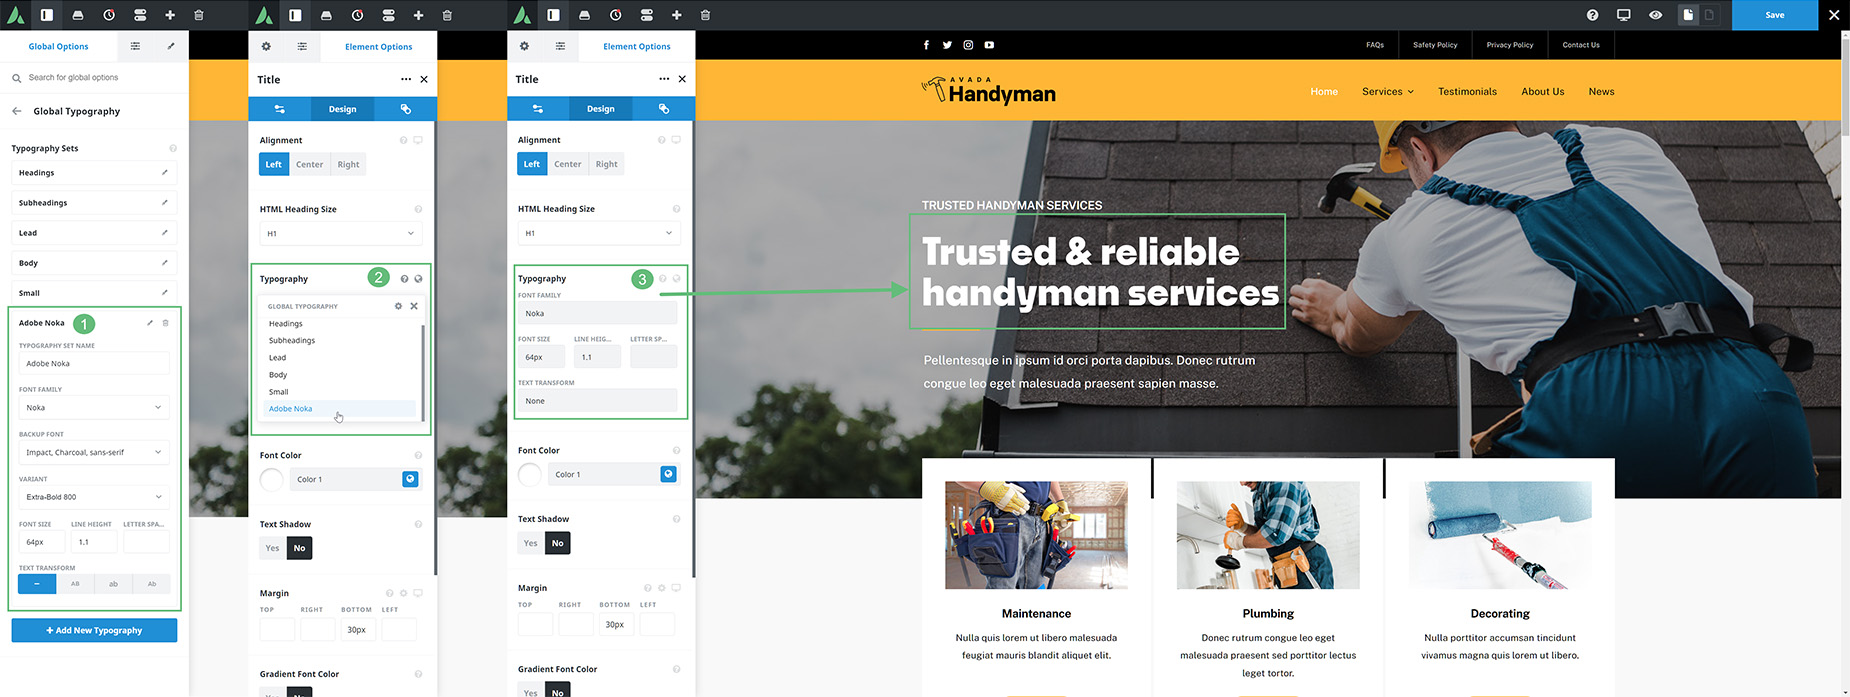
The best way, however, to apply your Adobe fonts is from a Global Typography set. As the great tip on the options notes: You can create a custom global font for each TypeKit font, so when you want to change that font, you don’t need to search for each element that has used the font.
Simply create a Global Typography set for each Adobe font added, and then you can apply them directly from the Global Typography sets icon, as seen below.
That’s how to use Abobe Fonts on your Avada website. So, if you think you don’t have enough choice for fonts, think again!


