Share
In a previous post, we discussed some basic WordPress security settings to protect your WordPress site from some of the most common attacks. In this post, we will discuss more advanced steps that you can take to strengthen your WordPress security. But before moving forward, let’s review our basic settings checklist.
Overview
Update WordPress Themes and Plugins
Reliable sources for WordPress themes, like ThemeForest or the WordPress theme directory, have a comprehensive review system. The same is true for WordPress plugins. However, sometimes hackers may exploit a vulnerability in a theme or plugin. This is why you must update your themes and plugins as soon as a new update is available. If you are worried that an update might break your site, you can always revert your site using backups.
If you have Avada installed for your WordPress website, included with your purchase is the ability to have an additional Staging/test/dev subdomain without needing an additional license. Using an Avada staging subdomain is a great way to test all updates safely using a clone of the production (live) site.
Check WordPress File and Directory Permissions
A WordPress website consists of executable scripts to query your database and write changes. Typically, only your web server should have permission to read and write changes to these files. If these file permissions are set incorrectly, your WordPress site is vulnerable.
WordPress requires a specific set of file permissions to work correctly. You can change these file and directory permissions using an FTP client.
Ideally, all your directories should have file permissions of 755, and all the files should have file permissions of 644.
Change WordPress Table Prefix
By default, all WordPress database tables use “wp_” as a prefix for table names. This makes the hackers’ job easier because they can write scripts to inject SQL into specific tables. WordPress allows you to change this table prefix before the installation. You can choose a table prefix during the installation. Ideally, your table prefix should be a combination of letters and numbers. This will make it harder to guess and break into your website.
You must run a few SQL queries to change your WordPress database table prefix in an existing WordPress website. Before you do that, you need to create a complete backup of your WordPress site. After creating your backup, you need to log in to phpMyAdmin.
phpMyAdmin is a web-based tool used to manage MySQL and MariaDB databases. It provides a user-friendly interface to create, modify, and delete databases, tables, and records. Additionally, it allows for executing SQL queries, managing users and permissions, and importing or exporting data. PHPMyAdmin simplifies database administration, making it accessible for users with varying SQL and database management expertise.
Click on your database and then click on the SQL tab. Now, you will need to copy and paste this SQL query. As you can see, we have used tf42_689t_ as our table prefix. Each line in this code snippet changes and renames a WordPress database table. If you are using a plugin that adds its tables to the database, you will need to add those tables yourself.
You will also need to update your options table to replace instances using “wp_” as a prefix to your new prefix. To find those options, you must run this SQL query and then replace each instance manually.
You will need to repeat the process with the users_meta table as well. First, run the SQL query to search for rows using the old “wp_” prefix, then manually replace them with your new prefix.
You can now test your site to see that everything works as expected. If everything seems OK, you should create another fresh website backup.
Adding Two Step Authentication
Most WordPress users work on their sites from different locations. If you access your website from a public network, like in a coffee shop or airport, the communication between your computer and your web server becomes less secure. This is where 2-step authentication comes in handy.
You will need your mobile phone for that. You will have to install Google Authenticator app on your mobile phone (Android | iOS).
After that, you will need to install miniOrange’s Google Authenticator. After setting up the plugin, your login screen will require you to provide your WordPress password and the one-time code generated by the Google Authenticator app on your phone. There are multiple choices for the authentication method:
Disable Directory Indexing in WordPress
By default, most web servers are configured to look for an index file in any web directory. This could be an index.html, index.php, or any other index file. When no index file is found, and there are no instructions for redirection, the web server will list all directory contents.

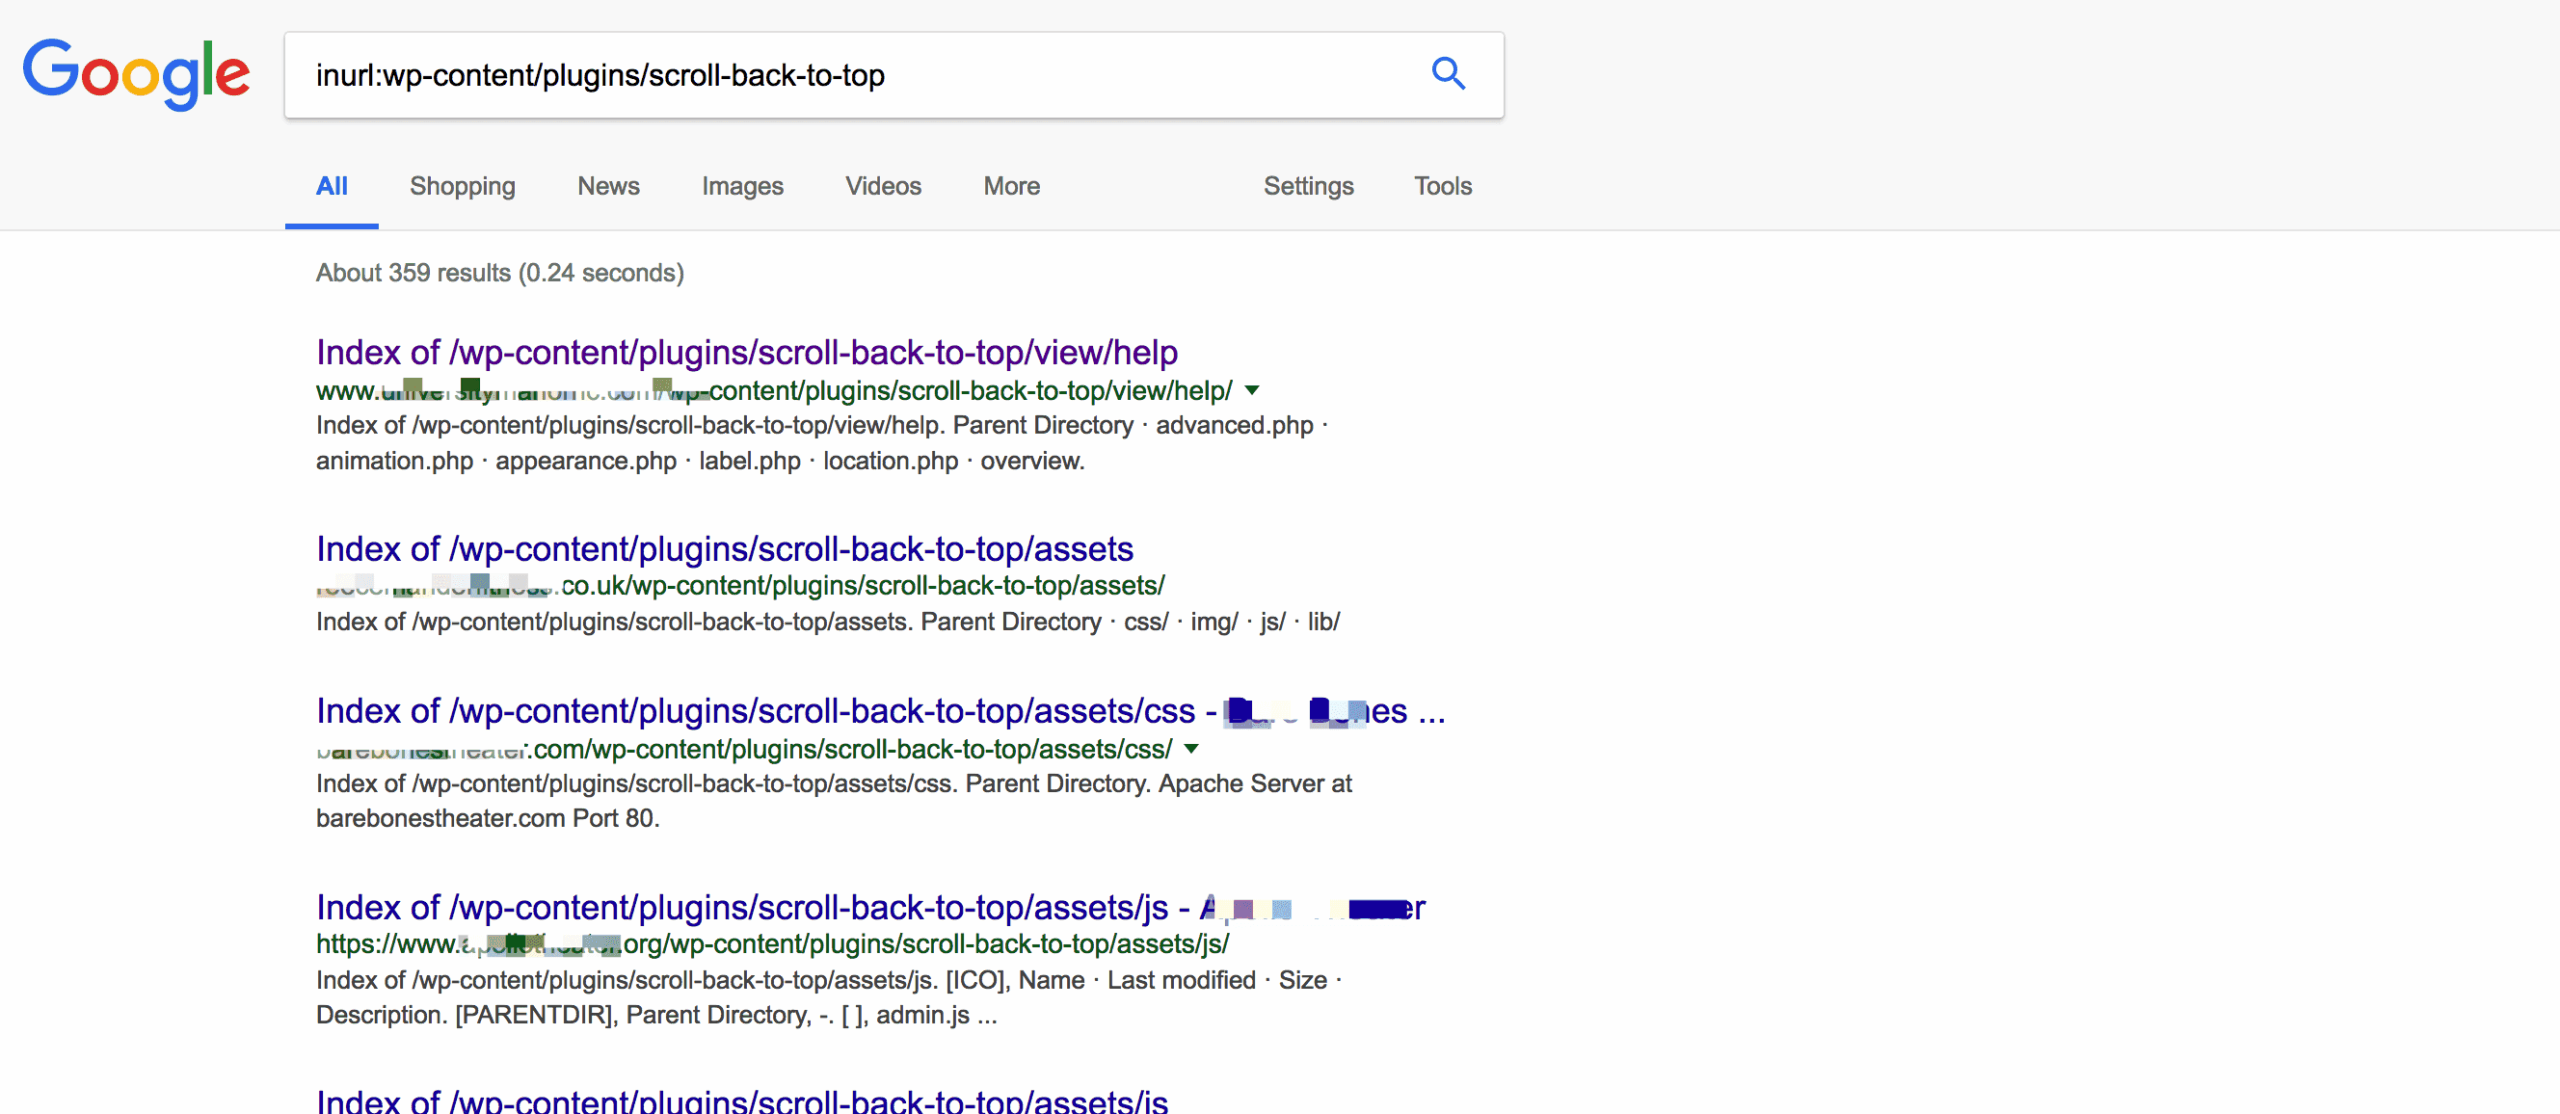
Now, this page will be browsed and indexed by search engines. If a plugin has a security hole that can be exploited, all the hackers need to do is run a query like this “inurl:wp-content/plugins/unfortunate-plugin-name” to find a list of websites using that plugin. Here is an example screenshot:

To disable directory indexing, add this single line of code to your website’s .htaccess file.
Summary
That is not all; there is a lot more that you can do to improve your site’s security. But with these tips, we have covered the most potentially vulnerable security backdoors. The most crucial advice is to be prepared for the worst and ensure you regularly back up your WordPress site.


