How To Create A Landing Page With Avada Layouts
Last Update: April 15, 2024
A landing page is essentially a page that you get to directly from a link. Landing pages are most commonly used to drive conversions in marketing and advertising campaigns, including email and Pay Per Click (PPC) campaigns.
Landing pages are designed with a clear focus or goal, and almost always have a singular Call To Action (CTA). Because of this, landing pages are typically without menus or other navigation, so as to help funnel the user to the CTA.
So how do you make a Landing page in Avada? It’s actually very simple. It’s really just a two step process of creating your content and turning your header (and potentially your footer) off. Let’s walk through it.
Create Your Page Content
The first step in making a landing page is to create your page content. Remember the idea that there should be a singular Call To Action. You can build this manually of course, or there are also some Avada Studio page templates you could possibly use as a starting point, like the Black Friday and Cyber Week templates, or some Avada Studio Containers, such as the Halloween, Black Friday or Cyber Monday Containers.
For this example, I have created a landing page manually, designed to entice students to apply to Avada University.
Turn Your Header & Footer Off
With a landing page, you generally want to turn your header and footer off to reduce distractions. It’s all about the CTA, and you don’t want a menu to tempt people to head off to a different page. Remember, a landing page isn’t typically on your menu, and the user has only arrived at the page by clicking a link in an advertisement or an email campaign.
Removing your header and footer might be typical on a landing page, but it’s not a necessity though, and you might want to leave your header and footer on, or even have a different header and footer for just this page.
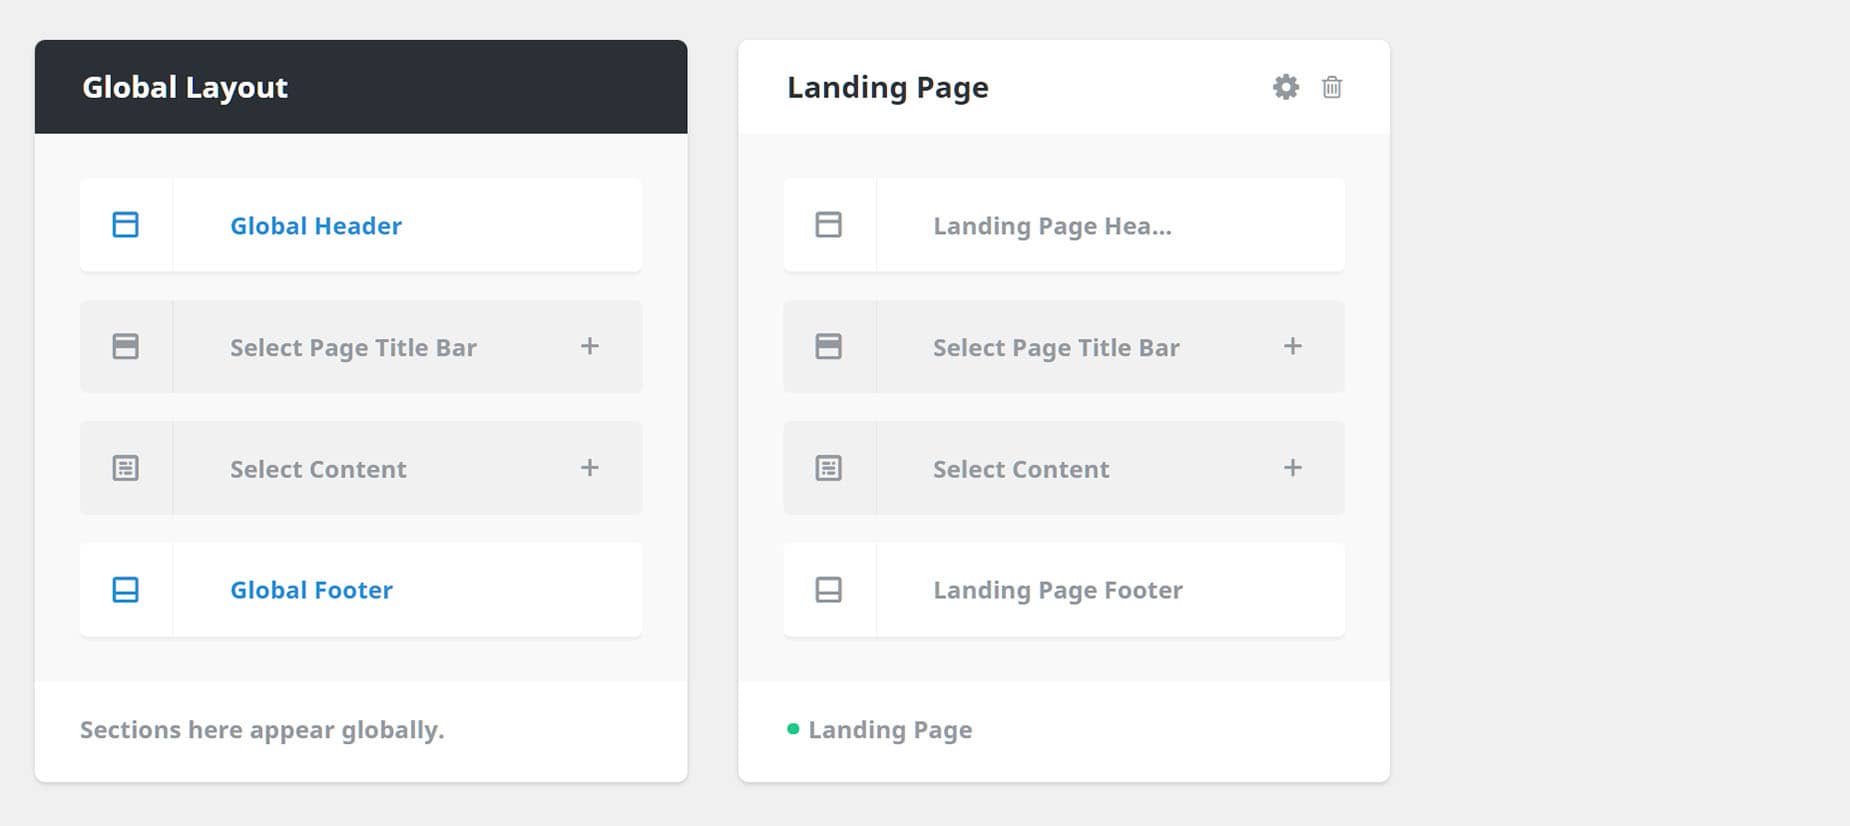
To remove the header and footer entirely, all you need to do is to create empty header and footer Layout Sections and assign them to a Conditional Layout (here called Landing Page), and use the conditions to set it to be used on just that particular page (or pages if you have multiple landing pages), as shown in the image below.
Alternatively, you could create different header and footer Layout Sections with just some elements, perhaps removing menus or other distracting content, and assign them instead to the Landing Page Layout.
Conclusion
So as you can see, landing pages are deceptively simple in Avada. Create your desired page content using the Avada Builder, and then determine whether you want any header and footer content and use one the above methods to control them. Then you will have a page URL you can add directly to mailouts or ads that take your users directly to your call to action.


