Table Element
Last Update: October 31, 2025
With the Table Element, Avada gives you an easy-to-use interface to create tables so that you can display various kinds of content to your viewers. Choose from 2 styles, unlimited columns, and a visual table interface that makes it easy and fun to create tables.
Watch the video below for a visual overview of the Element, view the Avada Table Element page for live examples, and read on to see the complete list of options.
How To Use The Table Element
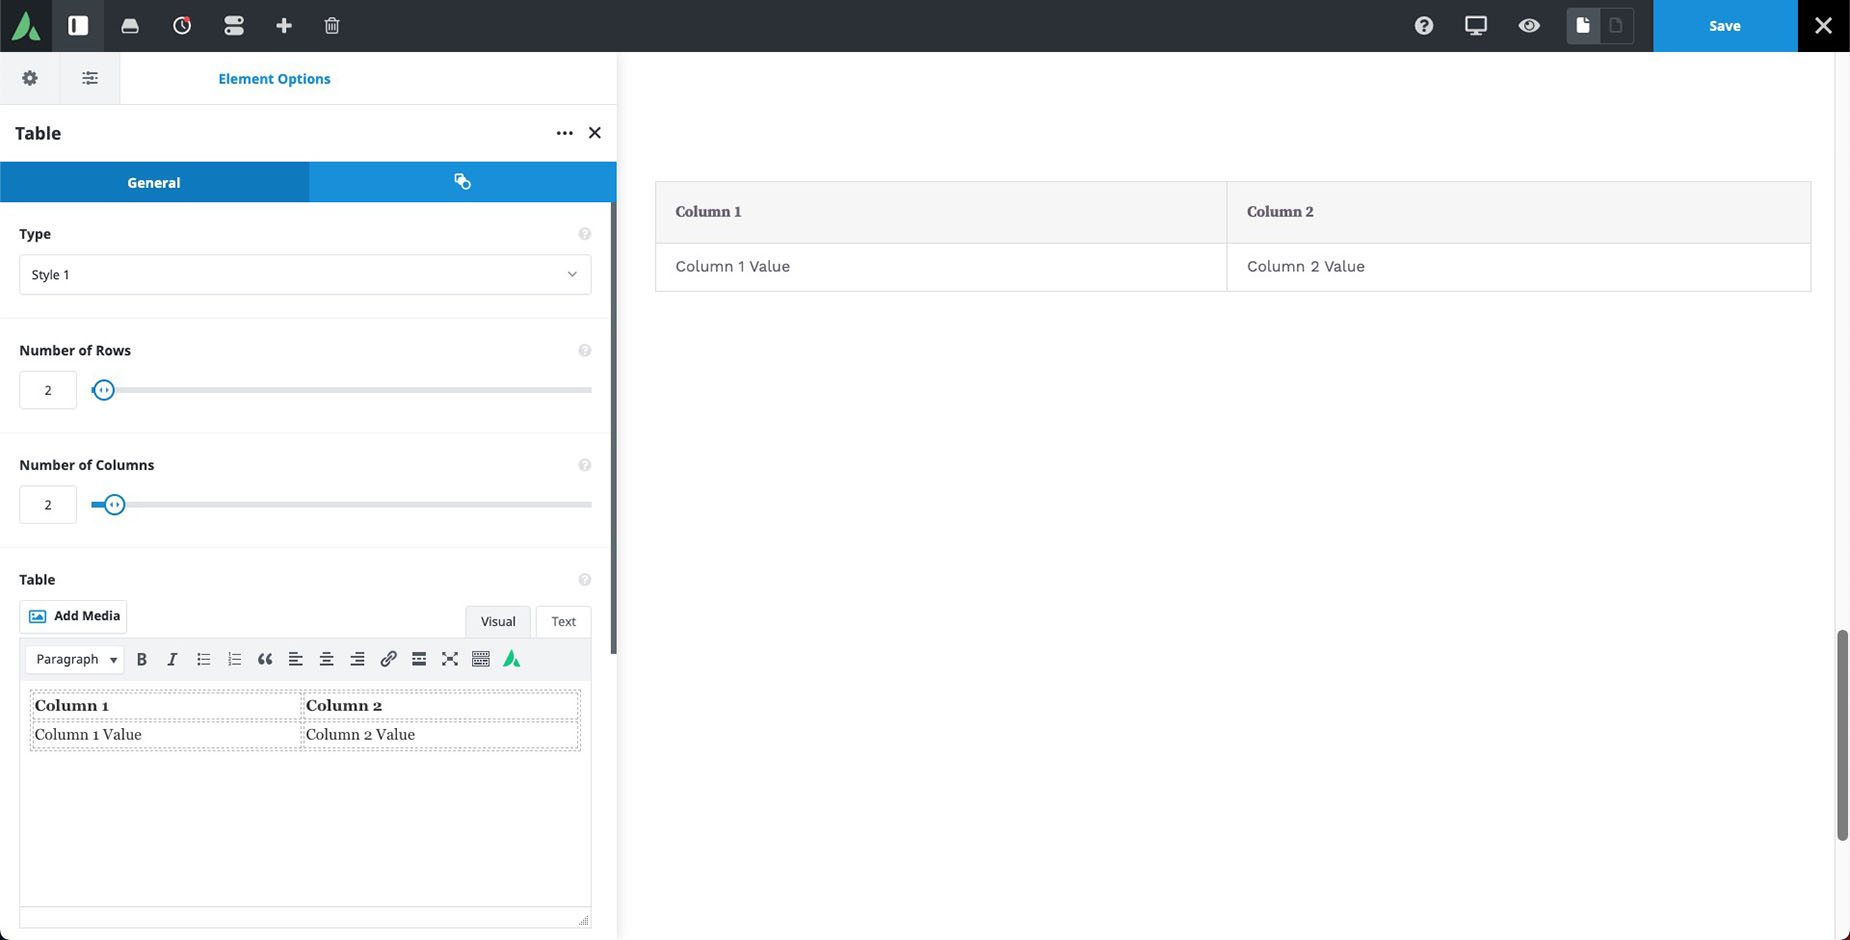
The Avada Table Element allows you to add customised tables anywhere on your WordPress website. To start, add the Element to the desired location in the site’s content. Choose from table style 1 or 2. Thereafter, choose how many columns and rows you want your table to have. You can select up to 25 for each.
This updates the table in place. You can then customize the headings and column content directly in the visual Editor, or if preferred, you can go into the Text Editor and work directly with the HTML. Read below for a description of all element options.
How To Edit An Existing Table
If you have an existing table that you want to edit, you can simply return to the Element and change the number of rows and columns using the Number of Rows and Number of Columns sliders. With these Element Controls, it’s very easy to change your number of columns and rows and then edit the content in the editor.
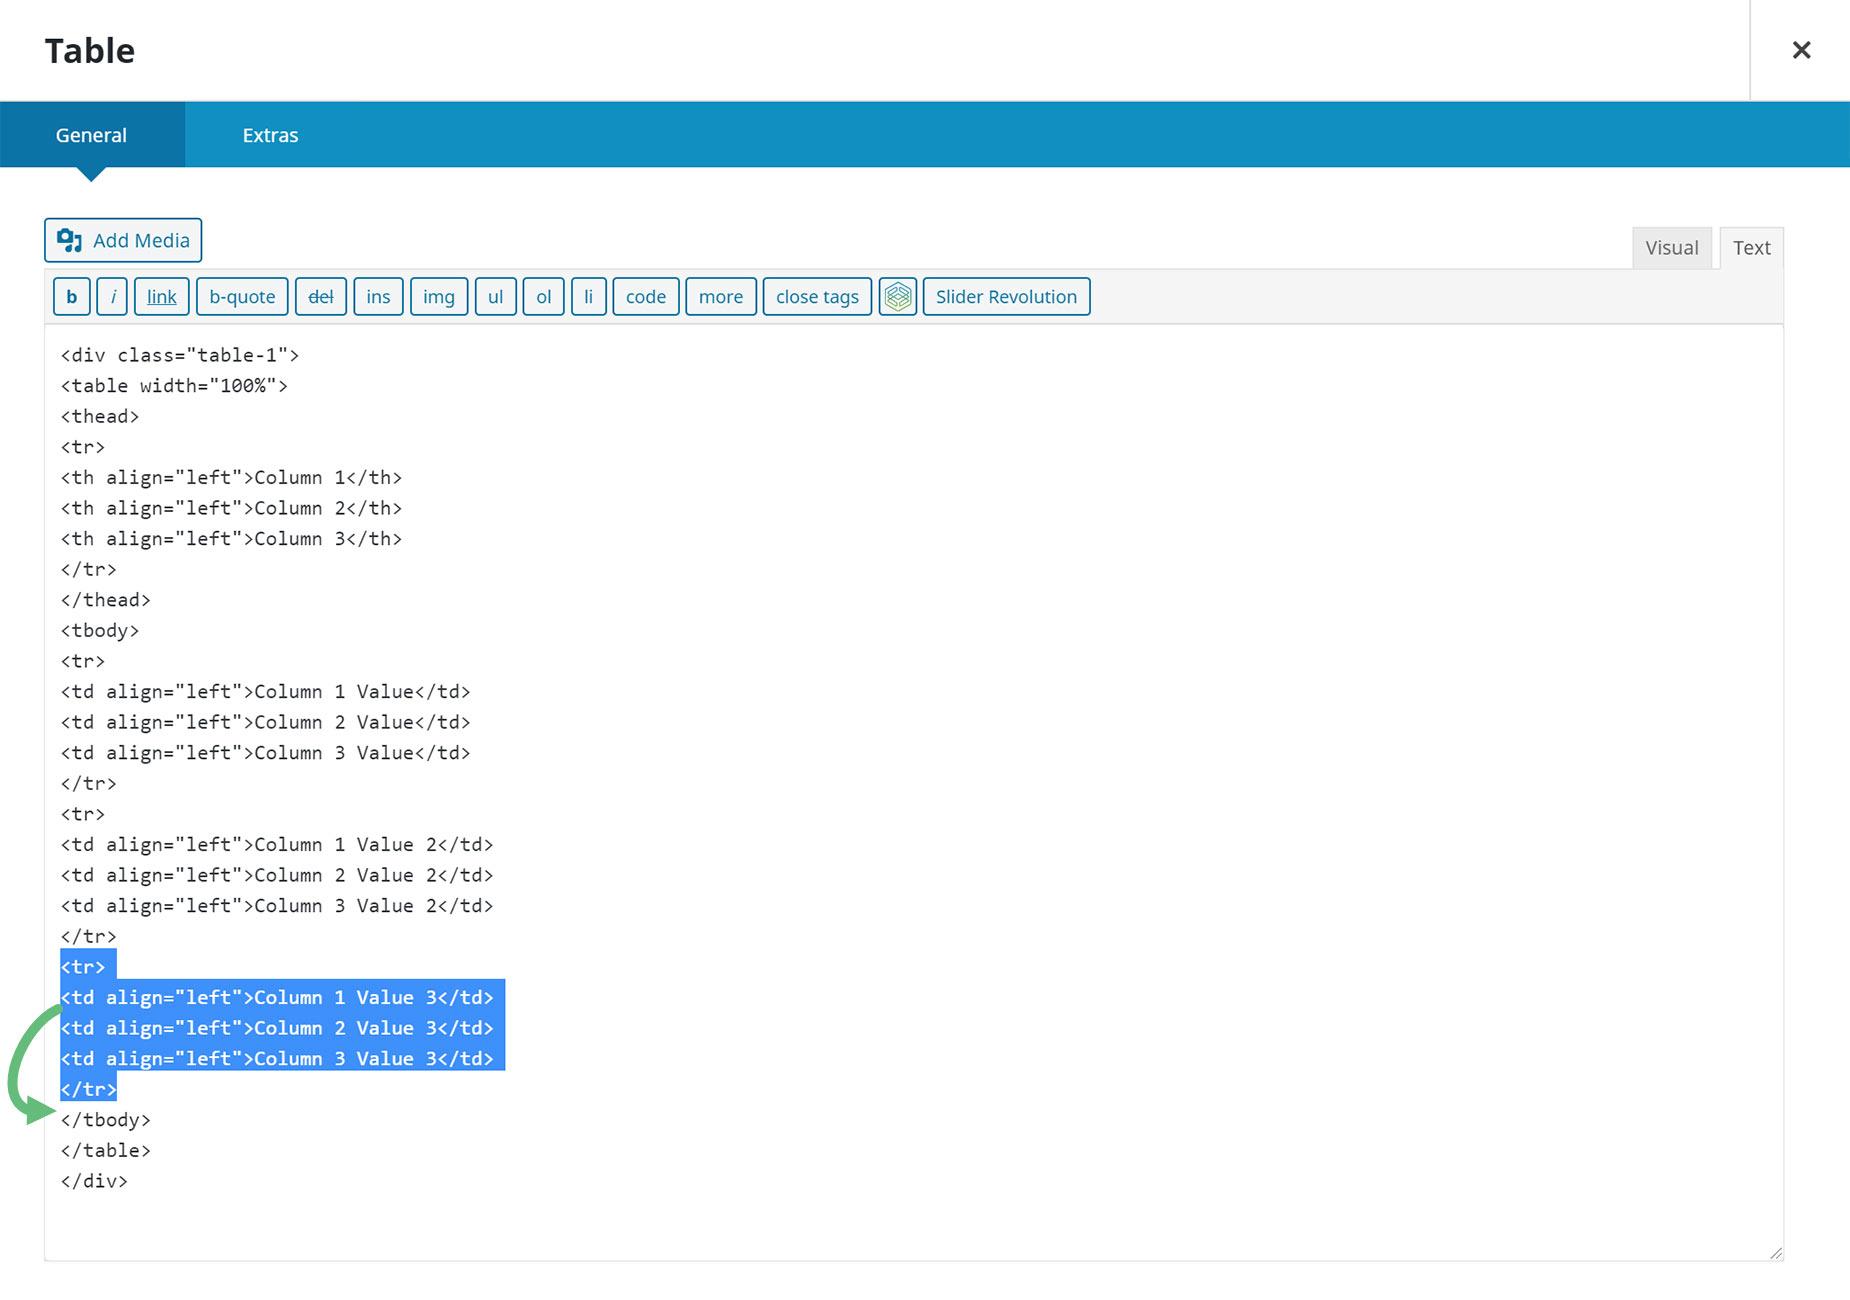
If you want to understand how to edit in text view however, it’s also very easy. If you look at the table code below, you can see in the Table Body section that each Table Row has its own section (between the tr and / tr HTML tags).
To create a new row, you would simply copy a Table Row section, and paste it in below itself, as seen below. Then you could manually edit each of the Table Data (td) lines. To add a new Column, you would have to add a new Table Header line for the Title of the new column, and add a new Table Data line in each Table Row. Generally though, it’s much easier just to use the visual editor and the element controls.


