Avada Builder Library Global Elements
Last Update: August 31, 2025
The Avada Builder Library gives you the ability to save Elements, Columns and Containers as Global Elements. This allows you to set up one instance that in turn can be deployed across your site, wherever you choose. Edit the Global Element once and see the changes populated across the entire site.
Setting Up Elements, Columns or Containers As Global Elements
Step 1 – Hover over the element to show the options and click the Save Element icon. For Columns and Containers click the Save Column or Save Container icon.
Step 2 – Enter a unique name and check the box for “Save as Global”. Duplicate names are not allowed.
Step 3 – Click ‘Save as Global’ and ‘Save Element’, ‘Save Column’ or ‘Save Container’.
Step 4 – Click ‘Update’ to save the page/post.
Note: After editing/creating the Global Element, Column or Container remember to save the page/post if you want to retain the position of that Global item within that page/post. If you don’t save he page/post, you can always come back later and add the Global Element back into the page/post
Adding Global Elements To Pages and Posts
Step 1 – To add a Global Element within your page/post, click the “Add Element” icon.
Step 2 – Click the Library Elements tab.
Step 3 – Select the Global Element you want to add. The globe icon indicates the element is a global element.
Step 4 – Click ‘Update’ to save the page/post.
Note: For Columns and Containers, just click the Add Column or Add Container buttons, and click the Library Columns or Library Containers. Then, select the Global Column or Global Container you want to use.
How To Edit Global Elements
Step 1 – There are two ways to edit the Global Elements. One way is through the Library, which is the centralized editing area for editing saved global or non-global elements, found at Avada > Library, from the WordPress dashboard. For more information on this, click here. Another way, is by simply choosing any Global Elements instance within a page/post and edit.
Step 2 – As soon as you save the page/post, the changes will automatically be applied to all instances of that Global Element across the entire site (including the Widget section).
Step 3 – Click ‘Update’ to save the page/post.
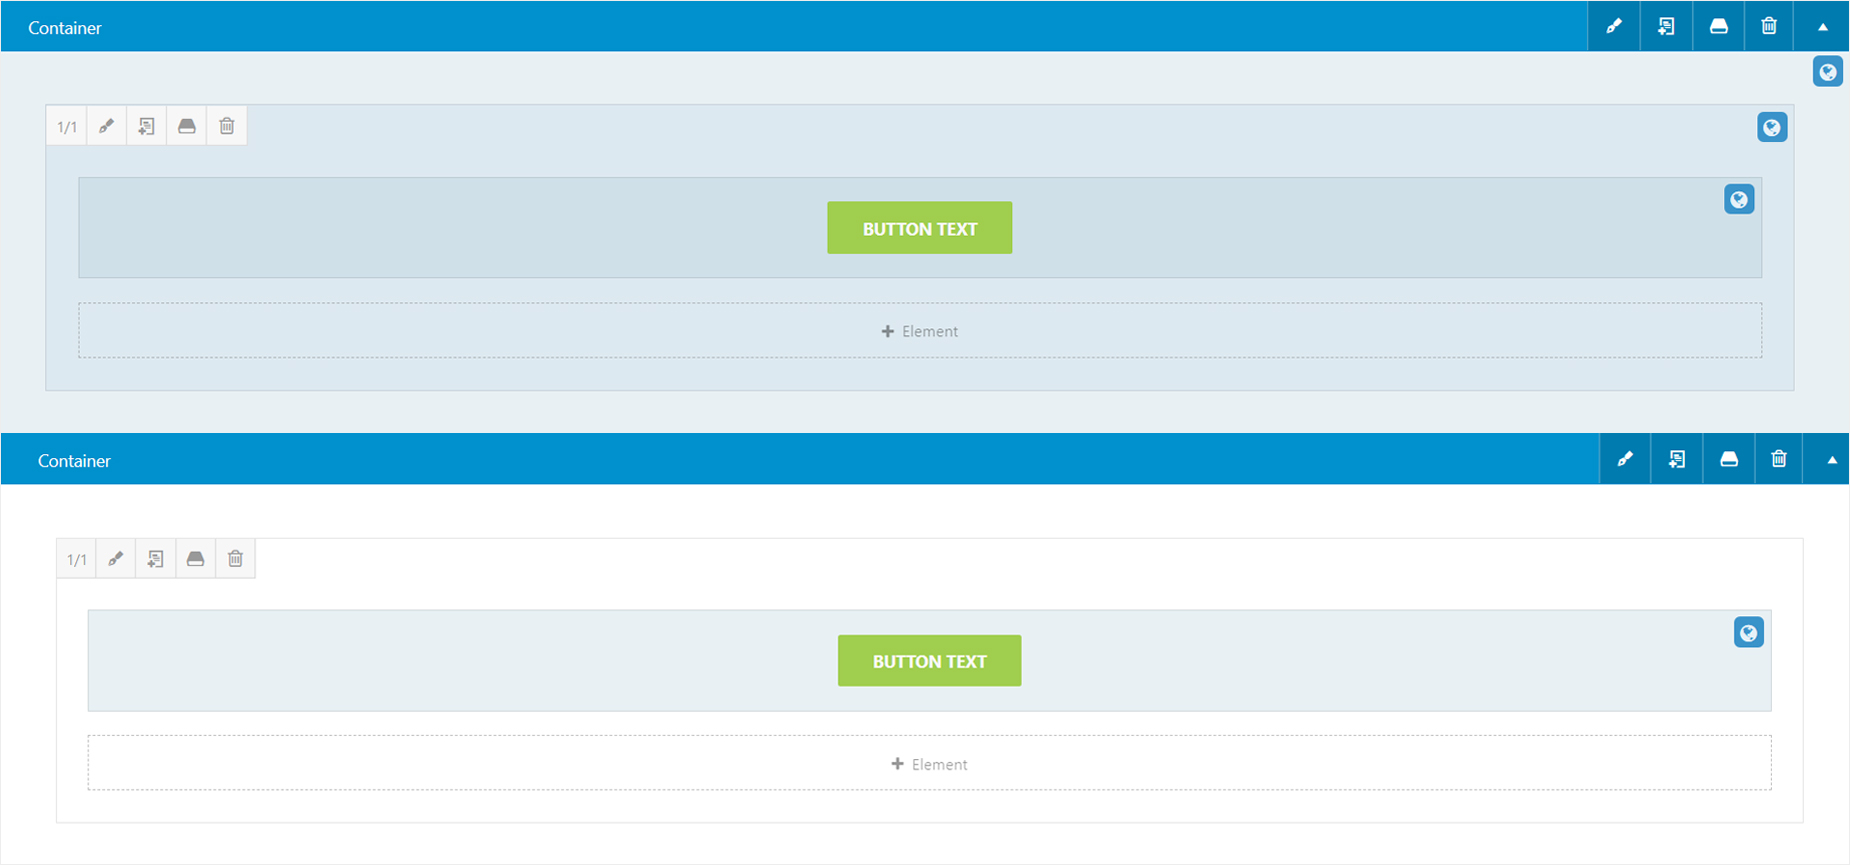
Global items will have a globe icon and a different blue background color than normal Elements, Columns, and Containers, which have a white background color.
Note: To ensure that edits to a Global Item are deployed to all instances, wherever used within the site, remember to save the page/post.
How To Delete Global Elements
Step 1 – There are two ways to delete the Global Elements. One way is through the Library, which is the centralized editing area for editing saved global or non-global elements, found at Avada > Library, from the WordPress dashboard. For more information on this, click here. Another way is to navigate to the Library tab from the Avada Builder on your page.
Step 2 – Click the Element, Column, or Container tab.
Step 3 – Click Delete for the global item you want to remove. The globe icon indicates the element is a global element.
Note: Deleting a single Global Element will remove all instances of the same Global Element across all pages and posts.
How to Unassign An Item As Global
Step 1 – Click the global icon on the element, column, or container you wish to unassign global status.
Step 2 – A confirmation message will appear asking if you want to remove global property. Click OK.
Note: This will only unassign the global status on the specific element, column, or container, and will not delete the saved global element, column, or container. If you wish to assign global status again, you may do so by saving it as global elements. See “Setting Up Elements, Columns or Containers As Global Elements” section above.
Adding Global Elements To Widgets
Global Avada Builder Items (Containers, Columns, and Elements) can very easily be added to widgets, by simply copying and then pasting the Global Element Shortcode into the widget, as described below.
Step 1 – In the Avada Builder Library, locate the Global Element you wish to add to a widget.
Step 2 – In the Global column, you will see a shortcode. Select and copy that shortcode.
Step 3 – Navigate to the Appearance > Widgets tab to access the list of widgets and widget areas. The left-hand side shows all the widgets you can use. The right-hand side shows all the different widget areas you can add widgets to.
Step 4 – Drag and drop the Text widget into your chosen widget area on the right-hand side.
Step 5 – Paste the copied global element shortcode in the Text editor.
Step 6 – When finished, make sure to click the ‘Save’ button in the widget editing box to save your changes.
Translating Avada Builder Global Elements, Columns and Containers
If you are using the translation plugin, WPML, you can now translate Global Elements, Columns and Containers.
Translation support for Global elements is supported by:
- WPML Multilingual CMS (4.0.6 or above)
- WPML String Translation (2.8.6 or above)
- WPML Translation Management (2.6.6 or above)
For more details on how to use this feature, please see WPML’s specific Avada documentation.


