How To Design A Website Header With Avada
Last Update: April 18, 2024
With Avada Layouts, you have the ability to create fully customized Header Layouts on your Avada website, using the full design power of Avada Builder. If you still want to use the legacy method of assigning a header layout from the Global Options, see the How To Set Up A Global Options Header doc.
You can build a Header Layout from scratch using the wide range of Elements in Avada Builder, or you can get a head start on your Header, by importing a prebuilt one from Avada Studio. A Header layout can be global, meaning it will display on every page of the site, or it can be conditional, and just display on certain pages, categories, or custom post types etc. In that way, you can even have multiple headers, for different sections of your site.
Read on to understand Header Layouts in Avada, and watch the video below for a visual overview of the entire design process.
The Avada Layouts Interface
A Custom Header is technically a Layout SectionLayout. See Introducing Layouts in Avada for a general overview of Layouts, and Understanding Layout and Layout Sections to understand the difference between the two parts of the Layout, but for now, let’s now look at creating a Custom Header Layout Section.
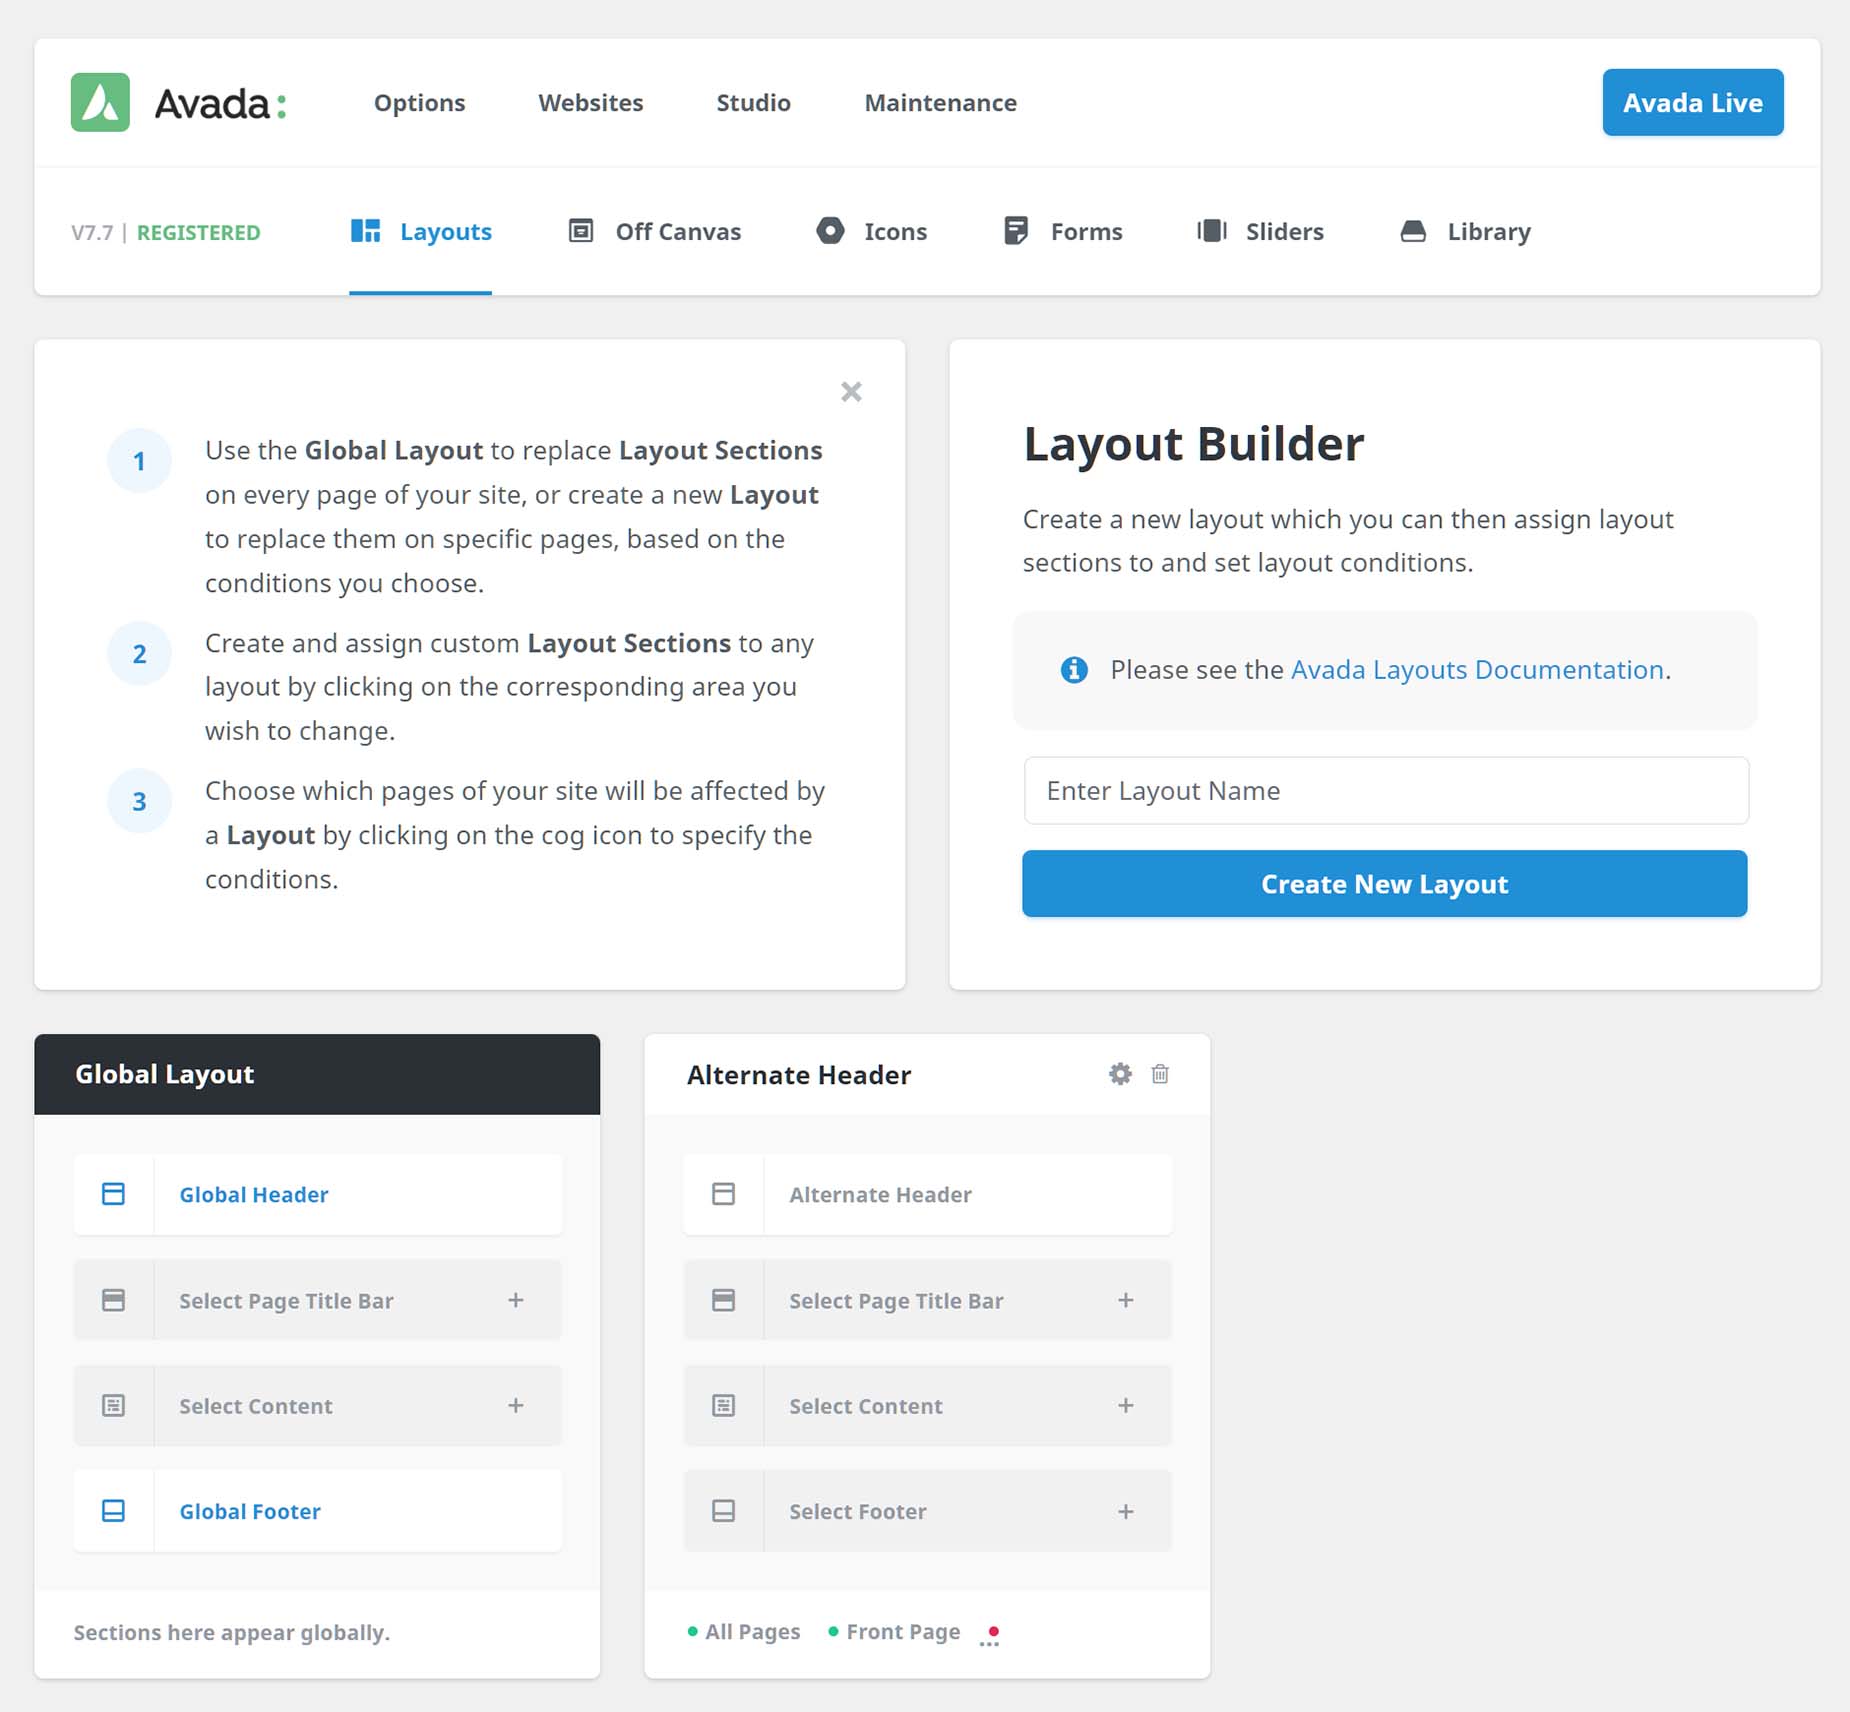
You can find Layouts at Avada > Layouts. This interface is where you create and manage your Layouts and Layout Sections in Avada. Initially, there is just a Global Layout, and by default, this is empty, with no attached Layout Sections, as can be seen below.
Creating A Custom Layout
You can add a Header Layout Section to the Global Layout, or to a Conditional Layout, set to only show on specific custom post types, or even single pages etc. The Global Layout is already there by default, but for a Conditional Layout, we have to first create a Layout.
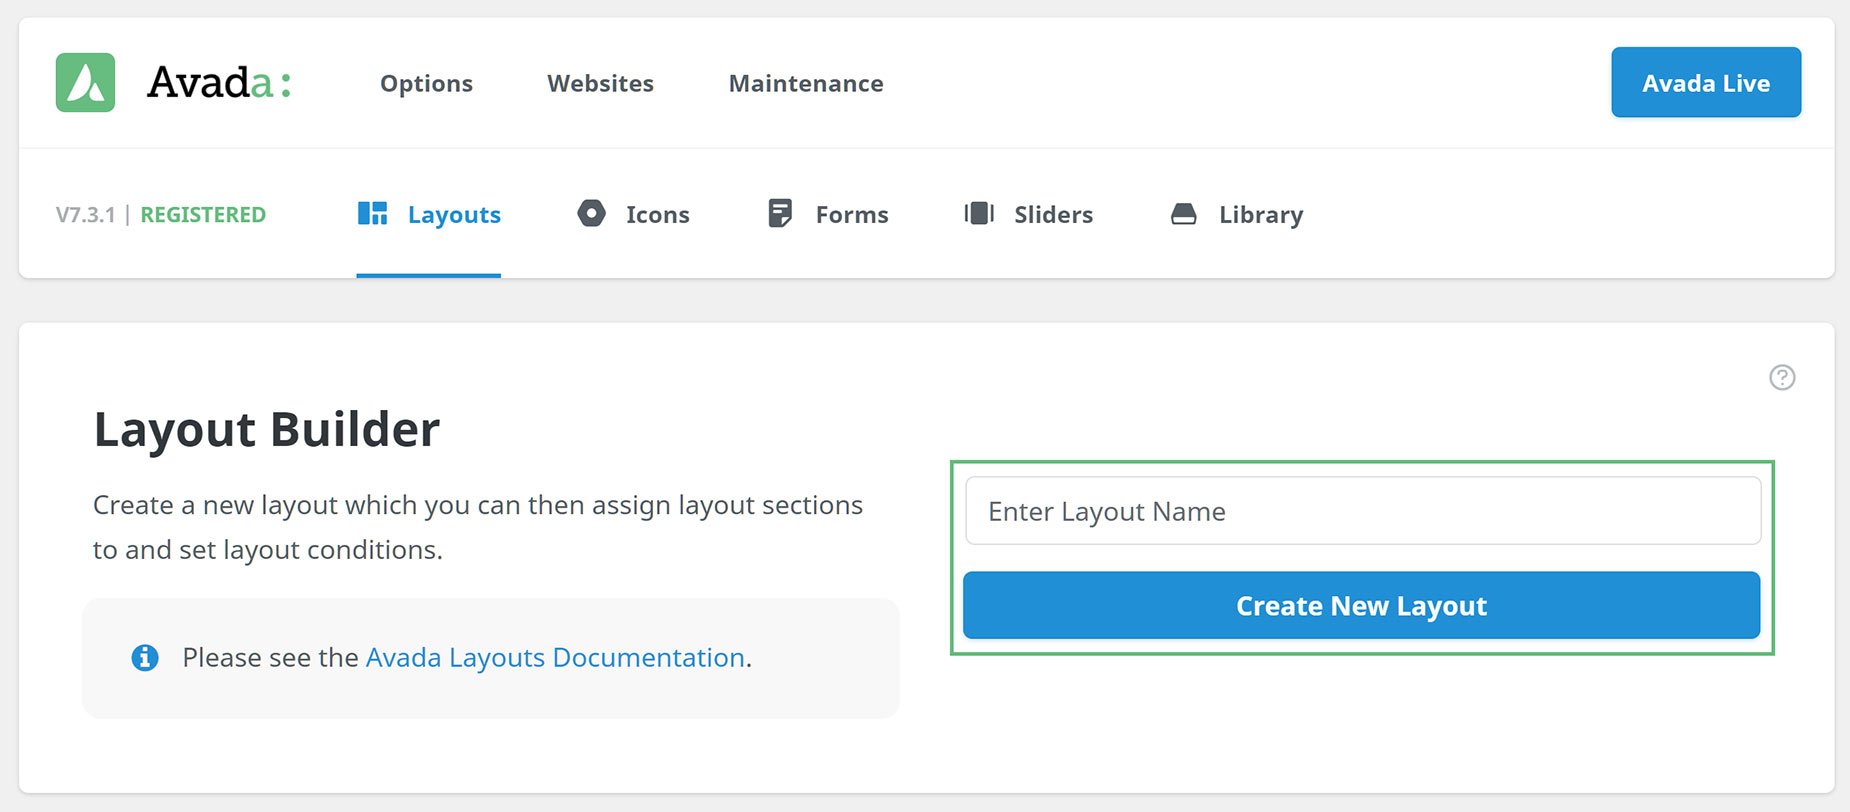
Creating a Layout is done on the Layouts page, by simply adding an appropriate name and then clicking on Create New Layout, as can be seen below.
Creating A Custom Layout Section
If you already have a Layout you want to add a Custom Header Layout Section to, or you want to add it to the Global Layout, then you can go ahead and create a Header Layout Section.
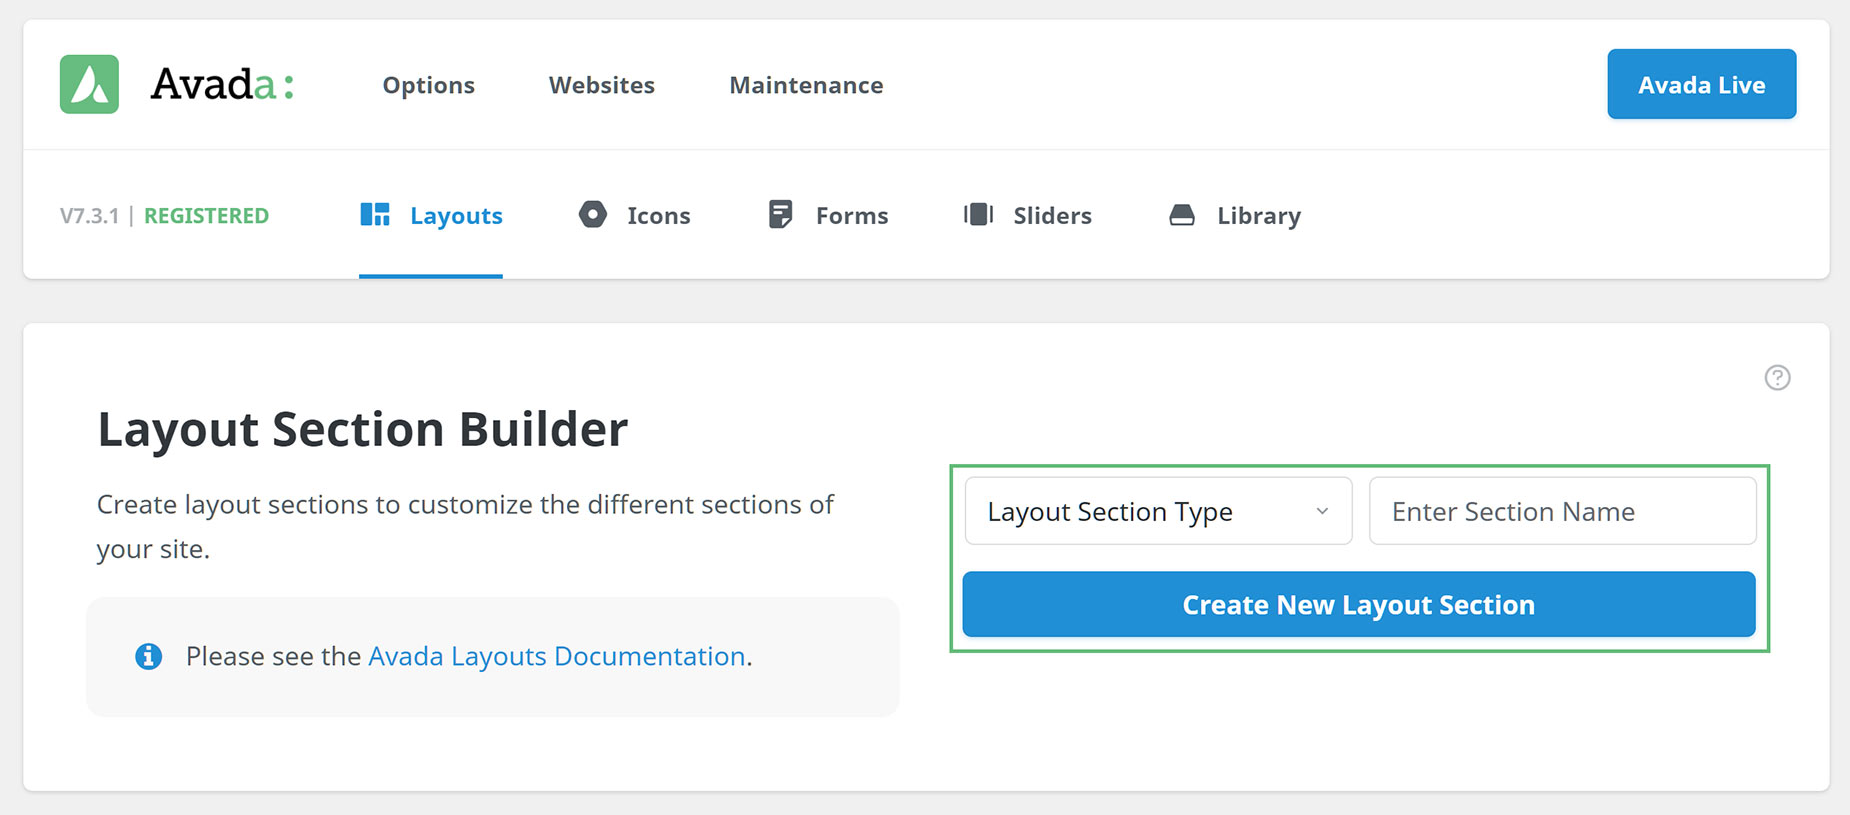
You can do this on the Layout Section Builder page, by simply choosing the type of Layout Section, and then adding a name (in this case, Header, and perhaps a name of Global Header might be most appropriate) and then clicking on Create New Layout Section, as can be seen below.
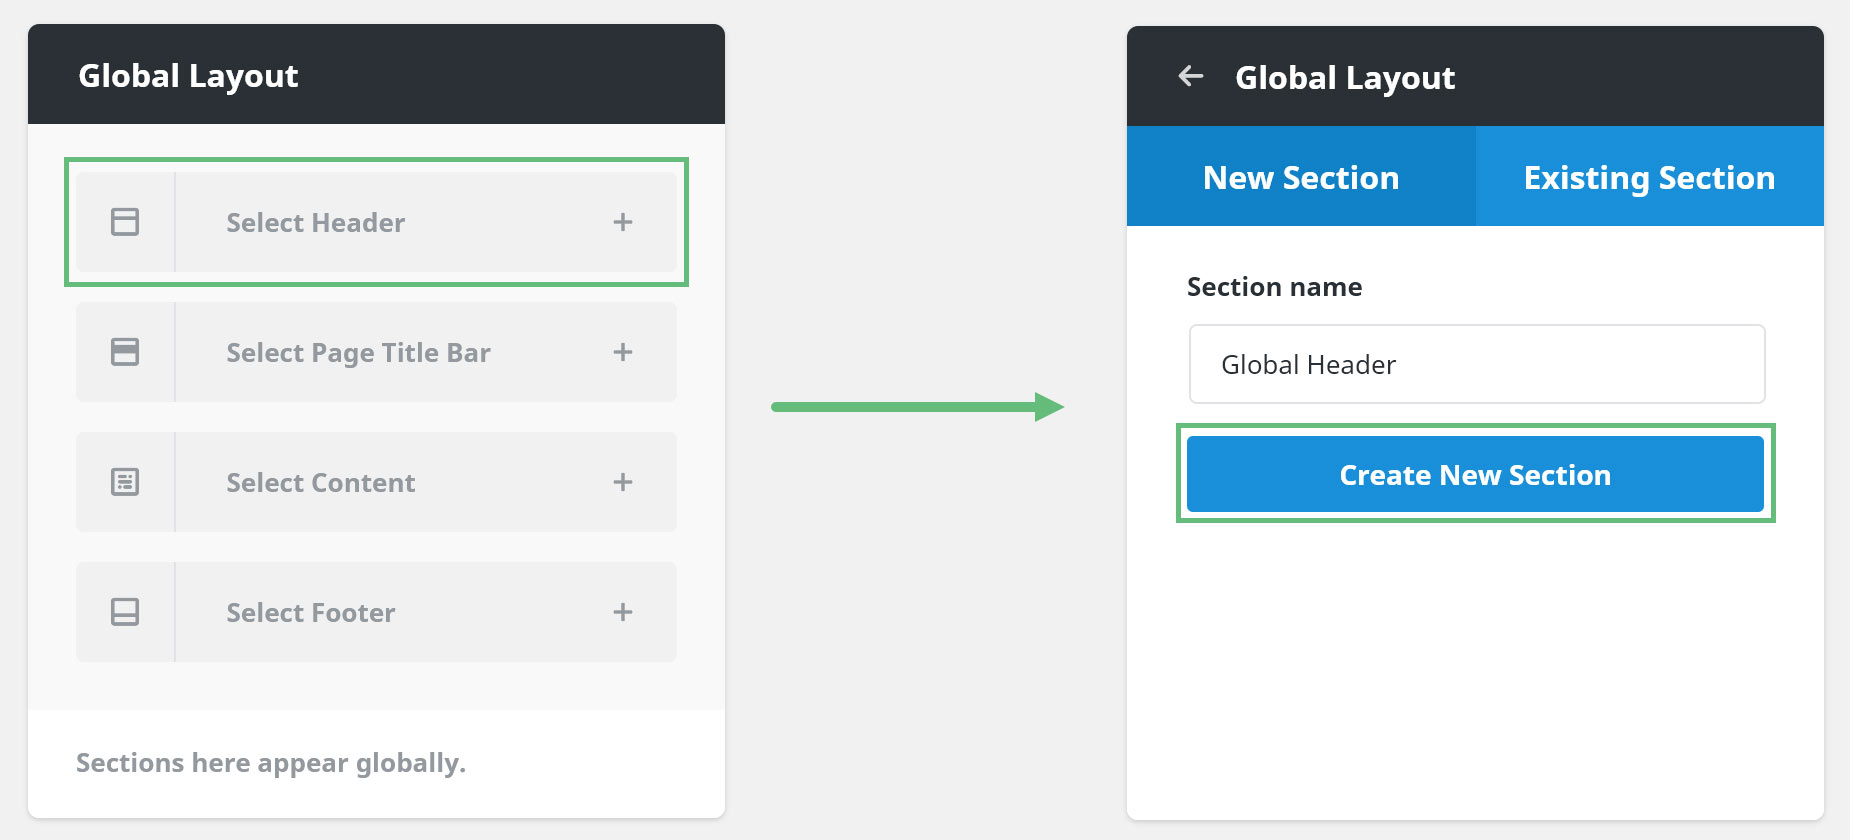
Alternatively, you can create a Layout Section directly from the Layout you wish to add it to, as can be seen below. For a Layout Section to appear on your site, it has to be added to a Layout. And as mentioned, there is initially only a Global Layout. So, if you wanted to create a Global Custom Header, you would just add it to this Layout. But if you wanted a conditional Custom Header, you would need to create a new Layout, assign a Custom Header Layout Section to it, and then add conditions to it to get the Layout to display according to those conditions.
There’s no wrong way to do this, but it’s important to think of the circumstances. If the layout is already active (i.e. it has conditions or is the Global Layout) then any Layout Section added would also be immediately active, and at this point would still be empty. So in the example of adding a Custom header to a Global Layout, it would make more sense to add it via the Layout Section Builder page first and build it before adding it to the Global Layout.
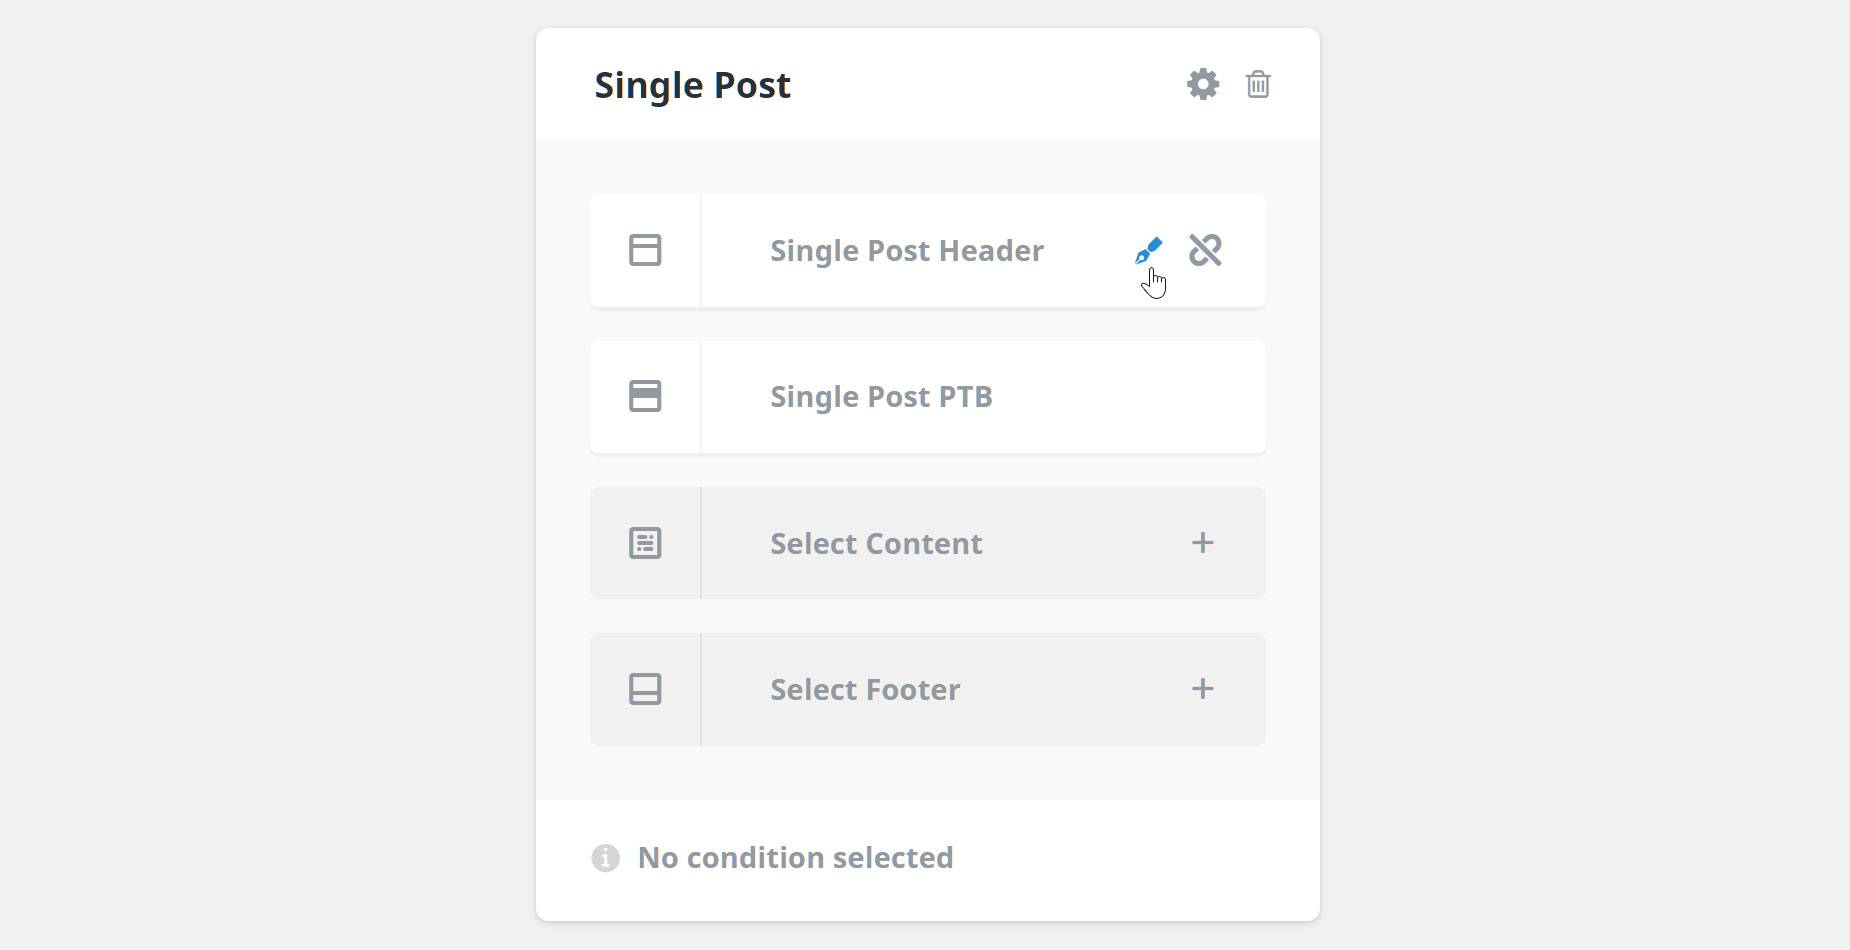
Alternatively, if we were adding a Header Layout Section to A Conditional Layout, then we could add it in this way, and then build it. Conditional Layouts are not in use until there are conditions added. If we mouse over the Header Layout Section on the Layout, as shown below, we can then click on the edit icon to design and build our Layout Section.
Editing a Custom Layout Section
When you first edit a new Layout Section, you come to the default WordPress Editor. From here, you can choose to use Avada Builder, or Avada Live. It is here we create our Custom Layout Sections.
Anything you can build in the Avada Builder can constitute the content of your Layout Sections. You can have multiple columns, background images, dynamic data… anything. The freedom this gives is enormous. The Layout Section is literally that – a section where can create the Layout. The content itself comes from the Builder, and what you can do is only limited by your imagination.
Adding An Avada Studio Header
An easy way to get started with a Custom Header is to use Avada Studio to add a Header to your Header Layout Section. Headers are just one type of pre-designed content you can add with Avada Studio, which you can then customize to meet your own requirements. There is a wide range of different Header designs you can import into your Layout Section, as a starting point for your own Custom Header, with more being added to Avada Studio regularly.
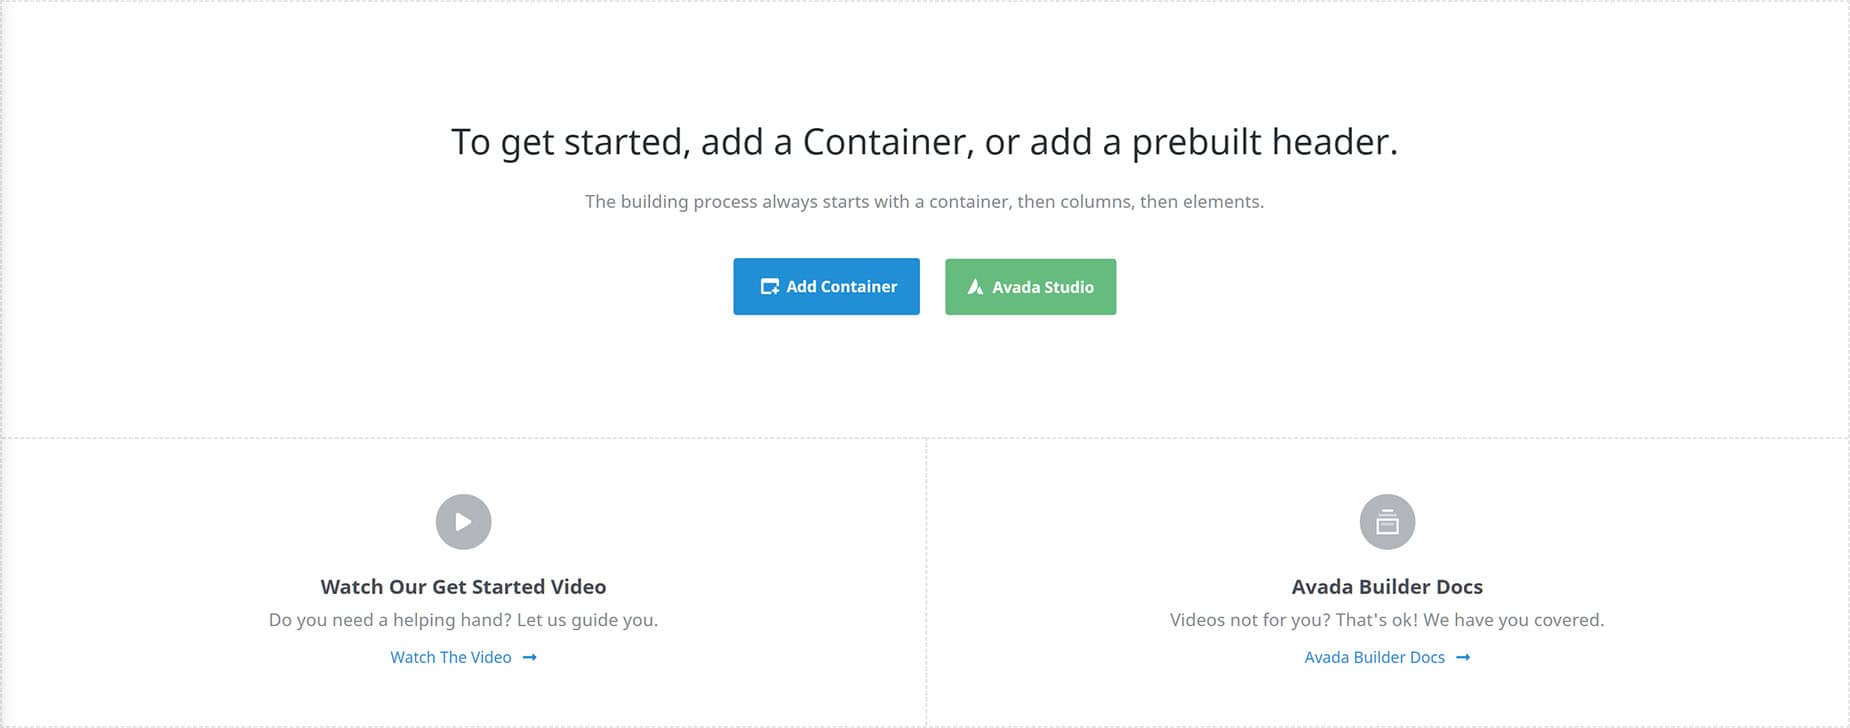
Adding a Studio Header to your Layout is very easy. When you first edit your newly created Header Layout Section in Avada Builder, just click on the Avada Studio link on the Starter Page, and the Library will open on the Studio tab, with all the available headers ready to import.
Elements of a Custom Header
For a Custom Header, one essential element would likely be the new Menu Element. This is the only specifically new Design Element made for the Header Builder and has a huge range of features to configure and display your menu in multiple ways.
The Image Element is another Element that will likely be in most Header designs, and this has been expanded, so you can use it to place your logo into your Header Layout as either an image or Dynamic Data. And remember, that with the Header Builder, you can use any Design Elements to complete your design, so depending on your design you might also use any number of other Elements.
For a Header Layout, there are also options in the Container and Column Elements you can use, such as Conditional Rendering, Container Background Options, Sticky Containers, Container Offset, Responsive Options Sets, Sticky Visibility options and many more. Please see the Container and Column Element docs for full details on their new features. The choice and the design are completely up to you, and the entire design flexibility of Avada Builder is at your fingertips.
Example Of A Custom Header
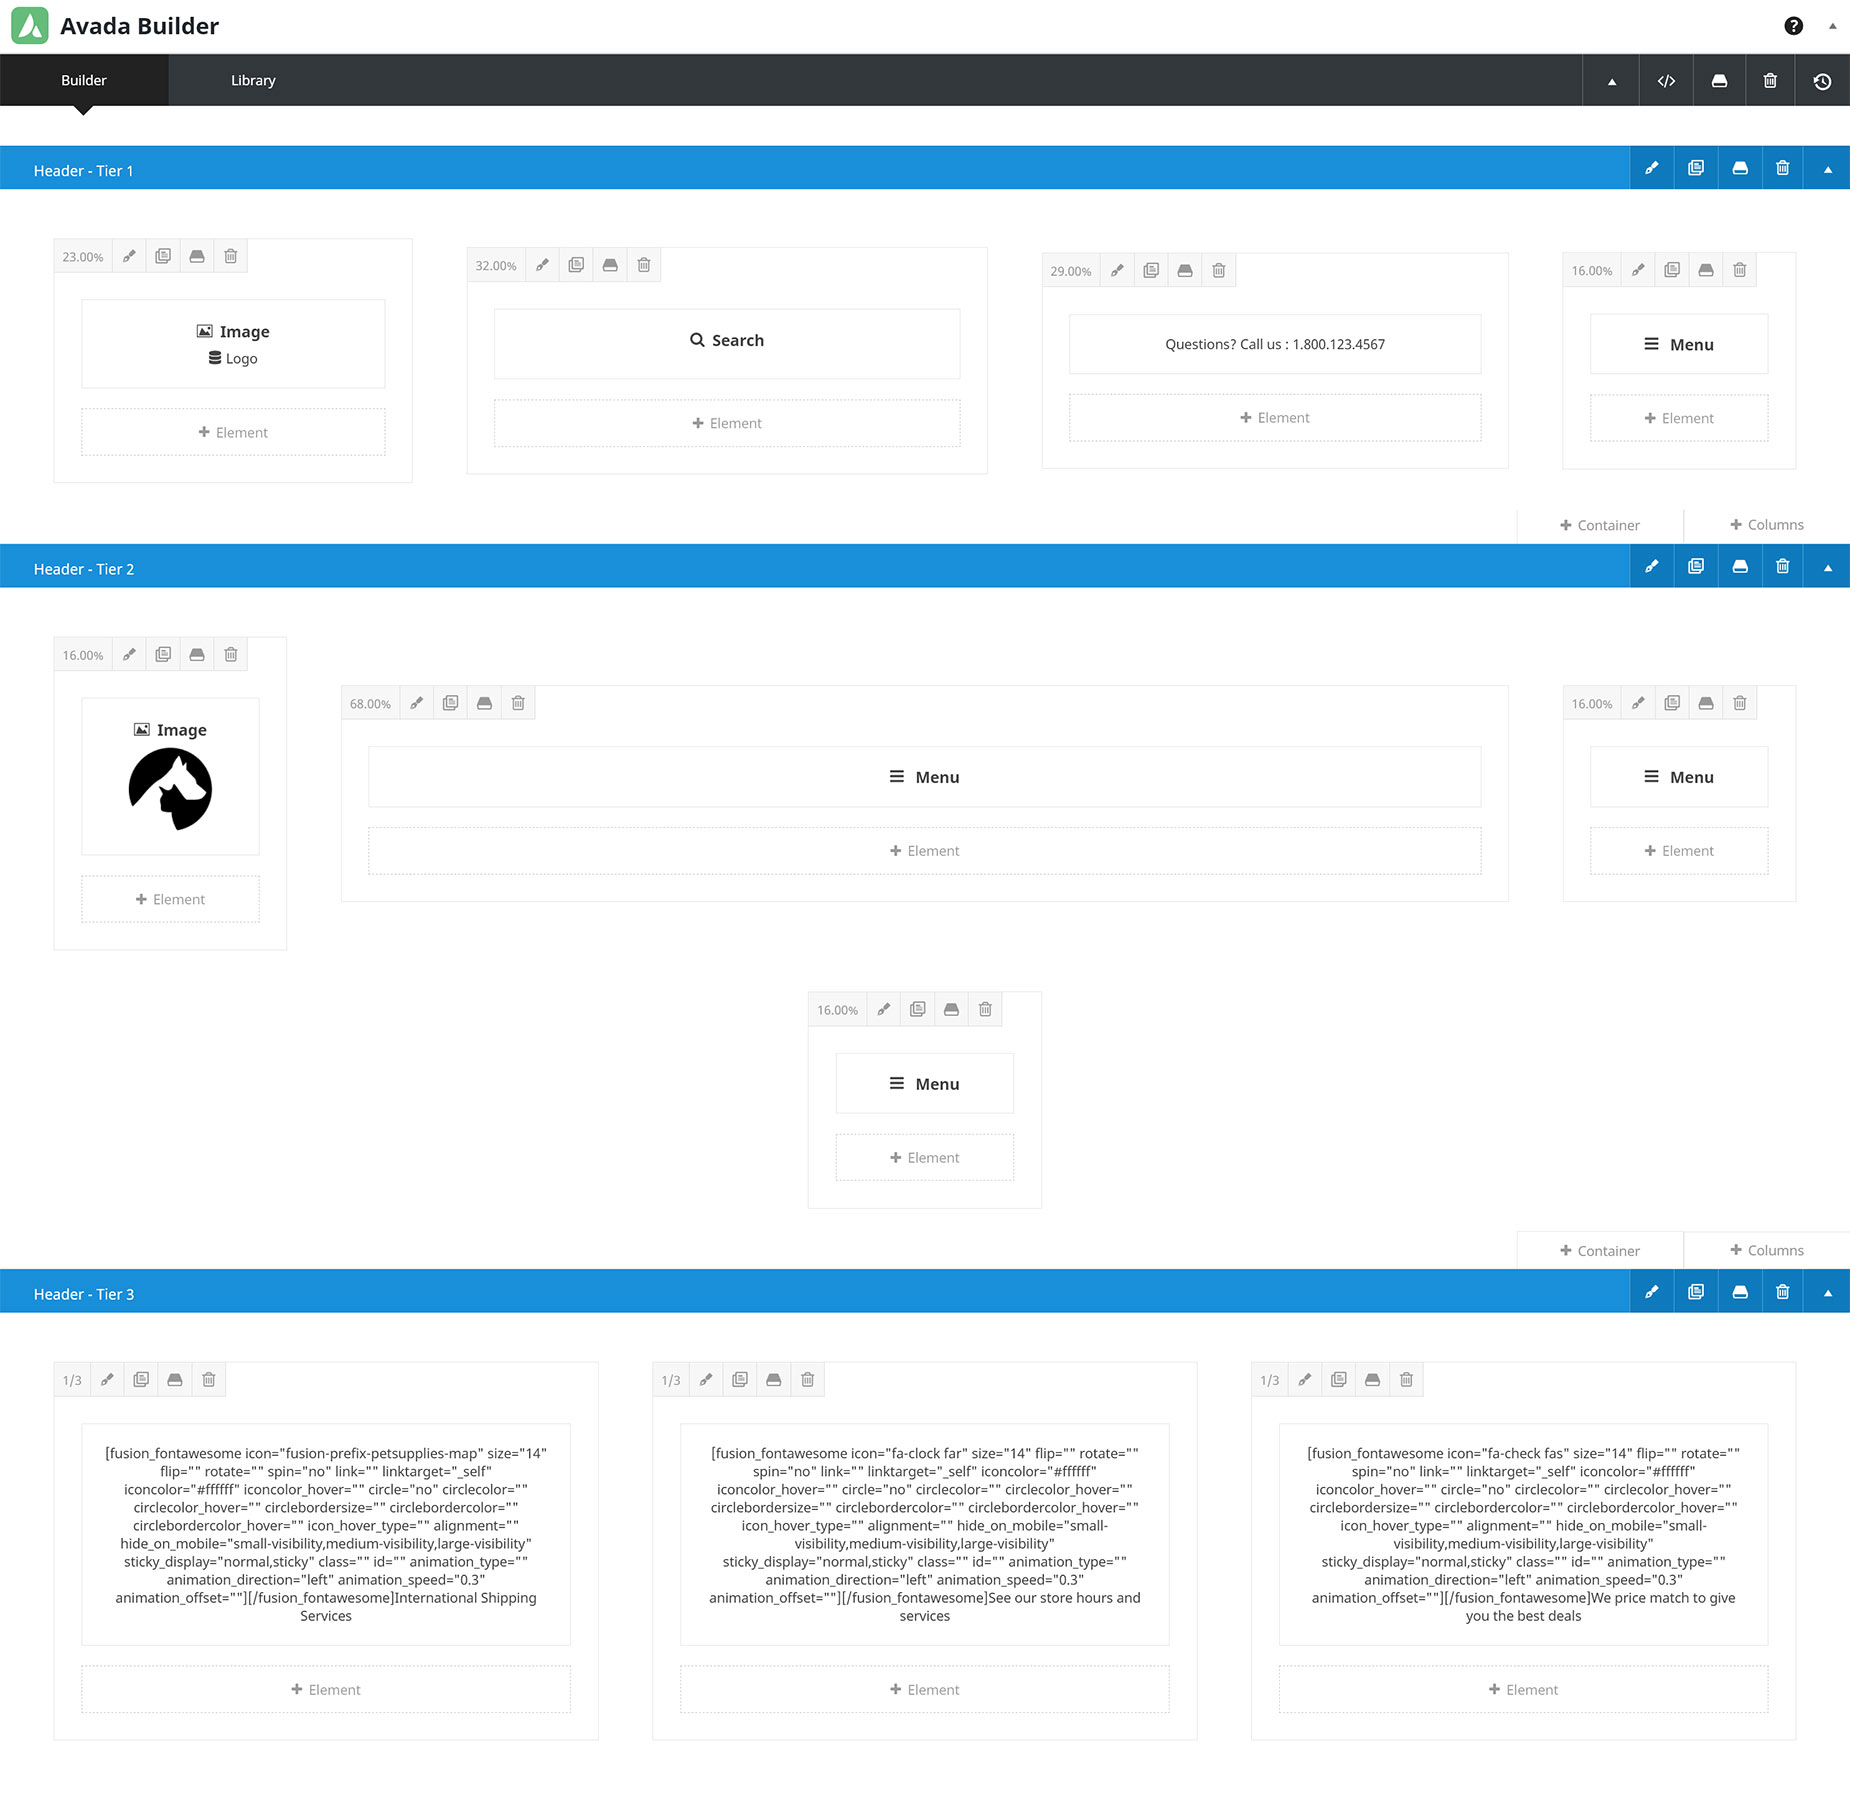
As mentioned, there are almost no limits for what you can create using the Header Builder. As an example, see below for the Header Layout design of the Pet Supplies Website. As you can see below in Wireframe view, it is a multi-container layout, using many of the features available in Avada, including the Menu Element, a dynamic logo, Custom Column widths, a Sticky middle Container with additional Elements that only have Sticky Visibility, as well as responsive changes in Tablet and Mobile layouts.
The top Container holds the logo, search bar, some text, and the WooCommerce Cart icons. The middle container holds the main menu, which itself has sub-menus and a mega menu, and a logo and another two menus with visibility options applied, so that they only show when the Container becomes Sticky. The last Container just has a tiled background image and three text blocks with icons and text. The Header also makes good use of the new Responsive Option Sets feature, displaying a different header layout for both Tablet and mobile.
Make sure to watch the How To Create A Custom Header video, embedded at the top of the page, to see further details of this truly custom header.
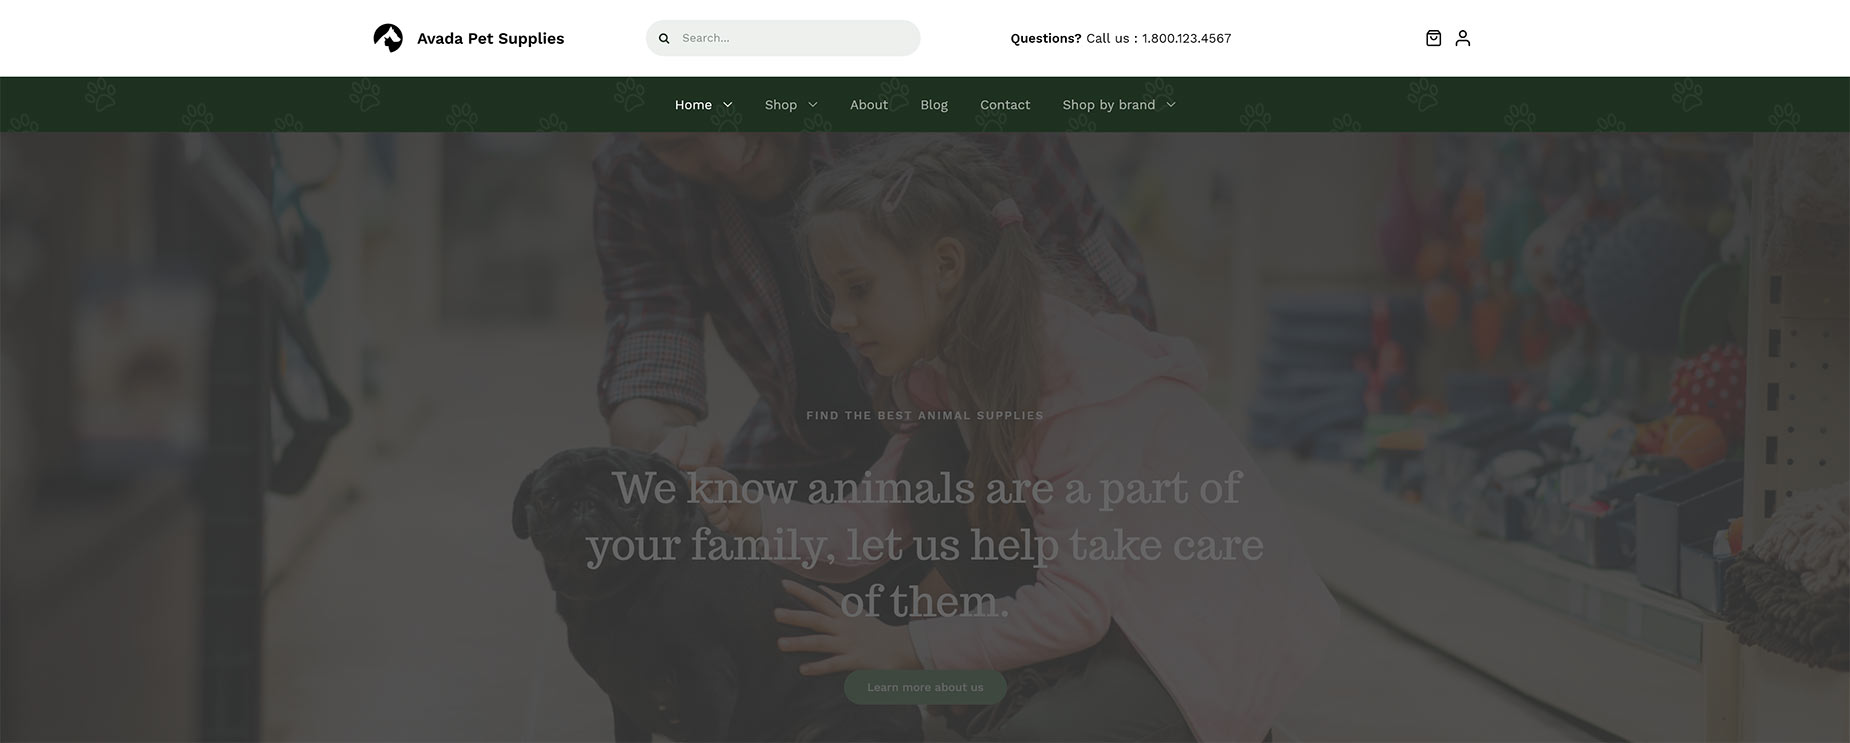
See below for an example of what this Header looks like in Desktop view, but to truly get a good feeling for all that’s going on in this Custom Header, it should be experienced on the live site, which you can access here.

Setting Conditions For A Conditional Layout
With a Global Layout, there are no Conditions. This is because it’s global, and any Layout Sections added to it will be used on every page. If, however, you wanted a Custom Header just on some pages of your site, you’d need to add a Header Layout Section to a Conditional Layout.
With any Conditional Layout, you need to set the conditions of the layout. This is best done last, because as soon as you set the conditions, the layout is active, and if you do this after first creating the Layout Section, but before editing it, the pages displayed that fit the conditions would be empty in those sections.
To add a condition, or conditions, simply mouse over the bottom of the Layout, and choose Add A Condition. This brings up the Layout Conditions Dialog. Please see Understanding Conditional Layouts for more information on Conditional Layouts.
In the example of the Pet Supplies Website, there is also a Conditional Custom Header, which only displays on one page, the Alternate Home Page. See below for the Conditions set to achieve that, and further below for an example of what that Header looks like on the Alternative Home page.

Conclusion
With Avada Layouts, creating a Custom Header is an unlimited possibility. Not only can you use the full power of Avada Builder to create almost any Header you can conceive of, and thanks to the power of Conditional Layouts, you can also show, or hide, the Header on any page, category, custom post type, or any combination of conditions you can think of. And with Avada Studio, adding a new Header is as easy as it gets.
Avada Layouts is a game changer in the true sense of the word. It enables such freedom of design, and gives such flexibility in deployment, that building Headers will simply never be the same again.


