How To Use Avada Forms
Last Update: April 19, 2024
Avada Forms is a powerful and fully integrated form solution for the Avada Website Builder, reducing the need for extra third-party plugins.
Using the full power of the Avada Form Builder, you can create your own forms using any of the Form Elements, as well as any other Design Elements you might like. And if you don’t want to build your forms from scratch, you can start with any one of the unique Avada Studio Prebuilt Forms, and then customize them to suit your needs.
With features like integration with HubSpot and Mailchimp, custom notifications and confirmation messages, five different submission types, conditional logic and even multi-step forms, Avada Forms will become an indispensable tool for you when building your sites. Read on for more details, and watch the video for a visual overview.
Getting Started
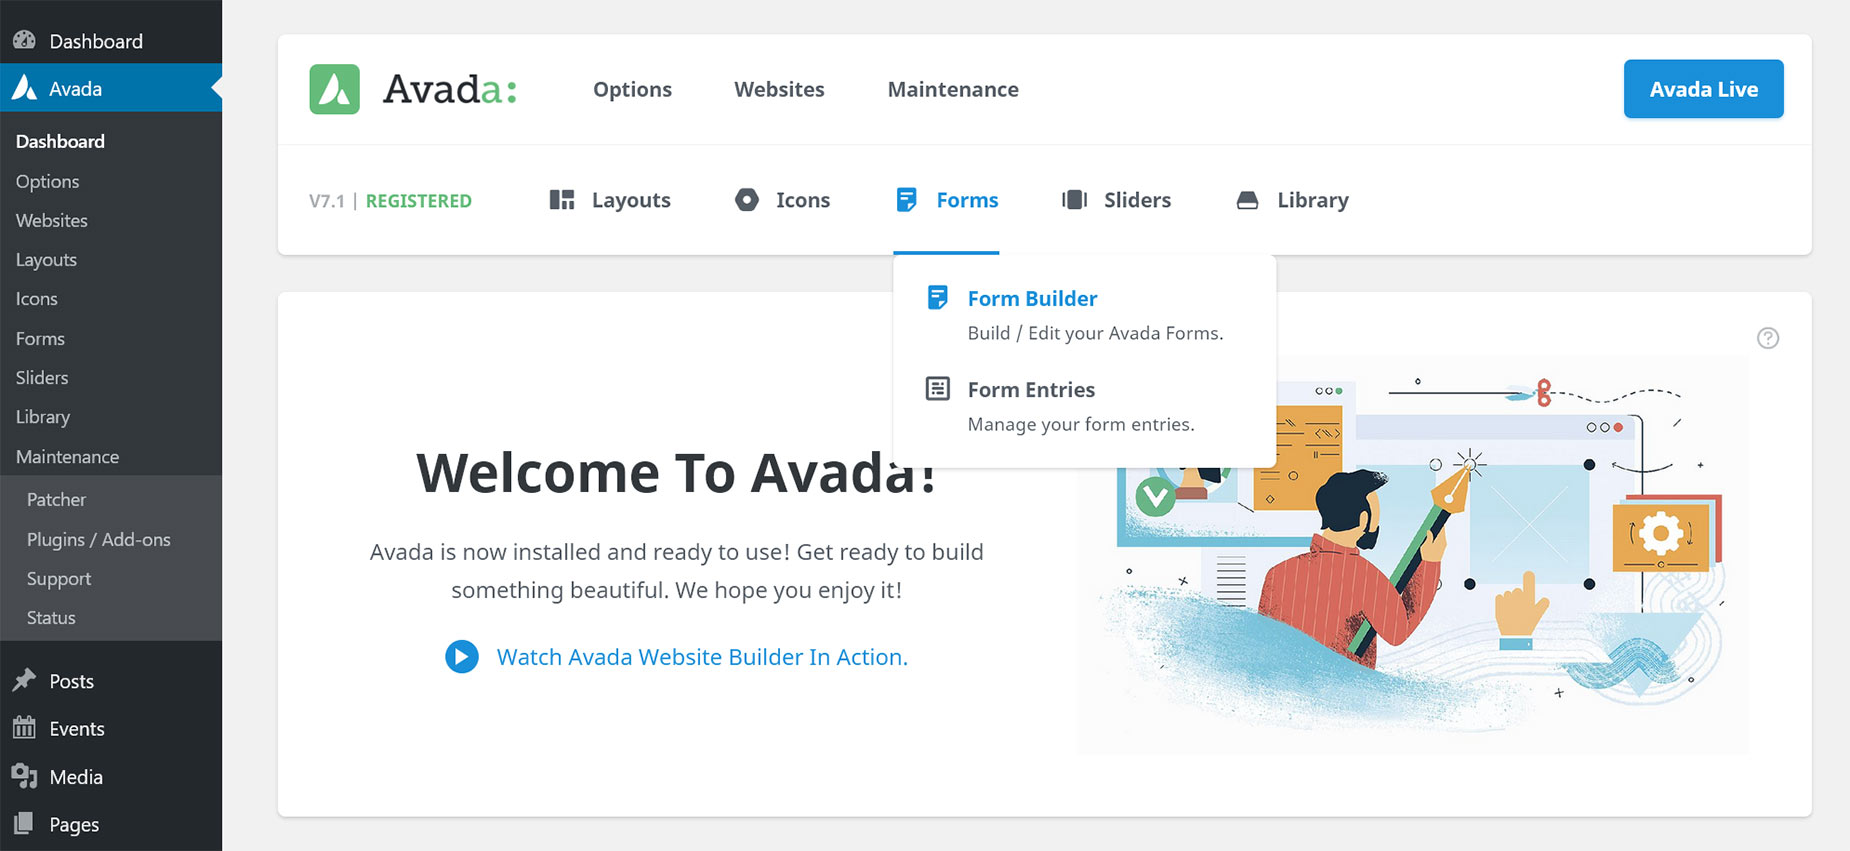
You can find Avada Forms on the Avada Dashboard. From the Forms menu, you can access both the Form Builder, and the Form Entries page. You can also find a link on the WordPress Dashboard sidebar, at Avada > Forms, which takes you to the Form Builder page, where you can add forms, and manage your existing forms.
Creating A Form
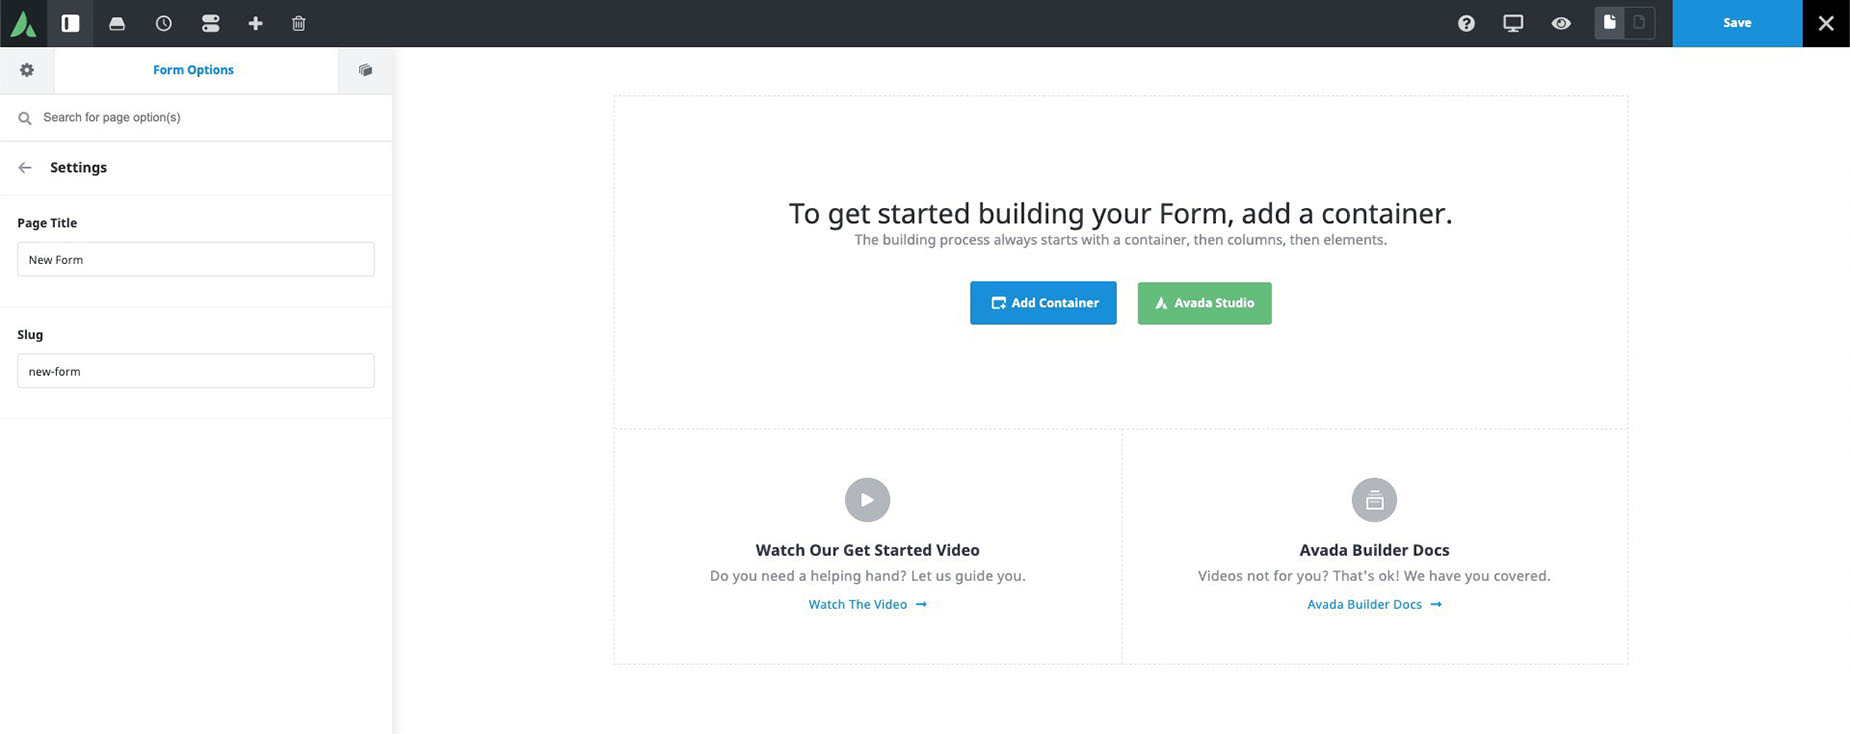
When you first create a form, you are redirected to the WordPress editor (unless you have Avada Builder Auto Activation enabled in the Avada Builder Options), from where you can choose which builder interface, with which to build your form. As always, you can work with either Avada Builder, the back-end builder, or Avada Live.
The first consideration is whether you want to build a custom form from scratch, or start with one of the Avada Studio prebuilt forms. On the starter page you will see an ‘Add Container’ button, and an ‘Avada Studio’ button. For more information on the full range of Prebuilt Forms, please see the How To Use Avada Studio documentation. But for the purposes of this tutorial, let’s assume you are starting with a blank form.
Form Design
One of the huge advantages in using Avada Forms is that by using Avada Builder, it’s now very easy to design your Form layout using any manner of column sizes and combinations, and any combination of Avada Form and Design Elements. With this method, form design is both powerful and easy.
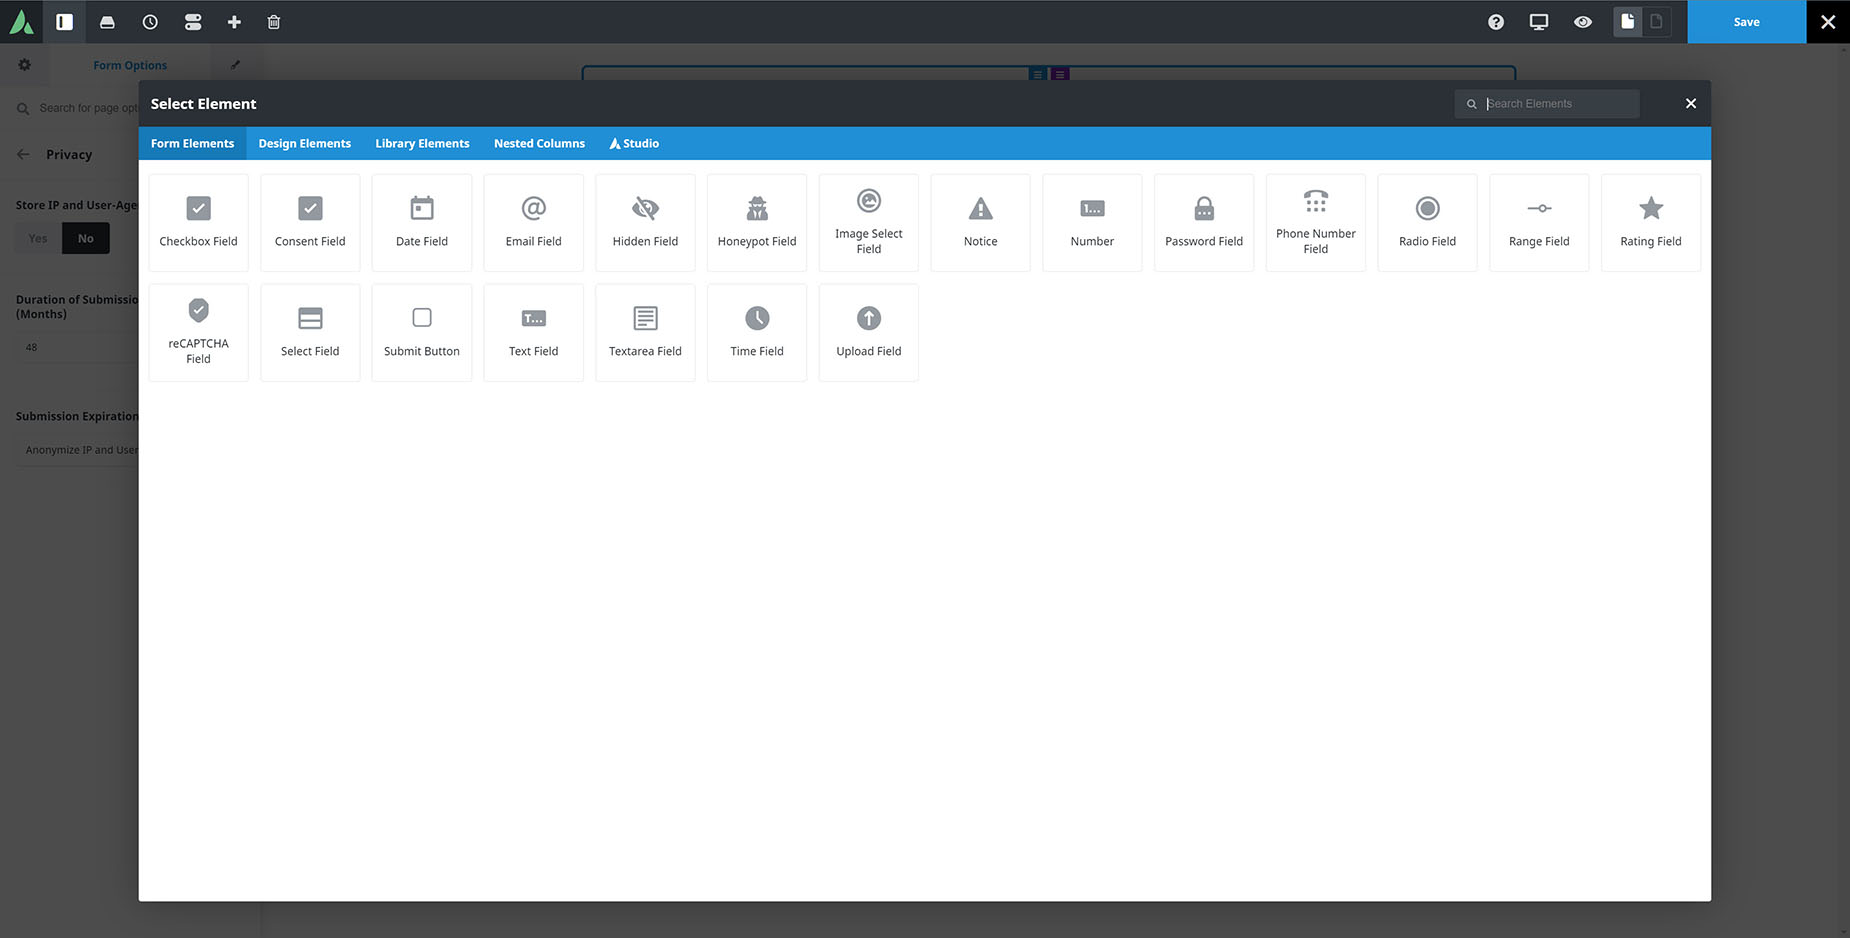
After adding a starting Container/Column combination from the Add Container button, you are now faced with a + button, to add your Elements. There are 21 Form Builder Elements, specifically created for the Avada Form Builder, and of course, you can use any of the other Avada Design Elements in your form design as well.
Form Options
Once you have designed and created your Form, you use the Form Options to customize its appearance, specify what happens when your form is submitted, set up notifications, and set privacy options. The Form Options are found in the same place as where the Avada Page Options are usually located. Check out the Avada Form Options doc, for a full rundown, but it is important to understand the difference between submission options and notifications.
Submission
Submission options control what happens when the form data is submitted. This is entirely optional. It can be a range of things, such as having the user redirected to a different URL, the form data being saved to the database, the sender details forwarded to MailChimp HubSpot to be added to a mailing list, or even having an Off Canvas open. These options are available when you use AJAX as the submission type. If you want to set up your own submissions, use the POST type instead.
Notifications
Notifications let you, or others, know about the form submission. You can set up a notification to have the email sent to a specific address, maybe your own, or a co-worker, or both, or you could also set up a notification that sends an auto-reply to the user. You can add CC and BC email notifications, and you can have an many notifications as you wish for each form you set up.
You can also use Form placeholders in your notifications to automatically populate the fields. See the Avada Forms Email Notification Placeholders doc for detailed information on that, and watch the How To Add An Auto Reply Email in Avada Forms video for an example of setting up a specific notification.
There are also Global Options for the default styling of your forms, Google reCAPTCHA, and HubSpot, found at Options > Forms. See the Avada Forms Global Options doc for more details on this.
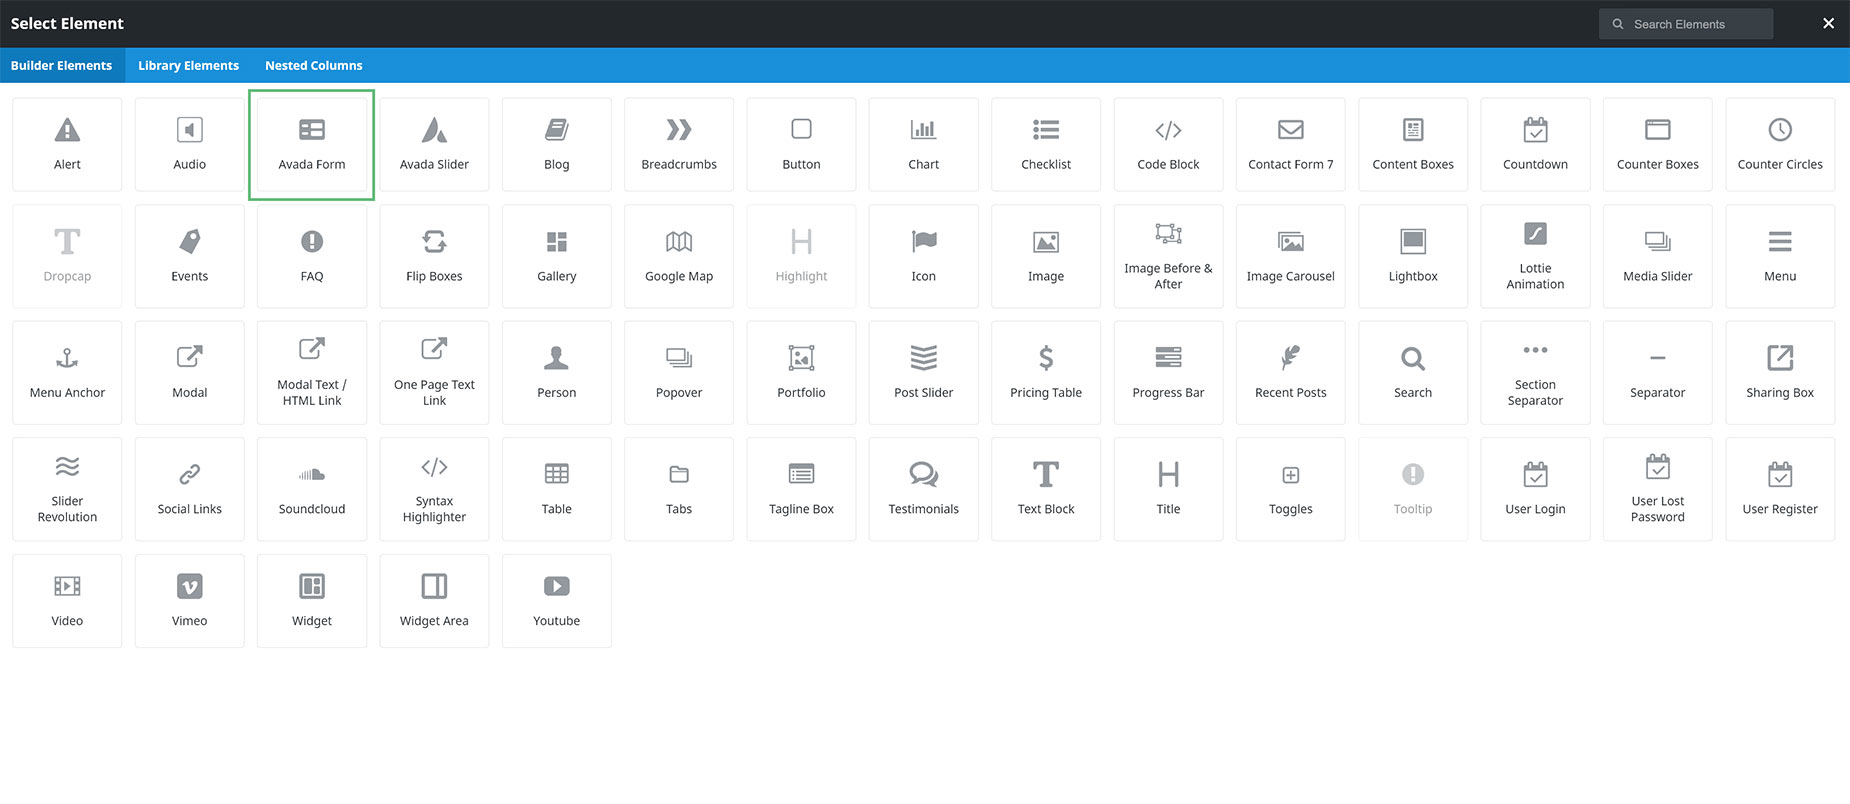
Adding Your Form To A Page With the Avada Form Element
Once you have completed your Form, it’s time to add it to a page. This is easily done with the Avada Form Element. With this simple helper Element, you can add any existing form anywhere you like into your page content. See the Avada Form Element doc for full details.