How To Use The Avada Builder Library
Last Update: April 17, 2024
The Avada Builder Library allows you to create, save, and quickly redeploy any of your Avada Builder content, from complete page templates, through to Avada Studio content, Containers, Columns, and individual Elements. The Library also allows you to import individual pages from the Avada Prebuilt Websites, and create Post Cards and Mega Menus.
The Avada Builder Library can be accessed from several places, depending on what you are trying to do. From the back end at Avada > Library, you can both create new and edit existing Library content.
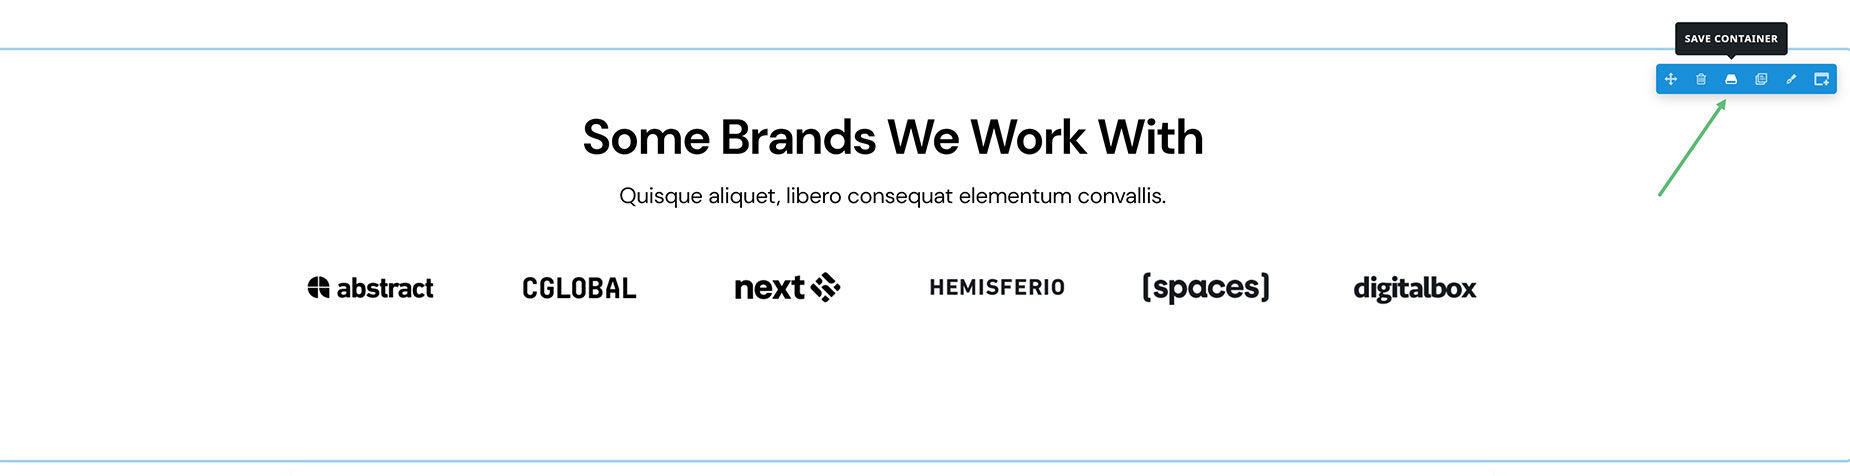
In the Avada Builder, there is a Save icon on Elements, Columns and Containers to save these items into the Library directly from the page content.
From the main Toolbar in the Avada Builder, you can access and deploy existing Library content, as well as Avada Studio content. Here, there are six main tabs – Websites, Templates, Containers, Columns, Elements, and Studio, organizing the various types of content into their own sections.
To learn more about each tab, please read the Library Window Tabs section in our article about Avada Builder’s Tools and Icons. Finally, when adding new Elements into your content, you will find a corresponding Library Tab, like the Library Containers Tab, with all saved Containers, and the Library Columns Tab, with all saved Columns etc.
Please read below to see how to take full advantage of the awesome Library in Avada Builder, and watch the video below for a visual overview.
What Can Be Saved To The Library
Avada Studio Content Blocks – From the Avada > Studio page, you can directly save any of the relevant content blocks directly to the Avada Builder Library. These are Studio Templates, Containers, Columns, Elements, and Post Cards. The other types of content blocks get saved to thier respective homes – Headers, Page Title Bars, Content Sections and Footers to the Layout Section page, Icons to the Icon Page, and Forms to the Form Builder page.
Custom Page Templates – When saving a full-page layout, it is saved as a Template. This includes all containers, columns and elements on the page and their settings, as well as the Page Template, any custom CSS set on the page via the Custom CSS icon on the Avada Builder, and any settings in the Avada Page Option panel.
This ensures that your page layout is intact and identical when you load it into another page. We’ve also added options that give you maximum flexibility on how to load the page template into a new or existing page. For more details, please read our Avada Builder Custom Page Templates article.
Containers – You can save individual Containers into the Library. This includes all columns and elements currently inside the Container, as well as their settings.
Columns – You can save individual Columns into the Library. This includes all elements currently inside it and their settings.
Elements – You can save individual Elements into the Library. This includes all its current settings, as well. Saved elements can be added back into the same sized columns, or larger or smaller ones as well.
How To Save Items To The Library
Apart from the Avada Studio Content, which is saved to the Library from the Avada > Studio page, most content is saved to the Library directly through the Avada Builder.
Step 1. Determine what section you’d like to save into the Library. Remember you can save an Element, a Column, a Container, or a full page layout.
Step 2. Click the appropriate ‘Save to Library’ icon, and the Library window will pop up, with the appropriate tab open. If you’re saving a Full-Page Layout, it will be saved under the ‘Templates’ tab. If you’re saving a Container, a Column, or an Element, it will be saved under the corresponding tab.
Step 3. Enter a custom name for your Library item. Use a descriptive name that will make it easy to find the item when redeploying. Once finished, click the ‘Save’ button, or hit Enter on your keyboard.
Step 4. When it has saved, the new Library item will appear in the Library contents. It is now available to be redeployed at any time. You can now close the Library window and return to your page.
Right Click Options
There are also right click options, including the ability to save items to the library. This can be used on Containers, Columns and Elements. Try it out, you’ll love it!
How To Load Items From The Library
Once you have saved any Templates, Containers, Columns and Elements to the Avada Builder Library, you can then easily load them anywhere, on any page, as many times as you’d like. Loading Containers, Columns and Elements not only loads the content itself, but also all its settings and options. This ensures that you load the exact same template you saved.
Let’s look at how you load the different types of Library content that is available.
Loading Custom Page Templates
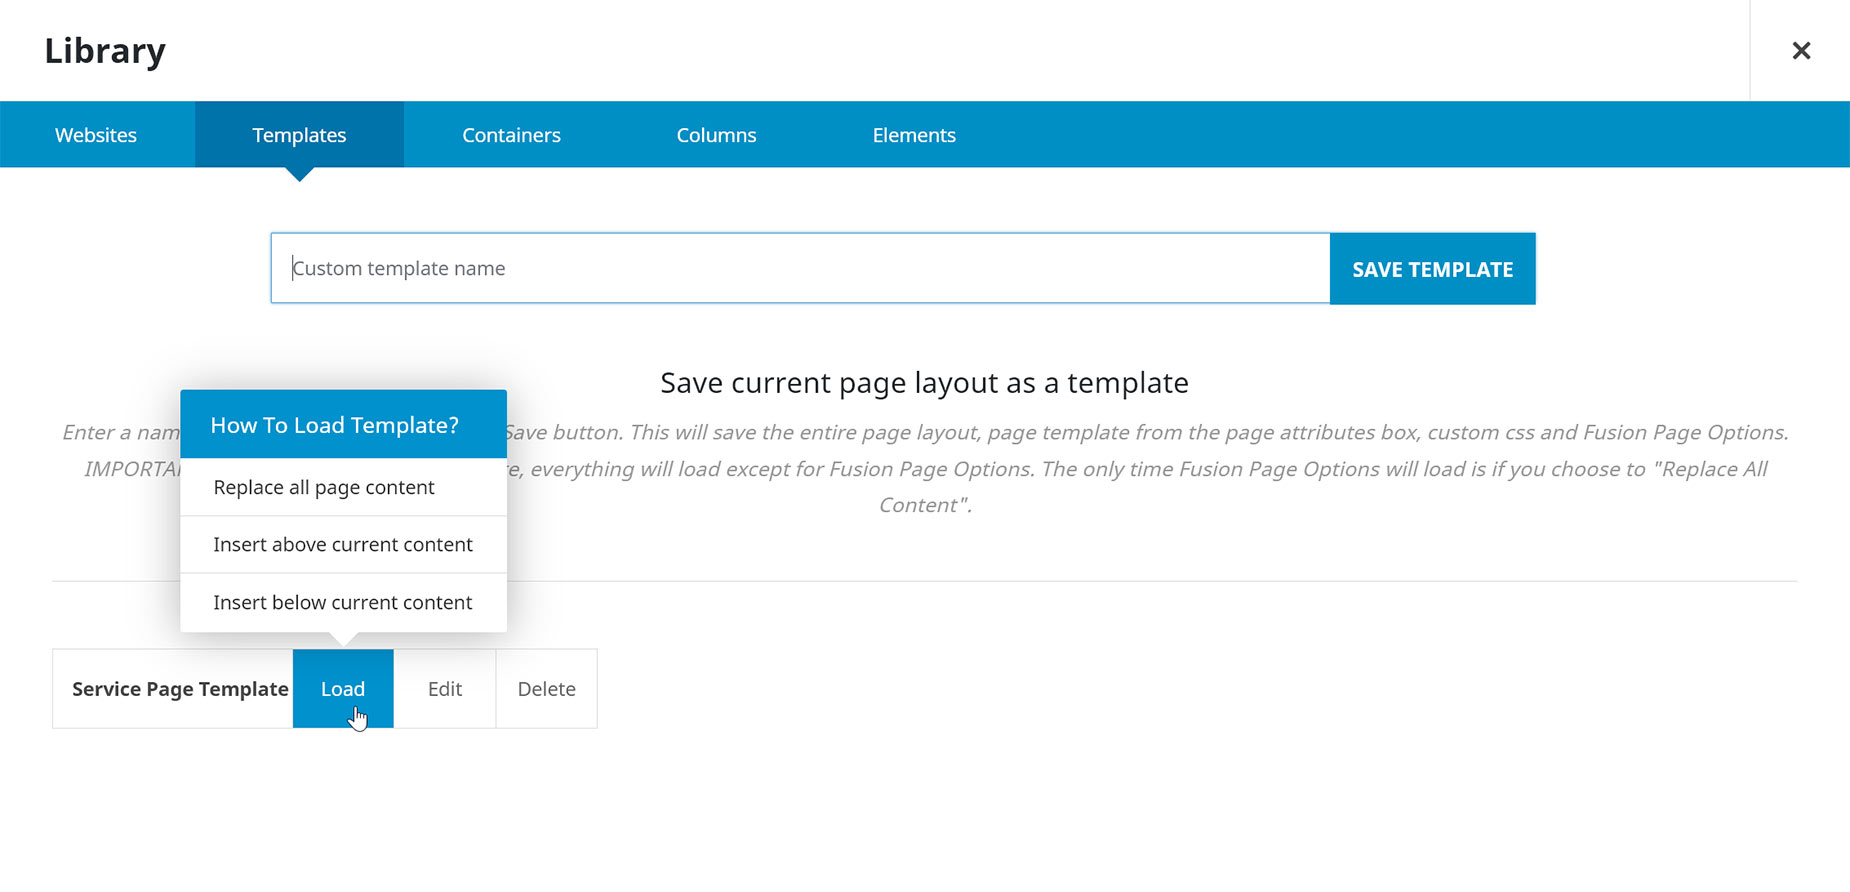
Previously saved full-page templates can be loaded into any page from the Avada Builder Library. You have three options of how to load this type of content, including Replace all page content, Insert above current content or Insert Below current content. This makes it easy to add type of content to both new pages and pre-existing pages.
To load a Page Template:
Step 1. Create a new page or edit an existing one.
Step 2. Click on the Library tab in the Avada Builder toolbar.
Step 3. Select the Templates tab.
Step 4. Choose your saved Page Template from the Library Content area.
Step 5. Mouse over Load (or the plus symbol in Avada live) and select the loading method you prefer.
The template content will now load into the page.
NB. This is the Avada Builder (back-end) interface here, but it’s almost identical in Avada Live.
Loading Containers
How to load a saved Container from the Avada Builder Library depends on which interface of the Builder you are using, and whether it is an empty page, or already has content.
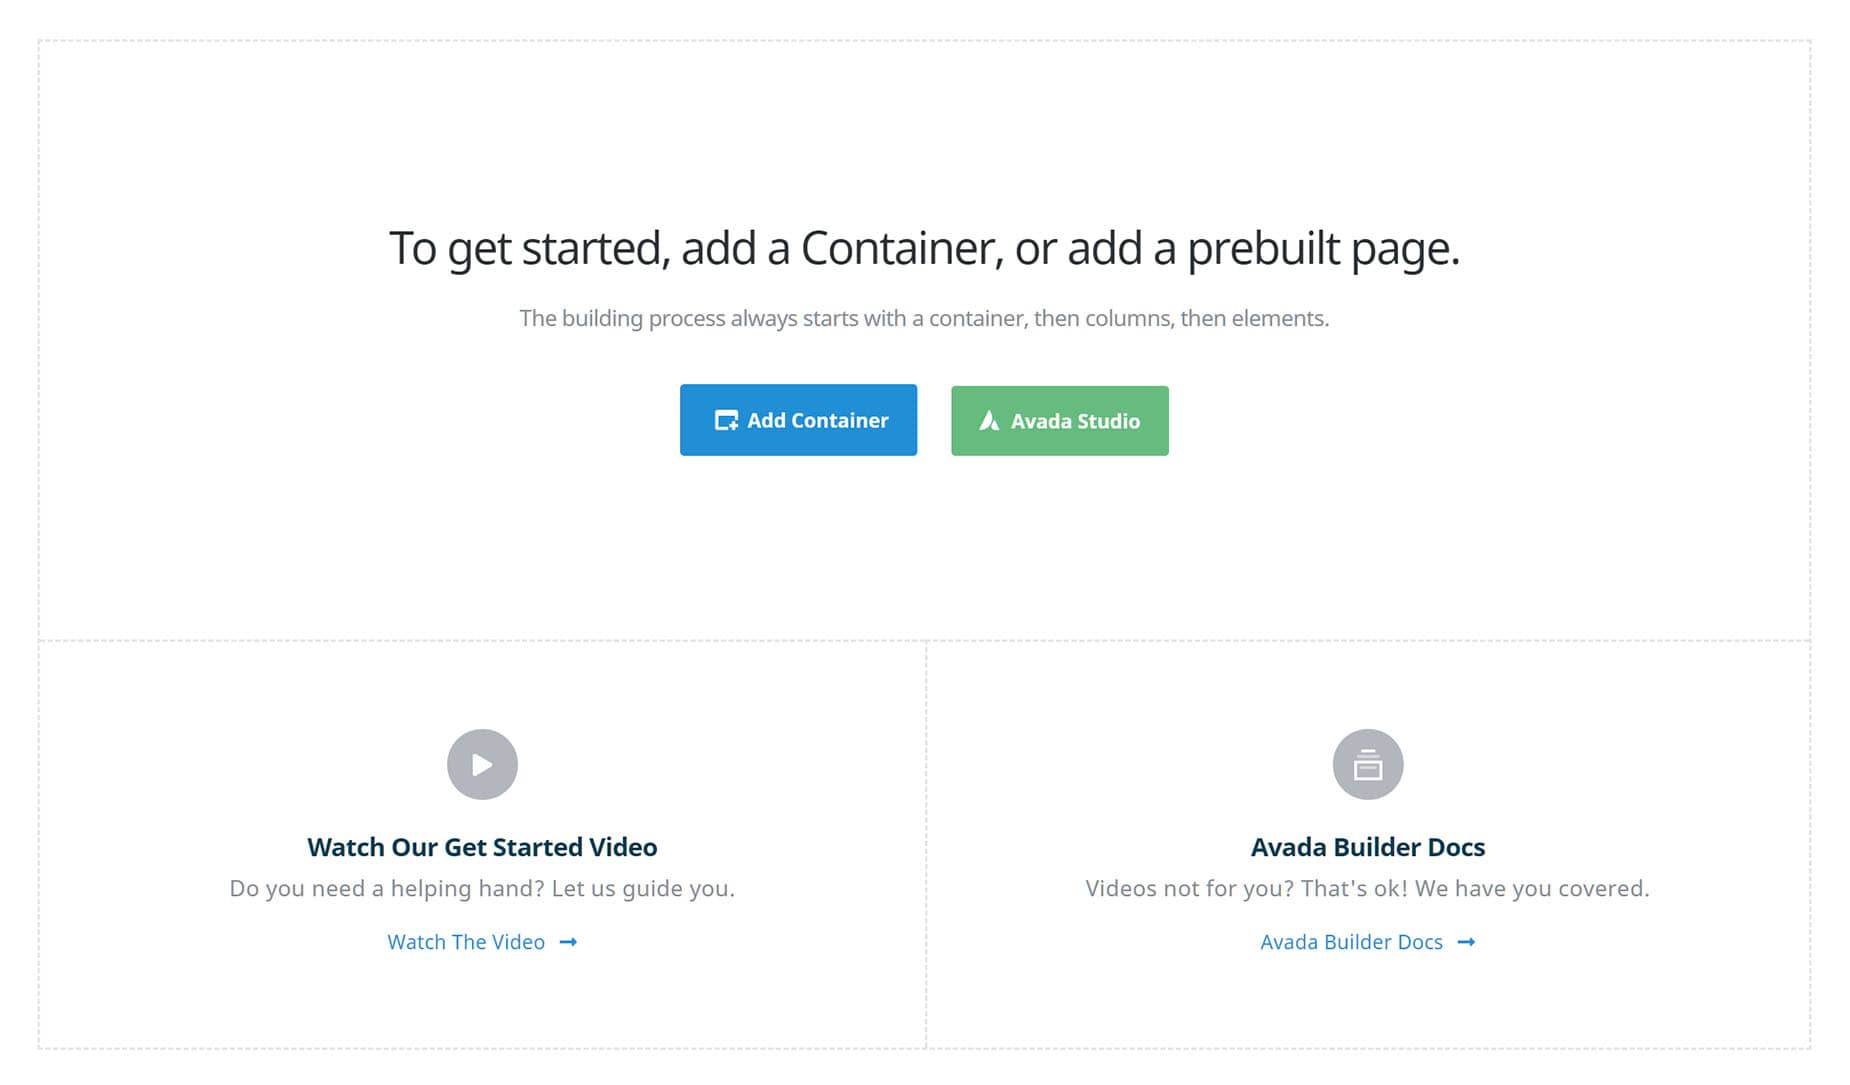
If it’s an empty page, there will be a + Container (Avada Builder), or Add Container link (Avada Live) on the starter page, and to access the saved Library containers, you simply click on this, switch to the Library tab and click on the saved container you wish to load.
If there is already content on the page, you just need to click on the Add Container icon, found in Avada Live on the Element Controls of the Container immediately preceding where you want the new container to go, or in Avada Builder with the + Container Icon can be located at the bottom right of every container. See images below.


Loading Columns
To load a saved column, you must first have a container to load it into.
Step 1 – Create or select a Container to load the Column into. You can add a blank Container or a pre-populated one, but the saved Column will load with the size it was saved with (1/1, 1/2, 1/3 etc.), so depending on any pre-existing Container content, the column might need to be resized or moved.
Step 2 – To access the Library, click on the Add Column Icon from the Element Controls of the preceding Column, or the empty Column added when you add a Container. In the back-end builder, click on the + Columns Icon at the bottom right of the Container (see images below).
Step 3 – On the Insert Columns dialogue that pops up, select the Library Columns Tab.
Step 4 – Click on the desired saved Column, and it will be inserted directly into your Container. Adjust as required.


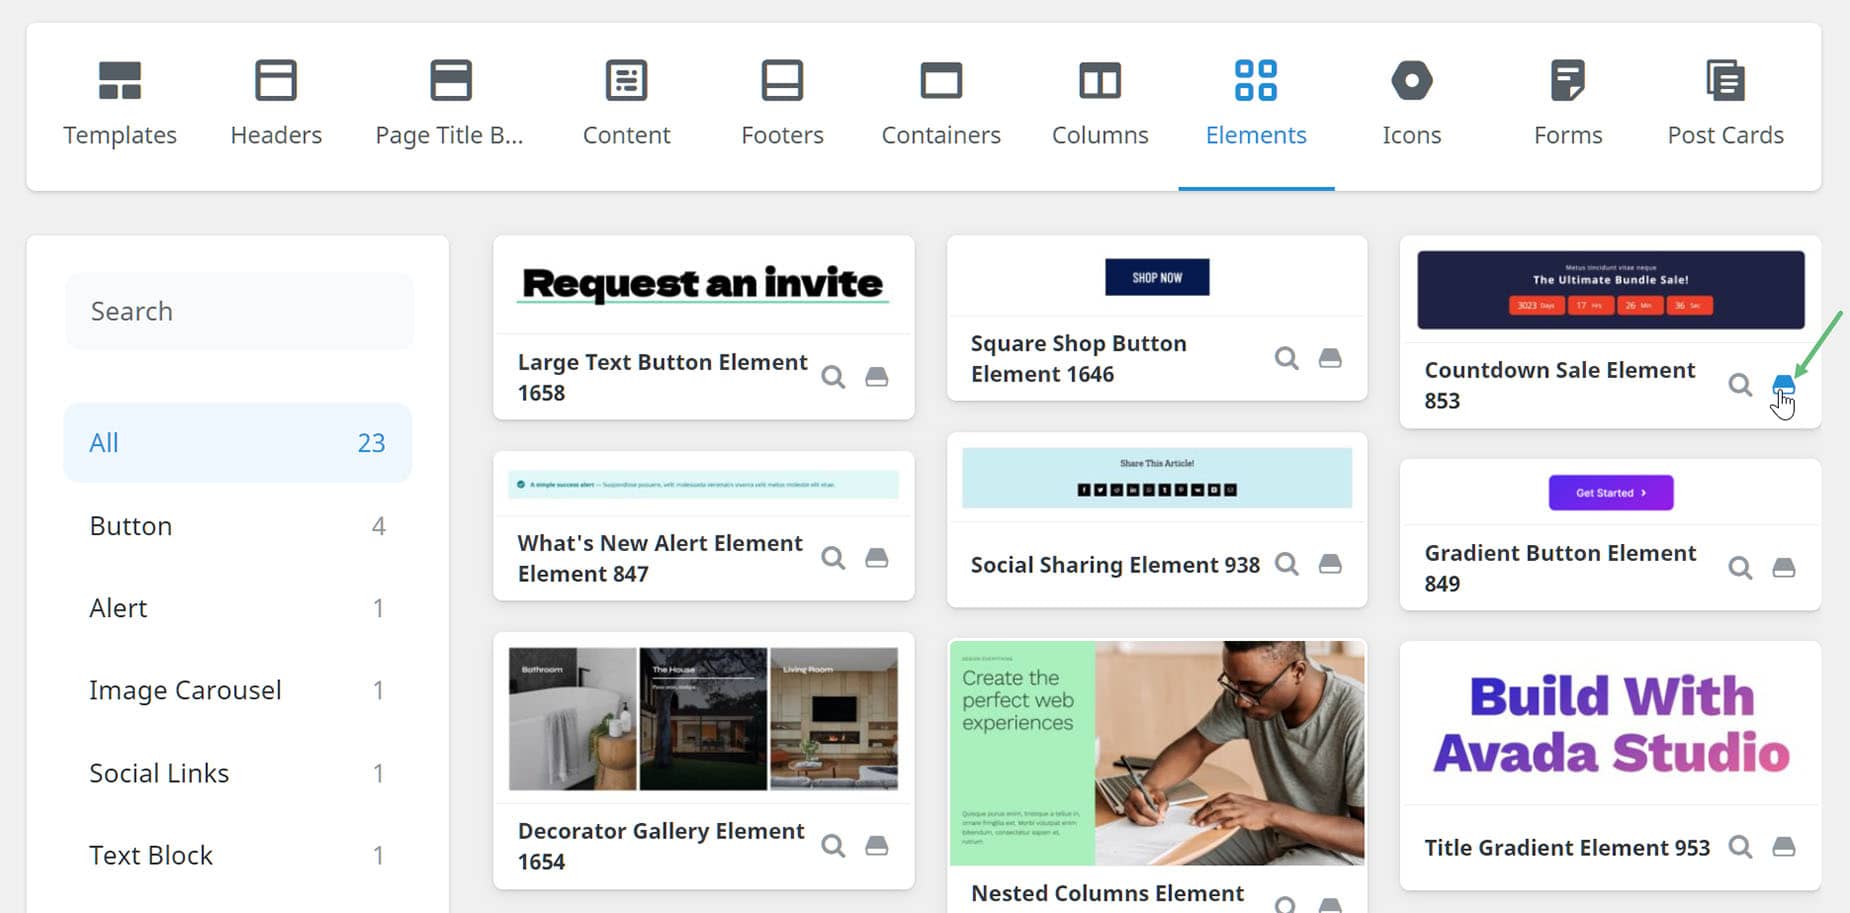
Loading Elements
To load a saved Element from the Library, in Avada Live, just click the + icon on the Element you wish to insert the saved Element after, and head to the Library Elements Tab. In Avada Builder, there is a + Element button at the bottom of every Column.

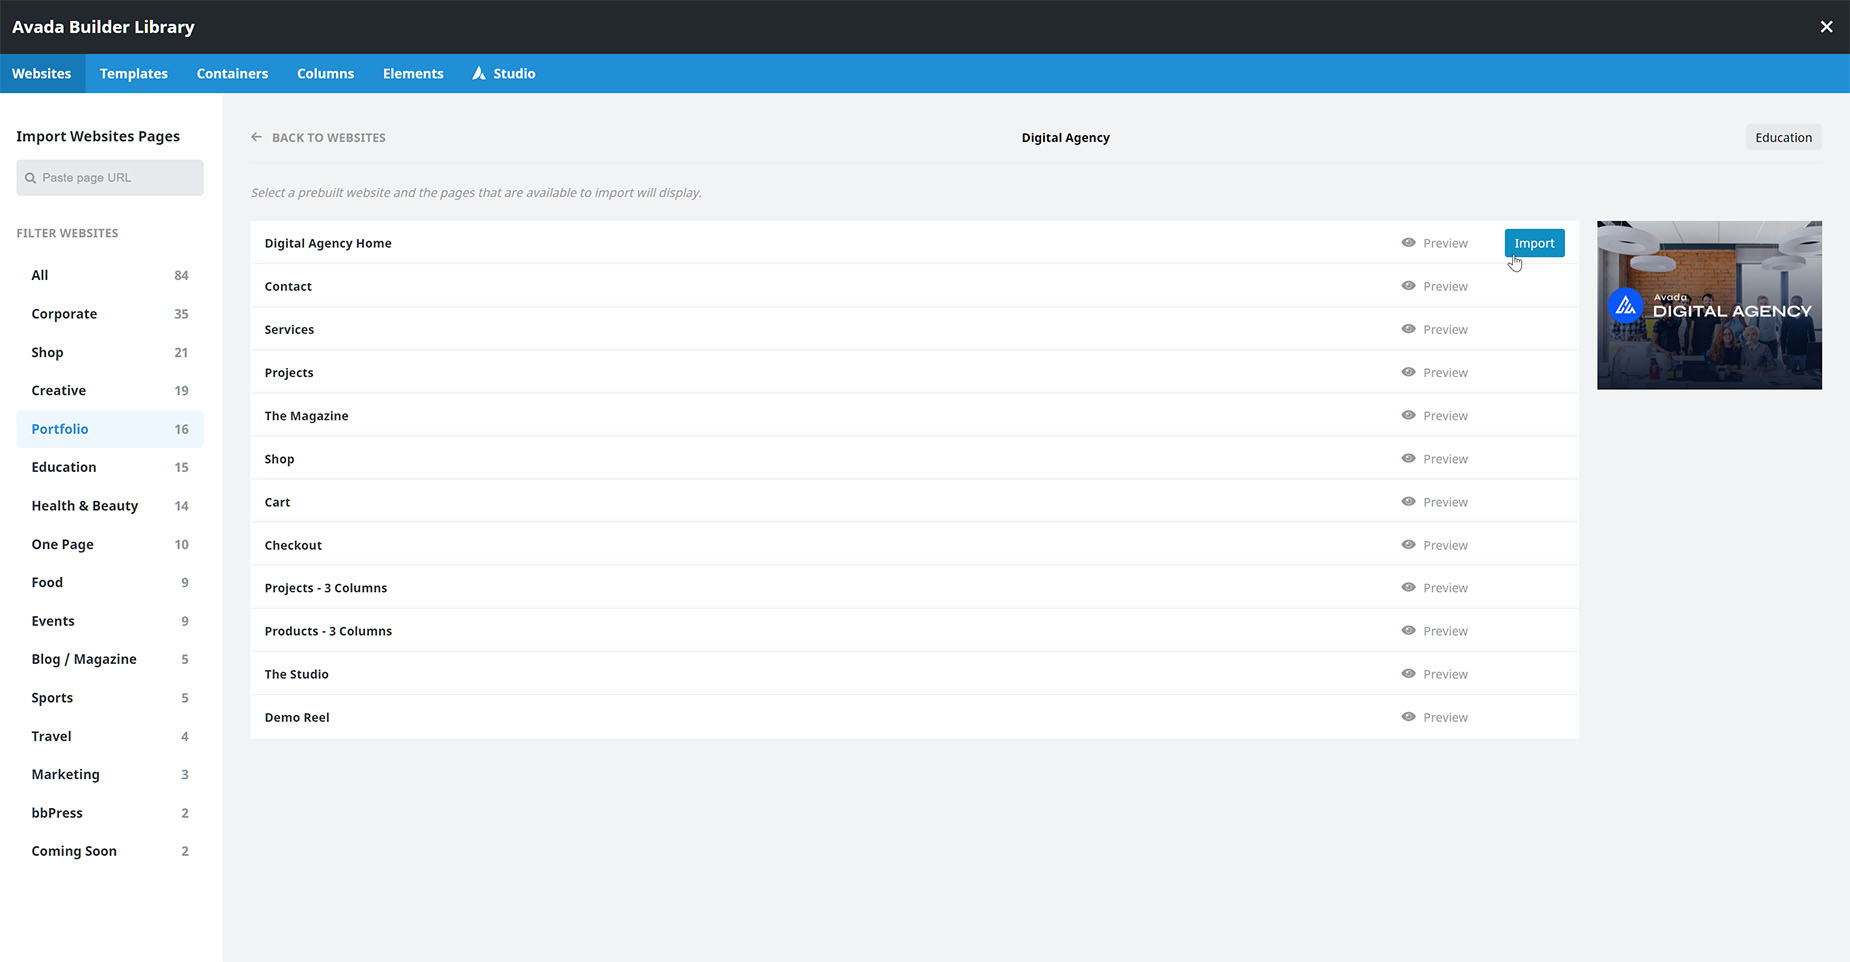
Loading Prebuilt Avada Website Pages
With Avada, you can also import individual pages from any of the Avada prebuilt websites and customize them as you like.
When you import a single website page, you are not only importing the page layout and content, but also the page template that was used, any Avada Page options enabled, and any images on the page. Global options, Sliders, and Custom Post Types are not imported.
To import a Prebuilt Website Page:
Step 1 – Create a new page or edit an existing one.
Step 2 – Click on the Library tab in the top bar of the Avada Builder.
Step 3 – Select the Websites tab.
Step 4 – Choose your preferred prebuilt website from the list.
Step 5 – Select the page you want to import.
Step 6 – Choose Import to import the page content.
The Avada Studio Library Tab
The Avada Builder Library also plays a significant role in the saving and deployment of Avada Studio content. Let’s look at saving content first.
From the Avada > Studio page, there is a Library icon on each content block. Here you can save any of your favorite content blocks directly to the Library. This places them in their relevant area of the Library. For example if you save a Container from that page, it will be saved in the Library under the Library Containers tab, so you can redeploy it any time you wish.
Global Elements
You can also save items to the Avada Builder Library as Global elements. This applies to Containers, Columns and Elements.
This allows you to set up one instance, that in turn can be deployed across your site, wherever you choose. Edit the Global Element once and see the changes populated across the entire site.
For more details on saving and deploying Global Elements, please read our Avada Builder Global Elements article.
Creating and Managing Avada Builder Library Assets
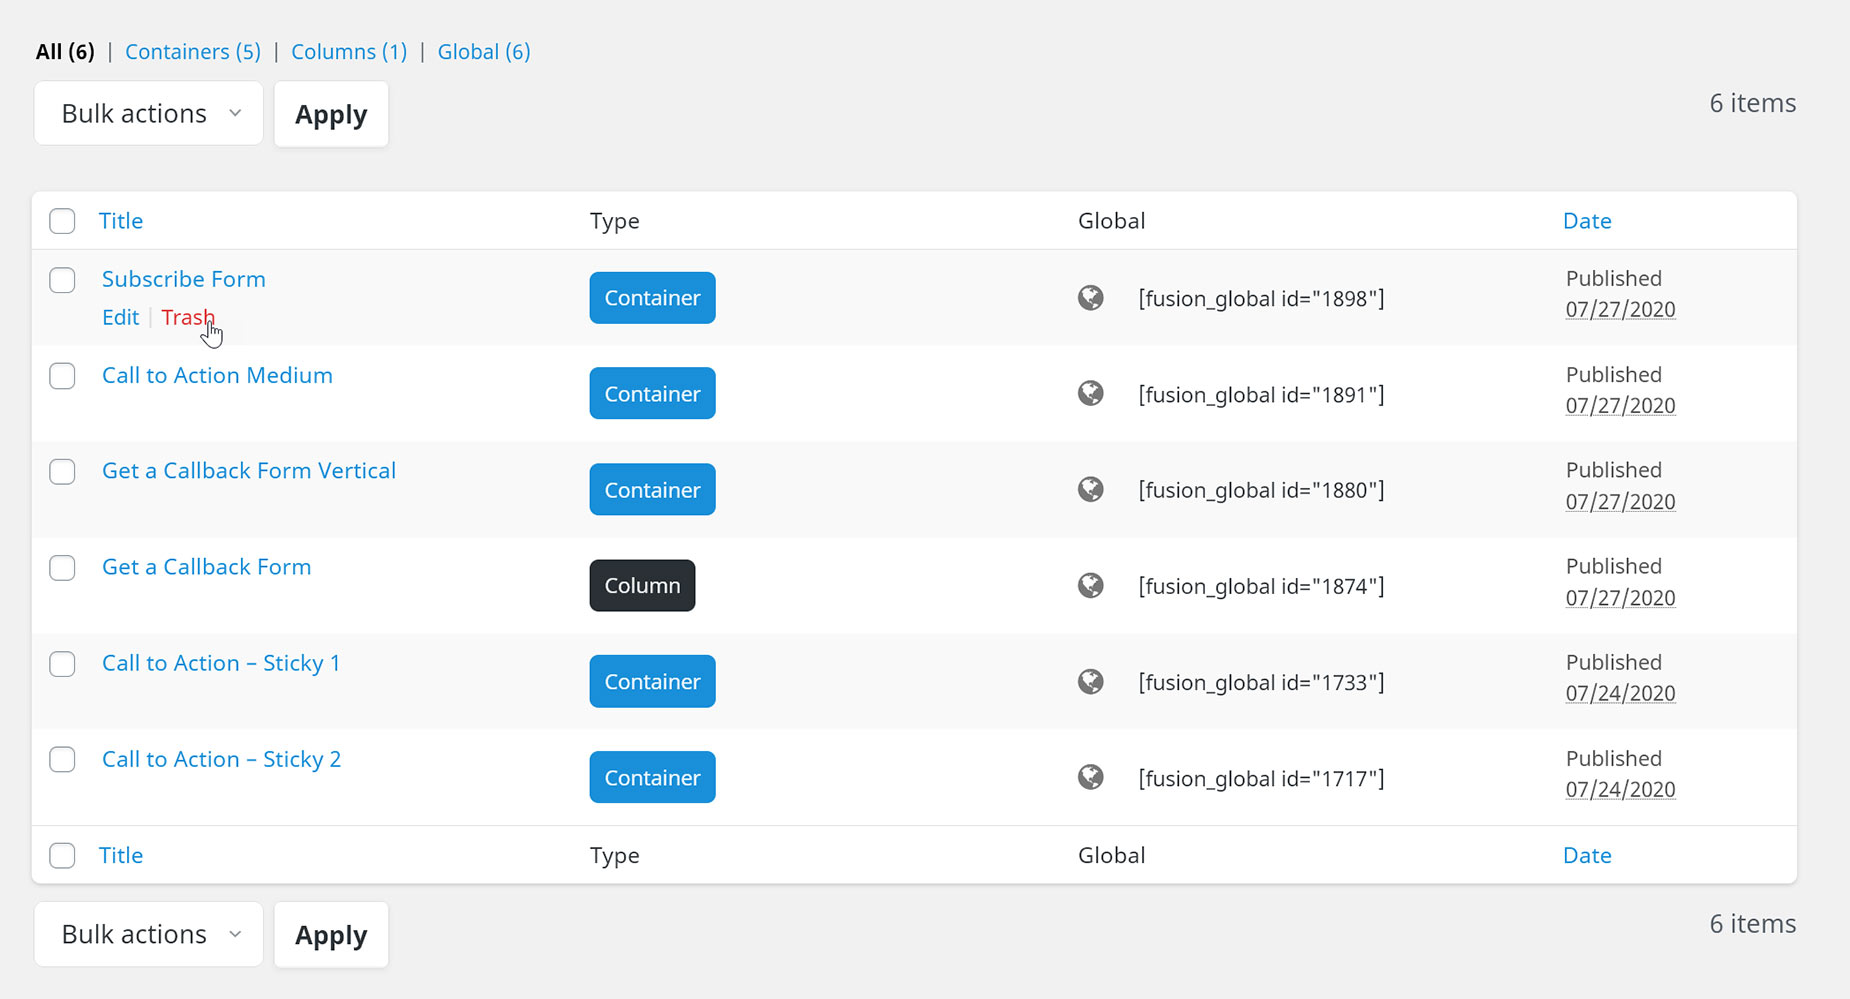
There is also an Avada Builder Library admin section, so you can easily create, manage, and edit your saved elements, columns, and containers, as well as your global elements, Post Cards and Mega Menus. You can edit them individually, delete them, and sort them per category type. The Library is found under Avada > Library, from the WordPress Dashboard.
Category types are labelled as Template, Container, Column, Element, and Post Card, and shown in different colors. Global items have the global icon. You can sort the items per category type or global items. The colored category types and the global icon can also be clicked to go to their corresponding list. For example, if you click Column label, it will go to the list of all your saved columns.
How To Create New Library Elements
You can save items to the Library when building page content, but you can also create Library Elements directly from the Library.
Step 1 – Select the type of Library Element you wish to create from the dropdown menu.
Step 2 – Give your Element a name and click Create Library Element.
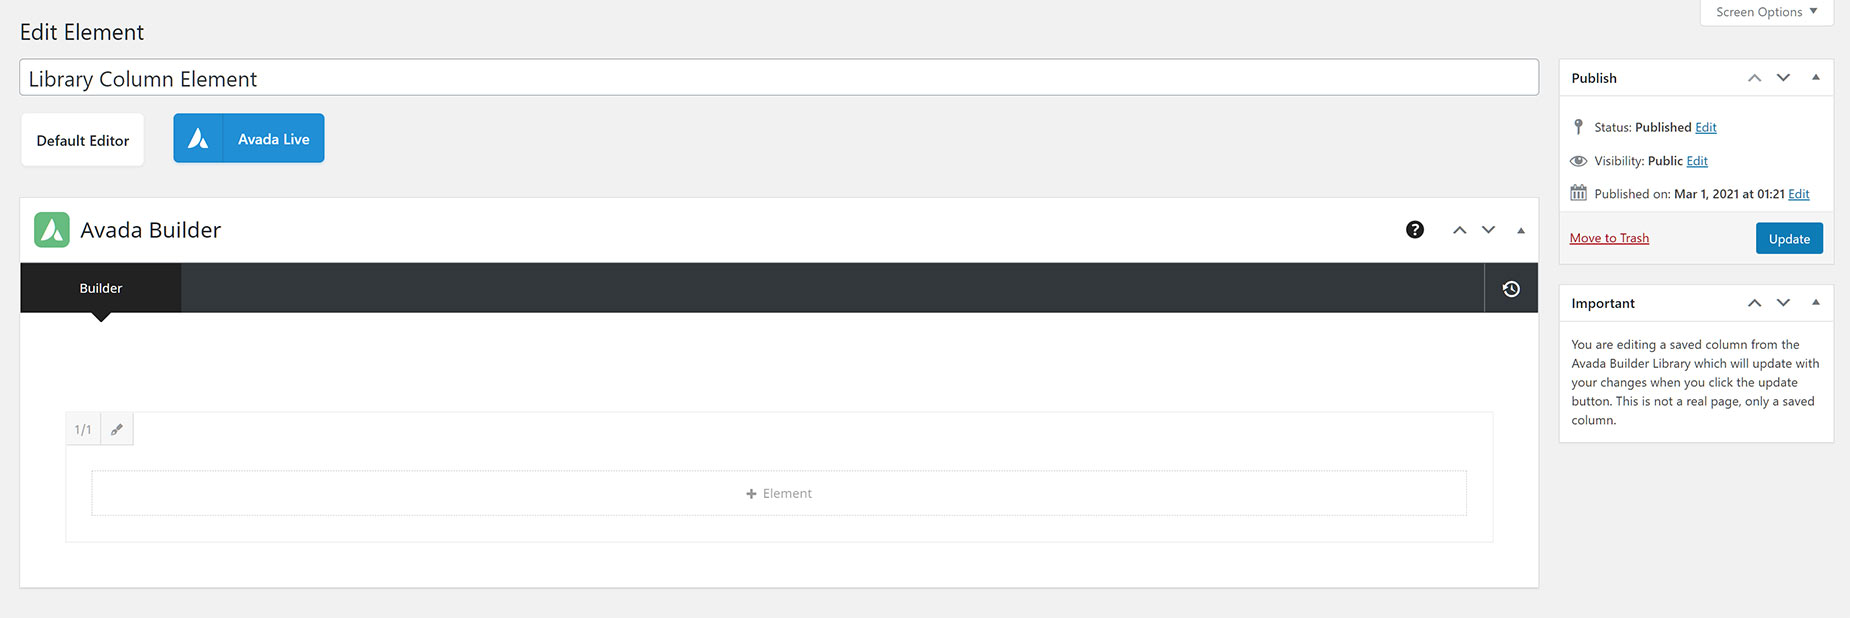
Step 3 – You will be directed to a basic editor that looks like a page. Here you can add content. Depending on the Element type, there will be different options. Note: This is not a real page, only a saved template, post card, element, column, or container.
Step 4 – Design and build your Element using the Avada Builder Elements.
Step 5 – When you are finished, click the Update button.
How To Edit Saved Elements
Step 1 – When you hover over the title of the item in the Library you wish to edit; an Edit and Trash links will appear.
Step 2 – Click the Edit link.
Step 3 – You will be sent to the saved element, column, or container which looks like a page. Here you can edit the element, column, or container. View screenshot below. Note: This is not a real page, only a saved element, column, or container.
Step 4 – Make the necessary changes.
Step 5 – When you are finished, click the Update button.
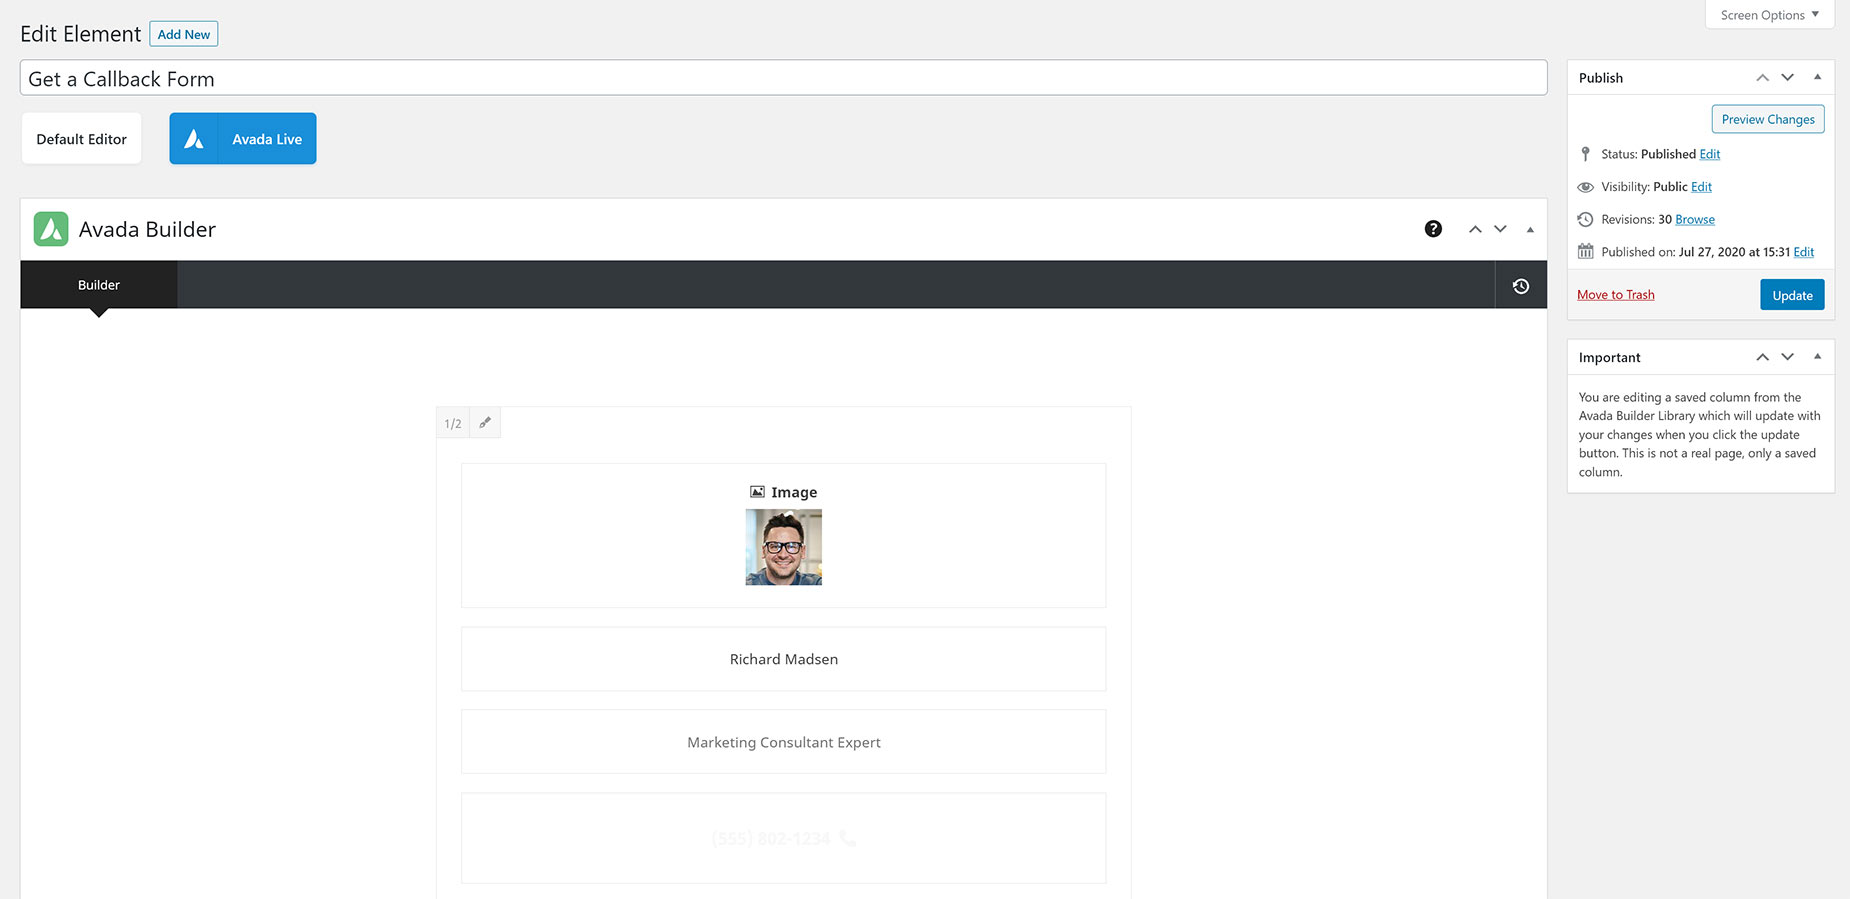
You will notice that the Library UI is slightly different for element, column, and container. Elements will only have the edit function, as you cannot add anything with it. Columns will have the edit function for the column, as well as edit, clone, and delete options for the element, and an option to add a new element. Containers will have the full options (e.g. add, edit, clone, and delete column; add, edit, clone, and delete element).
We have also added Right Click Options in the Element Library in Avada 5.6.1, so you can easily manage your saved global and non-global elements.
How To Delete Saved Elements
Step 1 – When you hover over the title of the item you wish to edit; an Edit and Trash links will appear.
Step 2 – Click Trash link. You can also choose to delete saved items in bulk by checking the check boxes, clicking the Bulk Actions dropdown menu and choosing ‘Move to Trash’, then clicking the Apply button. View screenshot below.
Step 3 – The item will be moved to the Trash list. If you hover over the item in the Trash, you can choose to restore it or delete it permanently.