Share
WordPress makes it easy for multiple users to work together on a single website, making it a great choice for running a multi-author blog, or other collaborative projects. So if you want to take advantage of this feature and let additional users publish content, or manage other aspects of your website, then they will each need their own user account.
Giving other users access to the dashboard of your website might sound risky. This is partly due to the control they will now have over the settings and other features that govern your website.
Thankfully though, to help overcome this issue, WordPress includes a number of different user roles that enable you to safely grant users access to the back end of your site. Depending on the role assigned, these users can then be restricted from making too many – or any – changes to your website.
As part of the process of allowing multiple users to have access to your website, the WordPress software also makes it very easy for you to differentiate the separate accounts from each other. This in turn makes it easy for your readers to quickly see who has written each of the individual articles on your site.
In this article in the getting started with WordPress series, we will take a look at the different users roles WordPress offers to help you keep your website secure, while still allowing others to join your team. We will also cover how you can set up your WordPress website user profile and publish an author biography at the end of each post.
Creating and Managing Your Own User Profile
Every user with an account on a WordPress website gets their own profile. By default, on a fresh installation of WordPress, that user profile can include the following details, some of which are required, while others are optional:
However, it’s possible to add more fields to the user profile screen, allowing you to store additional information about yourself and other users. This could include links to social media profiles, and other information such as customer details that you might find on an ecommerce store built with WordPress.
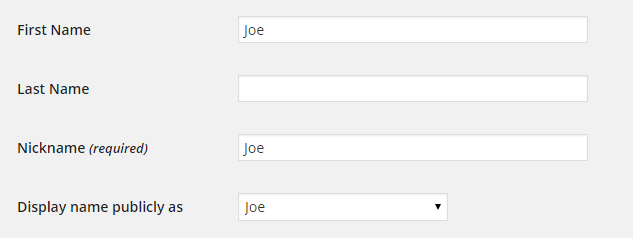
When it comes to creating your user profile, it’s important to understand where the information that is held as part of your profile is displayed publicly on your website to your visitors.
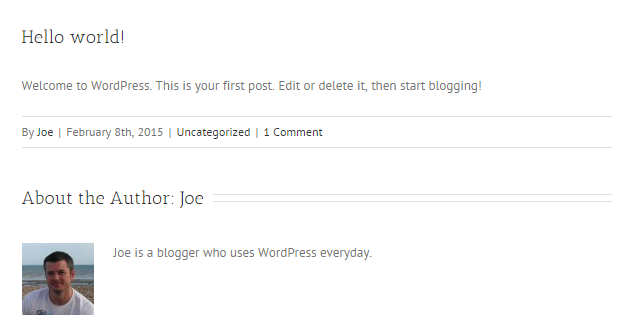
Depending on the WordPress theme you are using, the chosen display name is likely to be included with each post that is published by that user. Therefore it’s a good idea to ensure your profile is displaying the version of your name that meets your preferences. For example, this could be a nickname or abbreviation.
Many popular WordPress themes also publish the user biography after each post, so again, make sure you complete this part of your profile to help your readers find out more about you.

If you would like to display a profile picture, one option is to create a free account with the Gravatar service and upload a photo. That photo will then be associated with your email address and displayed in certain situations online.
Now that we’ve covered how to populate your own user profile on your WordPress website, it’s time to take a look at the user roles that are available in WordPress, as well as how you can go about creating additional user accounts and manage them successfully.
Understanding WordPress User Roles
By default WordPress includes five user roles. However, it’s possible to create your own custom roles, and some themes and plugins you might be using could also add new user roles to your website.
However, a new WordPress installation will generally have the following user roles:
There is also a Super Admin role which is present on WordPress Multisite networks, however a standard WordPress website won’t have this role. For more detailed information on exactly what each user role can do, read the official WordPress documentation on this topic.
If you are the site owner or manager of your website, then you will most likely be using WordPress in the admin role. A website have multiple users with the same role, so there could be more than one administrator of your website.
Adding New User Accounts
When it comes to creating new user accounts for your WordPress website, the process is very straightforward. However, for security reasons, it’s well worth spending some time to establish which level of access a new user will require.
It’s always better to be overly cautious, as opposed to giving away the virtual keys to your website. If you are adding a new user so that they can write posts, then the contributor or author role should suffice. If you are working with a developer or support provider, then they will more than likely need the administrator role in order to access the settings and theme files of your website.
With that in mind, once you are ready to create a new user account, login to your WordPress admin area (http://yourdomain.com/wp-login.php) and then navigate to the Add New item under the User menu on the admin sidebar.

From the Add New User screen you can enter the details for the new account you’d like to create. The fields you must complete are marked as required and include the username, email, and password fields.
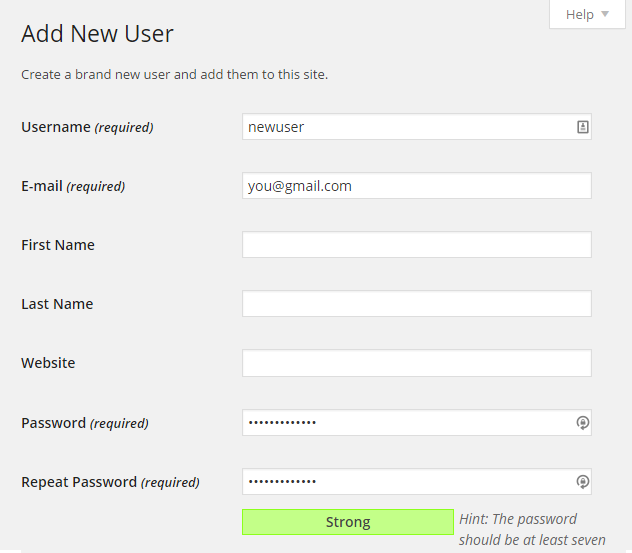
Finally you must select a user role for the new account and decide whether to send the password to the new user via email. Sending the account details via email is a good idea as it gives the new user a notification that they can now login to your website. The notification email also serves as a record of their account details for future reference.
Once you’ve created a new user account, that user can then login and add the additional details to their account, if you have not done so already.
Managing the User Accounts on Your WordPress Website
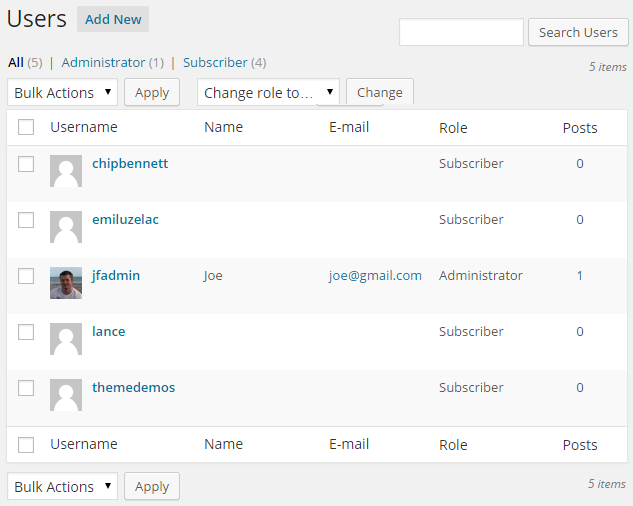
Users with the administrator role can manage the other user accounts on a WordPress website. This takes place from the All Users screen, found under the Users menu item.
From the User screen you can quickly delete accounts or change the user roles individually or in bulk, as well as select an account to edit in more detail.
Conclusion
Populating your WordPress user account with relevant information, such as a short biography and links to your other websites or social media profiles can be a great way to forge a better connection with your readers. By sharing a little bit about yourself, your readers can learn more about the person behind the article they are reading.
When it comes to creating additional user accounts, even if you are the only person working on your WordPress website now, there may come a time in the future when you may want to bring additional members on to your team. This could include content writers, designers, support staff, or developers.
As these users will each have their own account for accessing the back end of your website, it’s important that you understand the basics of WordPress user roles and know which roles to assign to new user accounts. Giving other users too much access to the inner workings of your website can have disastrous consequences should those accounts fall into the wrong hands.
However, by following the above advice you can ensure that security standards are maintained on your website, despite more users having access.
If you have any questions about user profiles, accounts, and roles in WordPress or using Avada with WordPress, please leave a comment below.