Share
The flexibility and power of WordPress has increased dramatically over the years. What began as a humble blogging solution is now powering millions of websites large and small worldwide, and forms the backbone of an entire industry.
That increase in reach and functionality comes at something of a cost however – the platform is naturally database intensive and performance can be an issue.
Regardless of site size, implementing some sort of caching solution is a sensible way of mitigating this risk on any standard WordPress install, and becomes ever more important the more traffic you have.
In this article we’ll run the rule over W3 Total Cache, one of the most popular WordPress caching solutions around. We’ll provide some background on its use and a simple overview of getting it up and running.
Let’s start though with a brief look at the subject of caching itself.
What Is Caching and Why Is It Necessary?
To put it in simple terms, caching is the process of storing data from existing requests to re-use for subsequent requests.
Rather than requesting more or less the same information over and over again in order to display a page, caching stores data that has already been asked for and serves it up instantly.
The overall result is faster page load times and an improved user experience. In terms of WordPress, caching can take place in two locations:
Caching is a crucial part of overall WordPress optimization, and stands to significantly improve the performance and speed of your site.
With site speed a considerable factor in SEO performance and user satisfaction, it’s imperative that you do as much as you can to increase it.
Background on W3 Total Cache
W3 Total Cache is the brainchild of Mashable’s Senior Technical Advisor Frederick Townes.
Describing itself as a “web performance optimization framework”, the plugin promises reduced server load, 10x improvements in overall site performance and transparent CDN integration (a topic we’ll be exploring further later in this series).
W3 Total Cache is a free plugin, though extra paid assistance is available at the W3Edge site of its creator. There is also a W3 Total Cache Pro option available with advanced functionality on a $99 per year subscription basis.
The free version advertises itself as being able to integrate seamlessly with your current theme and fit snugly into the vast majority of hosting setups.
A current install base of nearly five million users suggests it has largely made good on those promises to date. W3 Total Cache has also been trusted by a large range of blue-chip sites since its initial launch.
Along with Townes’ own work for Mashable, high-profile sites such as as yoast.com, ilovetypography.com, smashingmagazine.com and mattcutts.com have all plumped for this plugin as their caching solution in the past.
With the introductions out of the way, let’s move on to getting it set up.
Installation
W3 Total Cache requires a minimum of WordPress 2.8 and PHP5 or greater. It should also be compatible with the vast majority of server-side setups as detailed on the requirements section of its site:
We are aware of no incompatibilities with apache 1.3+, nginx 0.7+, , IIS 5+ or litespeed 4.0.2+. If there’s a web server you feel we should be actively testing (e.g. lighttpd), we’re interested in hearing.
The installation itself is a snap. Download from the plugin directory page or search for W3 Total Cache from within WordPress – you should see By Frederick Townes in the description – and install and activate as you would with any other plugin.
You should be able to see a new Performance tab in the side menu post-installation. Clicking here will take you into the W3 Total Cache dashboard.

It’s a slightly intimidating affair on first glance, but we’ll step through the basics shortly. The key point to bear in mind is that you switch different functionality on and off via the Performance > General Settings menu option and then fine-tune via individual modules. Let’s move on to the General Settings screen now.
General Settings
The General Settings menu option is your key to deciding which modules of W3 Total Cache’s functionality you want to enable. For this beginner’s overview, we will concentrate on a stripped down subset that can be put to use on even the simplest of site setups.
Preview Mode
The first point to note in the Performance > General Settings panel is the Preview Mode option. This gives you a simple way of testing configuration changes before they impact on your users. Switch to Enabled to safely test changes prior to deploying in a live environment.

Page Cache
Our next option is Page Cache. Enabling this will store a static version of frequently requested pages on your server that can be pushed to users immediately, rather than WordPress having to make a round-trip to the database.

It’s recommended that you enable this option and set the page cache method to Disk: Enhanced. This should perform reasonably on even the most basic of hosting setups.
Minify
The Minify module controls whether HTML, CSS and Javascript files are compressed and minified. Minification is simply the process of removing all unnecessary data from the code without affecting performance. This is something of a minefield when it comes to configuration as there a lot of moving parts that could potentially interact negatively with each other.
For the purposes of this tutorial, we suggest simply giving the default settings a quick test in preview mode to see if anything obviously breaks on your site. We’ll go into the intricacies of this module in greater depth in a future tutorial.

Browser Cache
The final option we’ll look at in this overview is the Browser Cache module. This is where you can configure how the end-user’s browser should handle your pages and page elements, and how much information should be cached on the client side.
Ensure this module is activated when you first set up W3 Total Cache. It’s an easy win in terms of performance and reducing the load on your server.

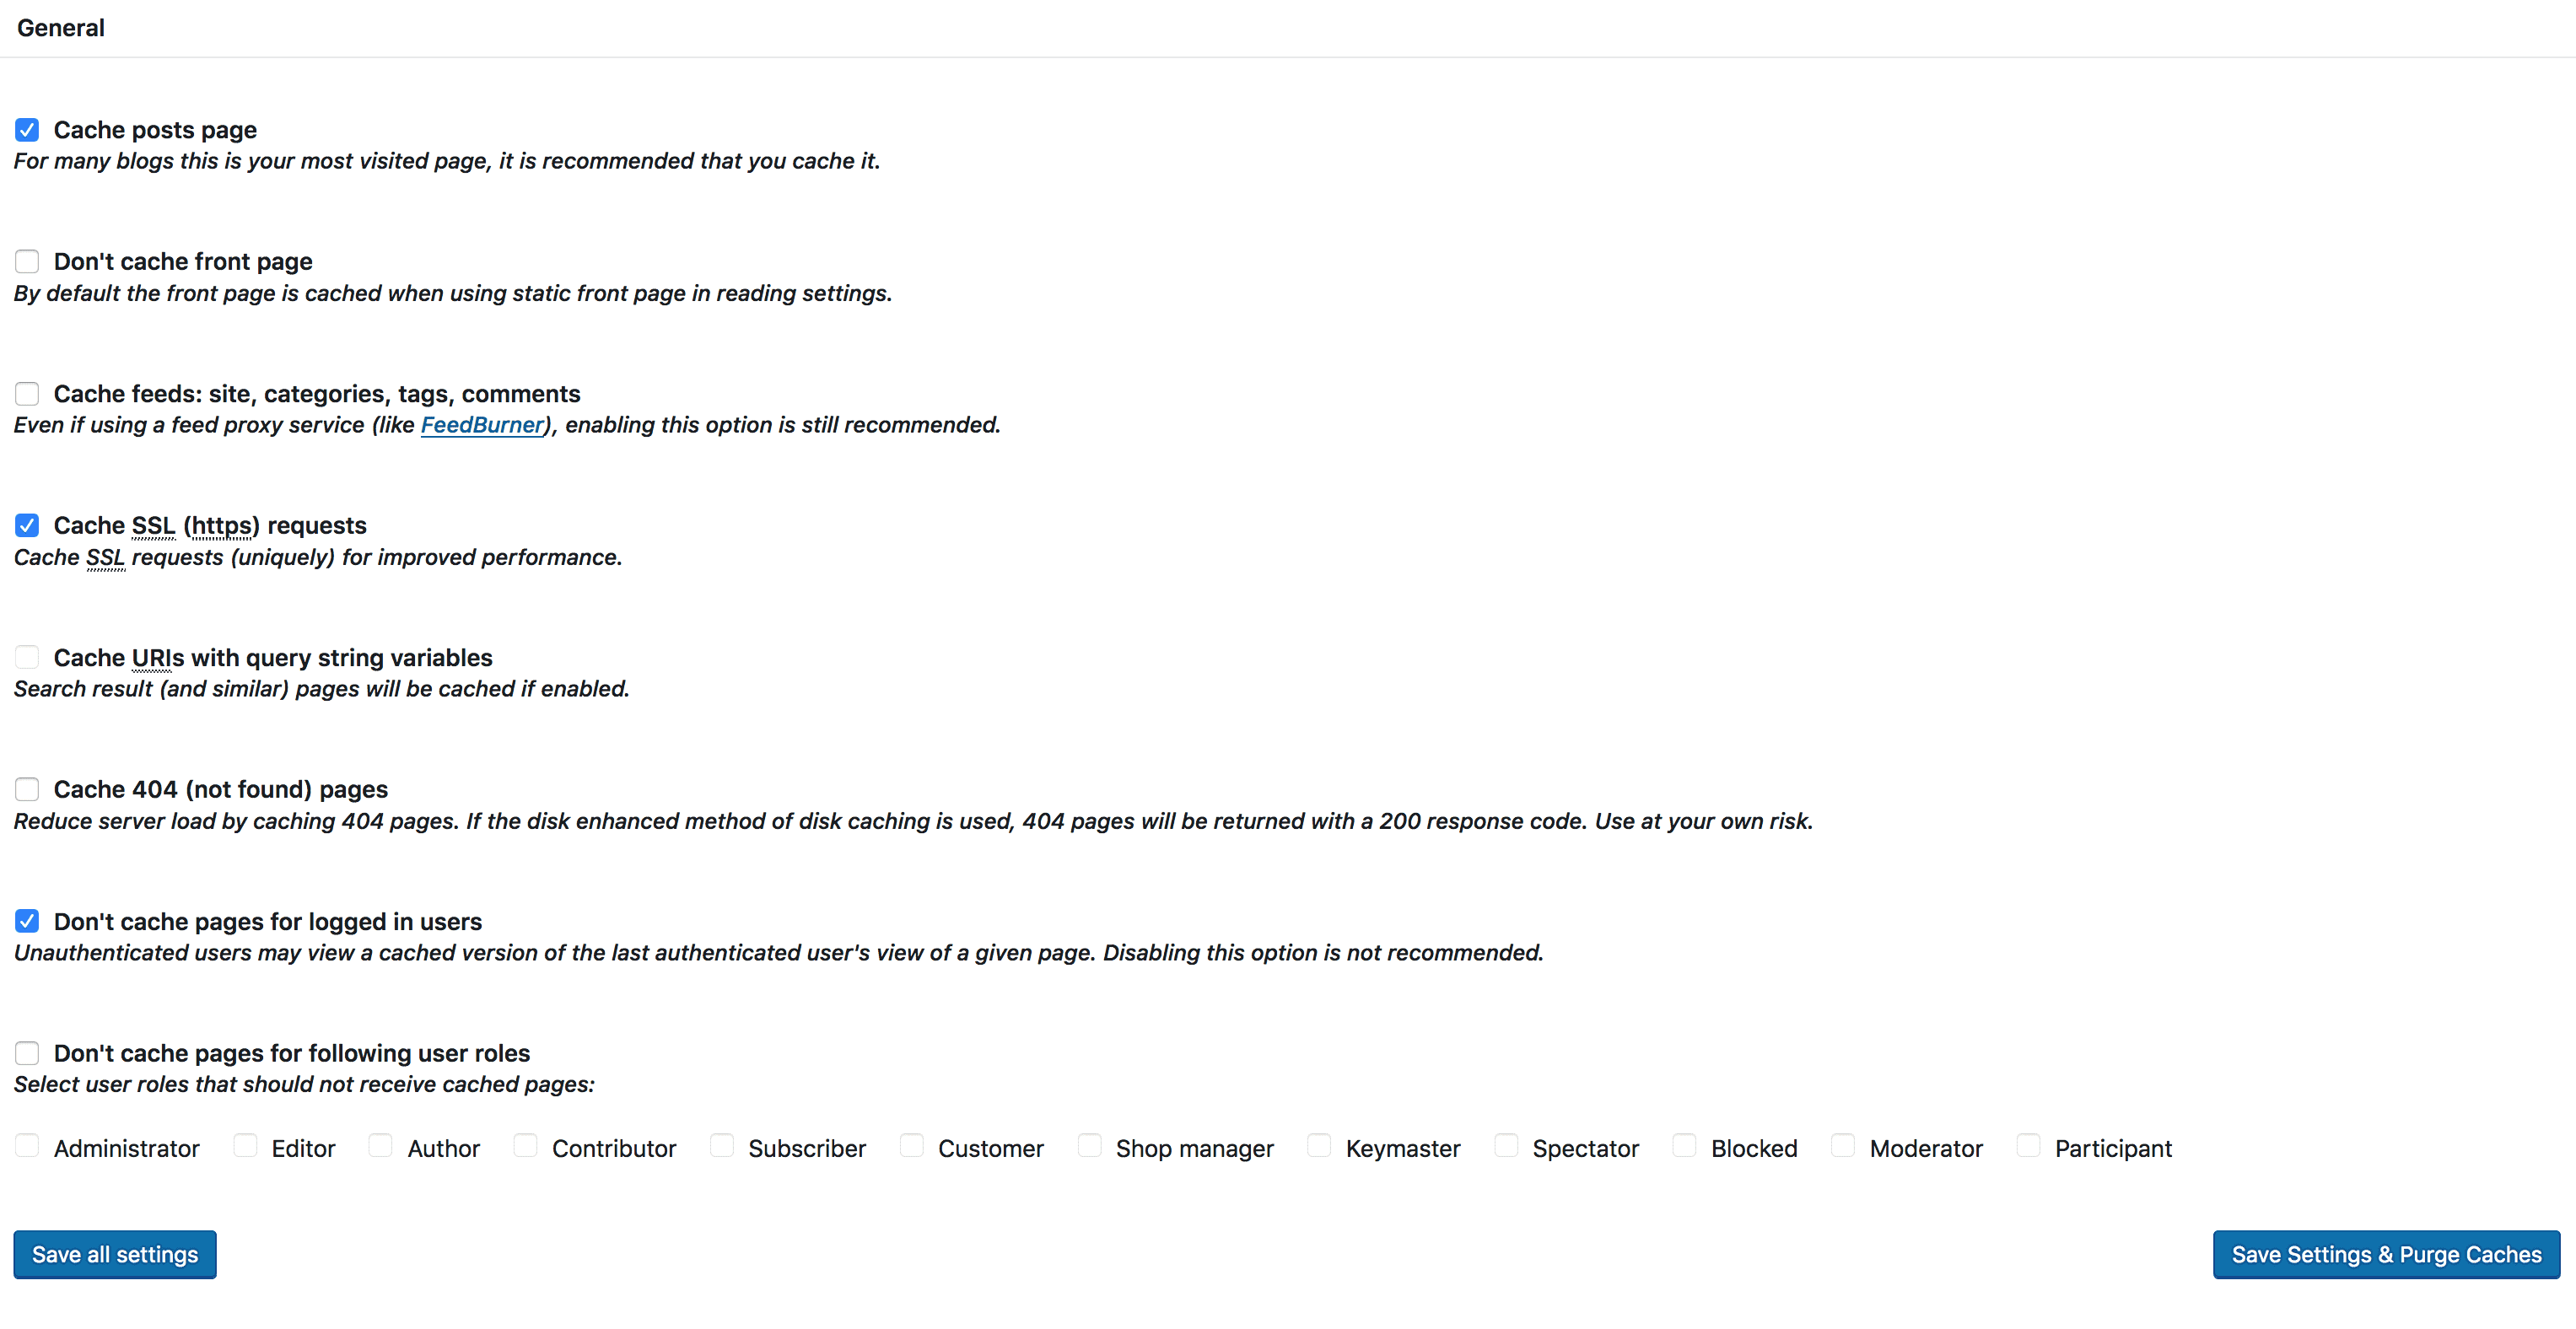
As with the Minify module – and indeed the plugin as a whole – there is a range of further fine-tuning available to you. To begin with, we recommend enabling the settings shown below in Performance > Page Cache as a starting point.
Other Modules
As you’ll doubtless have noticed by now, there is a comprehensive array of advanced options available throughout the plugin, but it is important to proceed bit by bit when you are first getting to grips with it. Enabling Database Caching out of the box, for example, could actually hurt your site’s performance rather than bringing any improvements if you are on a shared hosting setup. The Object Cache is likely to be similarly useless if you are on shared hosting.
CDN options will also obviously not be relevant unless you have actually signed up with a Content Delivery Network. We’ll go through the ins and outs of some of these modules in future posts, but it’s best to leave them disabled when you are starting out.
Saving Your Work
With the amount of potential configuration settings on offer, it’s a good thing W3 Total Cache comes with the option of importing and exporting configuration sets. If you go back to Performance > General Settings and scroll all the way to the bottom, you’ll see the import/export settings section – a useful option to have.

Profiling Your Results
It’s important that you have some sort of benchmark to compare your before and after results against when testing any sort of optimization improvements.
There are a lot of options out there but Google’s Pagespeed Tools are a wonderfully straightforward solution for beginners looking to get meaningful pre- and post-caching numbers to compare.

Alternative Caching Options
W3 Total Cache is of course not the only WordPress caching solution out there.
A quick root around the internet will turn up all manner of other contenders, but the two most common alternatives are the following:
Conclusion
Caching is a famously tricky area and the amount of variables and moving parts at play can be overwhelming for a beginner.
The advantage of tools such as W3 Total Cache is that they put a number of easy wins such as page and browser caching within reach of novice users from within WordPress itself, while also opening the door to an enormous amount of fine-tuning functionality for experts.
For users just starting off with optimizing their sites, we recommend the following sequence as a starting point:
We’ll move on to exploring this plugin in more depth in future articles but we’re curious to hear if you’ve had any successes, difficulties with implementing it yourself or questions about Avada. Let us know in the comments below!