Share
Now that we’ve covered the differences between posts and pages in WordPress, as well as how to organize your blog content using categories and tags, it’s time to turn our attention to creating your first WordPress blog post.
The basics of creating and publishing a blog post in WordPress is relatively straightforward. However, it’s a good idea to get a thorough overview of all the components that make up a WordPress post. This should ensure that you are making full use of WordPress and all its publishing powers.
There are many possible steps involved in the process of publishing a post in WordPress. Therefore, this part of the series on getting started with WordPress, will be broken up into two halves: 1) the core components, and 2) the advanced extras. This post will cover the first steps and will teach you how to create a new WordPress post. This will include adding an image to the post and publishing it so that the post can be accessed online.
The second part covers some of the slightly more advanced aspects of creating content and publishing a post. This includes adding categories and tags, creating a post excerpt, setting a featured image, choosing a future publication date, and more.
By the end of this article, you will have all the information you need to get your first blog post online. The second post will cover the extra steps you can take to make the most of all WordPress has to offer.
Creating a New WordPress Post
The first step is to create the new post you will be working on. As WordPress was initially built to be a blogging platform, and it remains its core focus today, it’s not surprising to learn that the act of creating a new blog post is very easy. However, as you will soon discover, there is much more to creating a successful WordPress post than the act itself.
After logging into the admin area of WordPress, you have two main options for creating a new post:
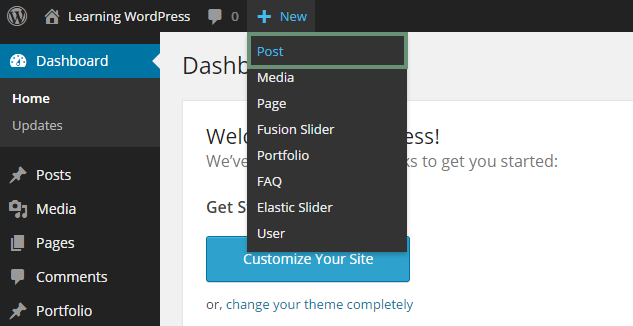
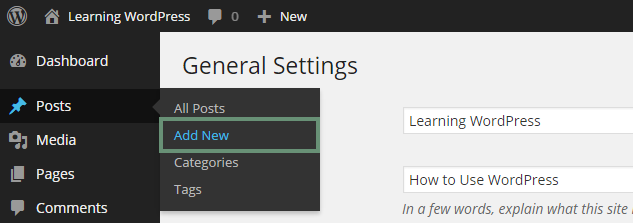
Whichever option you choose, the result will be the same, and you will have created a new blank blog post for your WordPress website.
Introduction to the Post Editor Screen

On a new installation of WordPress, the post screen editor will consist of a few key elements, usually displayed in their own meta boxes. This can include, but is not limited to:
However, if you are using a feature-rich theme such as Avada, or you’ve installed any plugins, then your WordPress post editor screen could look slightly, or substantially different.
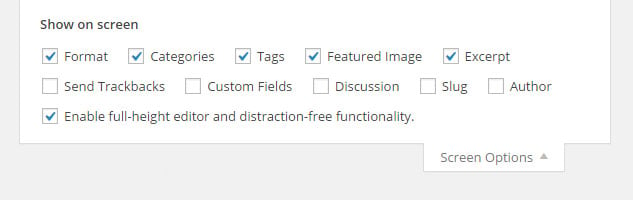
In some cases, the meta boxes on your post editor screen may be hidden. To check whether this is the case or not, click on the Screen Options tab at the top of the page.

From the set of options that is displayed, you can then decide which elements – meta boxes – are visible or not. Just check or un-check the boxes to show or hide the elements.
Adding the Title to Your Post
A good place to start when creating a new blog post is to give that post a title. This title will be displayed on your blog, when your visitors are reading the post. Furthermore, it will also be displayed on your website when your posts are listed. This could be in the sidebar, on menus, or on the lists of posts assigned to each category, and many other places.
However instead of working on your title now, one popular approach is to give your post a very rough title. Then, after you’ve written your article, you should have a better idea of what would be the best title to use in order to fully describe the contents of the post.
When it comes to writing your final post title, it’s important to that it is descriptive and explains the contents of the article to your readers. As the goal of your blog is for it to be read by your target audience, making that post title as enticing as possible should increase the chances of readers clicking through to view that post.
Your blog titles will also be displayed in search engines, such as Google, when someone is looking for an article on the topic you have written about. This means it’s essential that your titles are informative and compelling in order for them to catch the attention of your potential readers.
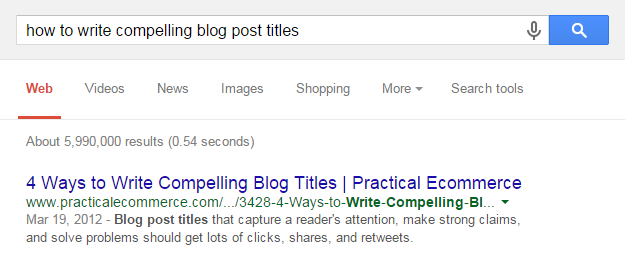
In general, your blog post titles can be any length. However, it’s recommended that you keep them in the 50-60 character range to ensure they display correctly on your blog and in the Google search engine results. This will prevent them from being truncated, or becoming too long. We will cover the art of creating content that provokes interest and action from your readers in a future post in this series. However, a good resource to bookmark is this Copyblogger article on creating magnetic headlines.
Creating the Blog Post Content
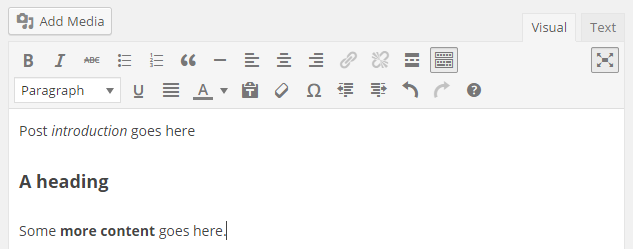
A good title will draw readers into your post. However, if the content isn’t what they were hoping for, or doesn’t meet their expectations, they will quickly hit the back button. WordPress makes the process of inputting your content pretty straightforward. Simply click in the text area and start typing.
The WordPress post editor has two views: Visual and Text. You can switch between these views by clicking on the tabs on the editor.
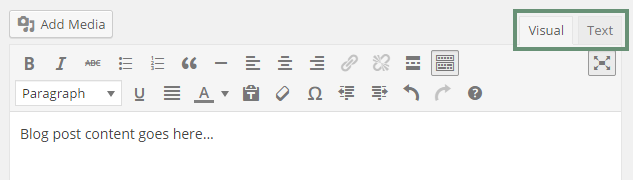
The Visual tab is a rough approximation of a ‘what you see is what you get’ (WYSIWYG) view of your content. This includes formatting and presentation choices you make. However, this can differ greatly to how your post will actually look when it’s published.
The Text tab on the other hand, displays the underlying HTML that has been used to format your content. If you prefer to enter your content and then style it using HTML, the text tab gives you the ability to do so.
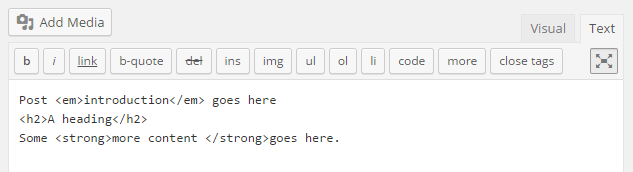
You are free to switch views as needed. This allows you to create your post and style it using the visual editor, before switching the text view to make any more precise changes. Viewing the underlying HTML can give you a better sense of how your content has been formatted by the editor. However, it’s not necessary to ever switch to the Text tab if you prefer to use to the WYSIWYG visual editor.
Previewing Your Work
You can preview your post at any time. This allows you to view the post as your readers will see it when it goes live, and is published on your blog.
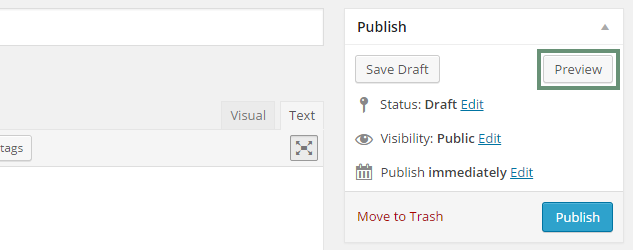
Clicking the preview button should open the post in a new browser tab, allowing you to see how your work it is developing and what changes, if any, you need to make. To resume working on your post, simply switch browser tabs and continue adding more content.
Adding Images to Your Post
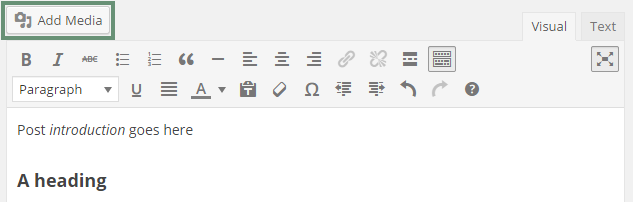
WordPress makes it very easy to add images to your posts. This could include photos, graphics, or illustrations. To do so, first click or place the mouse cursor at the position in the post editor area where you’d like to display the image. Then click on the Add Media button.
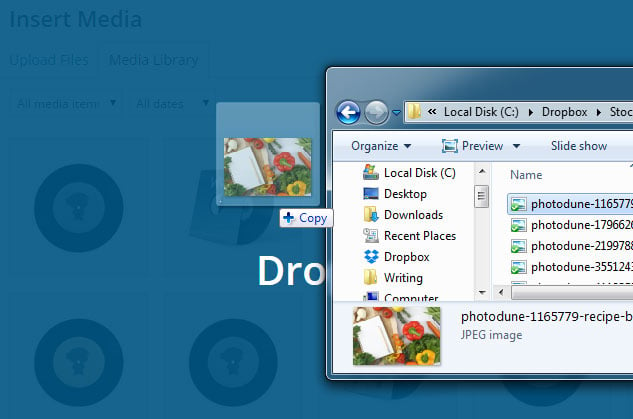
Clicking that button opens up the Insert Media screen. If there are already images in your site’s Media Library they will be displayed here. If not, you can easily add them by dragging them from your computer, onto the screen.
After you’ve added the image to the Media Library, you can then add some additional information about that image. This could include the image title, caption, alt text, and a description.
These are optional and can be used to display more information about photograph. Some of the information is displayed to your readers, while some of it is used by screen readers and search engines to better understand your content.
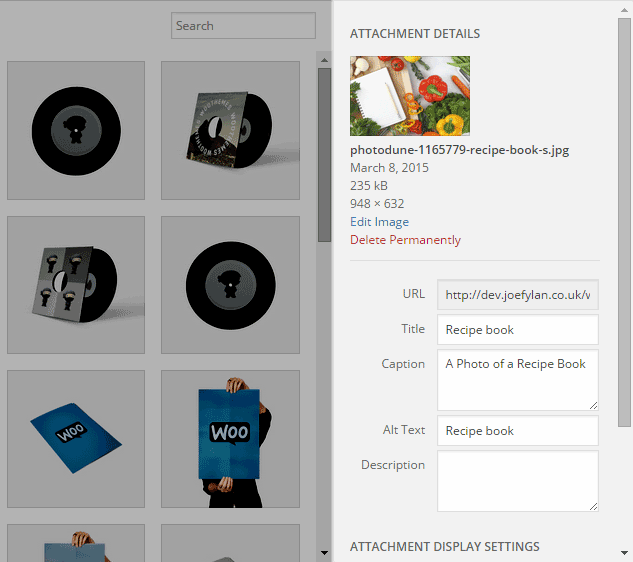
After you’ve at least given your image a title to describe it, you can then define its display options. Through the display settings, you can choose the alignment of the image, such as left, right, center. You can also decide whether the image is a link or not. This gives you the option of taking your readers to another location after they’ve clicked on the image. This could be a custom location of your choice, the image file itself, or a page which contains the image and some other information, which is known as the attachment page.
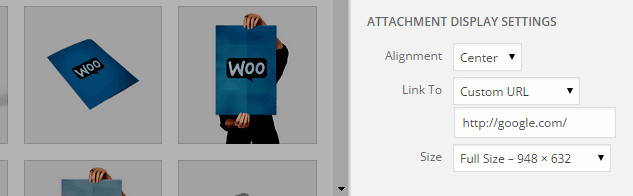
Finally you can set the size at which the image will be displayed. These are pre-defined options which are dictated by the WordPress theme you are using. However, you can modify them through the Media Setting page, located under the Settings menu on the admin sidebar menu.
Once you are happy with the settings, you can click on the Insert into Post button. If you need to revise the settings, simply click on the image in the post editor, and then click on the pencil icon.

You can then edit or change any of the image settings, before clicking the Update button to save your modifications and re-insert the image with the new details.
Publishing Your WordPress Post
Entering your post content, with optional images, and giving it a title, are the three main steps of publishing a WordPress post. Once you are happy with your post after previewing it, you can set it live so that it is accessible on the internet.
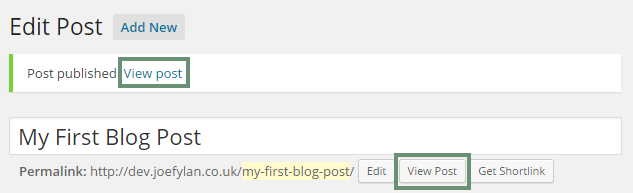
To do so, click on the Publish button and your post will be visible to anyone visiting your website. After hitting the publish button, you can view the post by clicking on the View Post button, which is located below the post title area.
The post can still be edited and updated after it’s been published. Any changes that you make will go live as soon as you hit the Update button on the post editor screen.
Conclusion: End of Part I
That covers the three main components of publishing a post in WordPress: creating the post, giving it a title, and adding content.
The second post in this set covers the other features that are available to you when creating and working with posts in WordPress. If you would like to receive email notifications when a new post in this series on getting started with WordPress goes live, be sure to subscribe to the newsletter by using the form in the sidebar or footer.
If you have any questions about creating posts in WordPress or using Avada with WordPress, please share them in the comments below.